
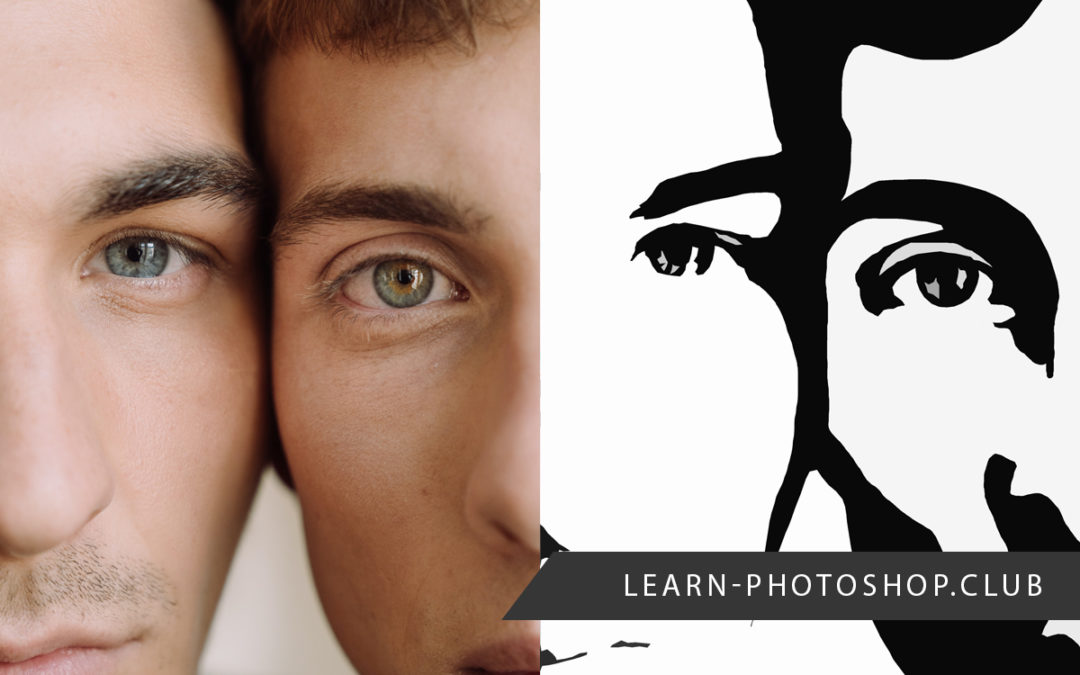
How Do You Make a Stencil from an Image in Photoshop?
Creating and printing a stencil of any image is a great and efficient way to create artwork. And luckily, the method of doing so in Photoshop is quick and simple! All you’ll need is an image to edit and any version of [sherpa id=”ec063570″]
The process involves simply adjusting the Threshold of the image to adjust the level of detail, followed by using the Brush Tool to clear up any extra unwanted details. Here is an overview of the steps we will walk you through:
Table of Contents
1: Go to File > Open to Open Your Image
Of course, to begin, we’re going to want to open up the image that we want to convert into a stencil in Photoshop.
To do this, launch the program, and select File > Open from the bar along the top of the screen.
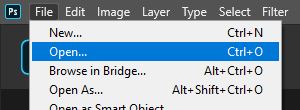
Doing so will cause a window to open in which you can select the file that you want to bring into Photoshop. Here, go ahead and locate the image within your files and double click on it to select and open it.

For this tutorial, we’ve selected an image by cottonbro from Pexels.
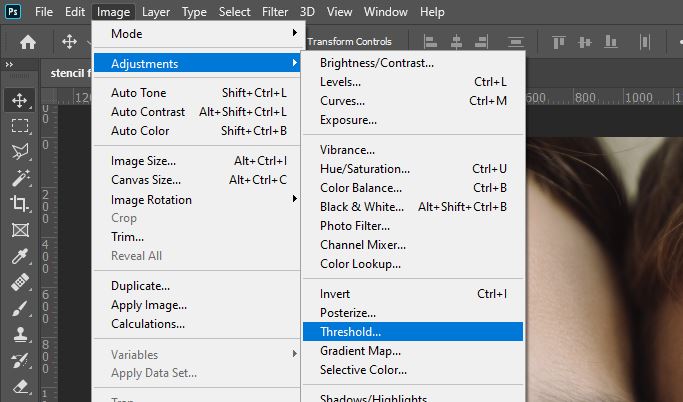
2: Open the Threshold Window
Once the image has been opened in Photoshop, we can start turning it into a stencil! To make a start, let’s adjust the level of detail within the image. This can be done in the Threshold Window.
To open this window and adjust the settings, select Image > Adjustments > Threshold from the menu bar at the top of the screen.
3: Adjust the Level of Detail Using the Threshold Level Slider
You should notice that a new window opens, containing a slider entitled Threshold Level.
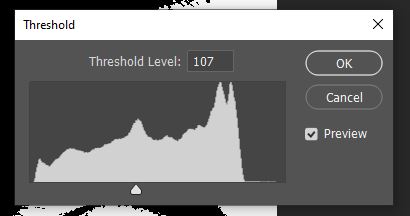
Here, we can adjust the level of detail using the slider. Simply click on the slider and drag it either to the right or left to increase or decrease the level of detail within the image, respectively.
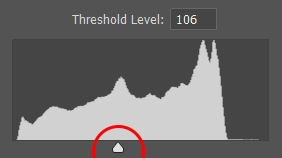
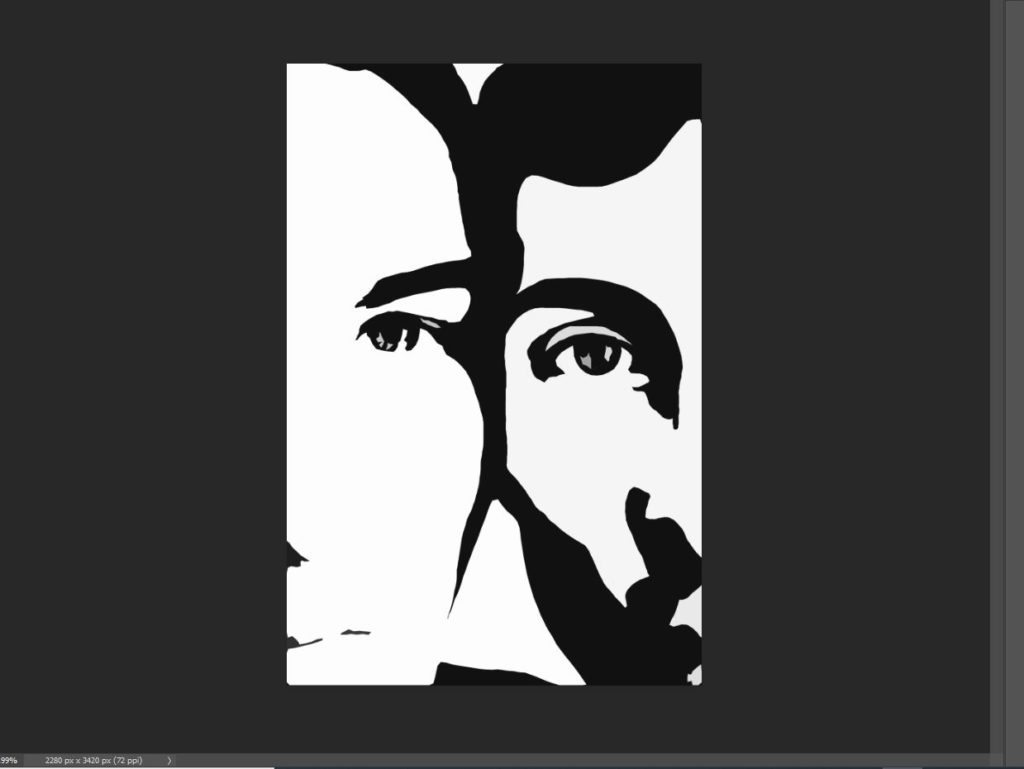
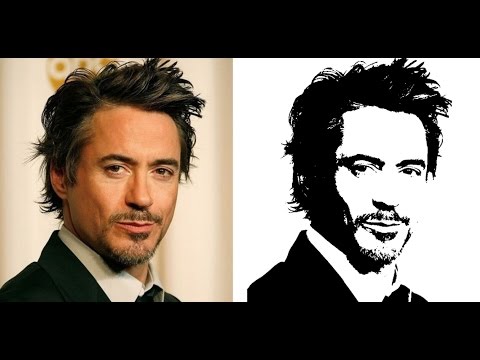
You should aim to achieve an effect where the lines remain strong- not too thin or pixelated- with a sufficient level of detail. The suitable value depends on your image and your personal preferences, but a value of around 106 worked well in our case.
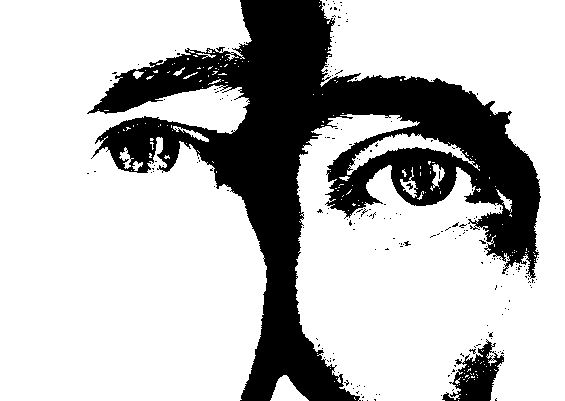
Once you are satisfied, hit the OK button in the corner of the window to apply the changes, and hopefully you’ll see that you now have a black and white, simplified trace of your image!
4: Use a White Brush to Delete Any Unwanted Details
Whilst you have now successfully converted the image into a stencil with the main shapes and details of the image in black, there may be some unwanted areas of black that you would like to get rid of. To therefore finetune the stencil effect, we can simply use a white brush to cover up any black specks or unwanted sections.
To do this, begin by selecting the Brush Tool from the toolbar down the left side of the screen by clicking on the icon shown below.

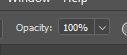
With the tool selected, draw your attention to the new settings bar that appears near the top of the screen. In this bar, there are options that let you adjust different properties of the brush, such as the smoothness, the size, and the opacity. If you want to know more about the Brush Tool you can head over to our complete Photoshop guide here.

Keep the brush at 100% opacity. You can change the size of it at any time during the process of concealing unwanted areas by using the square bracket keys ([]) to make the brush smaller or larger respectively.
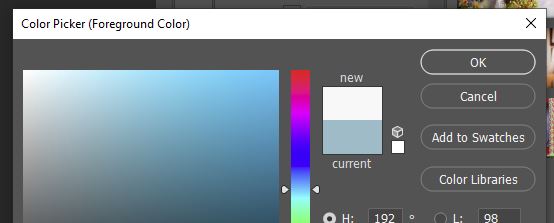
Set the color of the brush to white by clicking on the top colored box near the bottom of the toolbar and selecting a white color from the palette that appears.

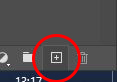
Once you’re happy with the settings, you can go ahead and start using the brush to paint over any unwanted areas of black! To avoid working destructively, first create a new layer to paint on. This can be done by clicking on the Create New Layer icon at the bottom of the Layers Window.
With the new layer active, you can click and drag anywhere on the canvas to paint new areas of white and cover up the black areas you want to hide! You can also switch the color of the brush to black in order to paint back areas and add more detail or fill in black sections.

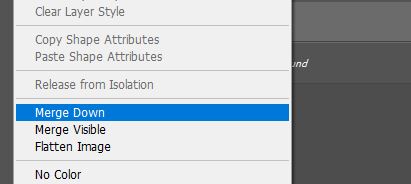
When you’re happy with the edits, merge the layer to the image beneath it by right clicking on it in the Layers Window then clicking Merge Down.
5: Apply the Cutout Filter to Further Simplify the Stencil
At this point, you can finish if you are satisfied with the effect already! But if you’re happy to take an extra step to make the stencil look more complete and easier to cut out, you can apply a quick adjustment to the image to further define the sections within it.
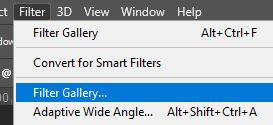
So how can we do this? Simply head along the top of the screen and click on Filter > Filter Gallery.
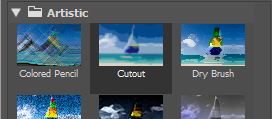
Then within the new window that opens, select Artistic > Cutout.
Applying this quick filter will further simplify the stencil effect, making it easier for you to cut out the edges of the stencil smoothly later on.
6: Print the Final Image
Now that you have finished creating the stencil effect, the last thing to do is print the stencil and use it to create awesome pieces of artwork!
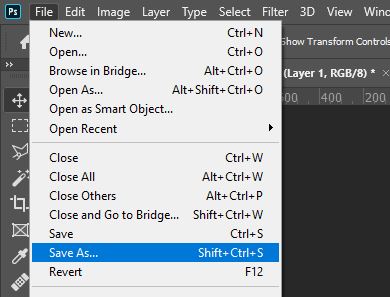
To save the file for printing, select File > Save As from the top of the screen.
Within the new window that opens, type in a name for your new file and select a location for it to be saved to.
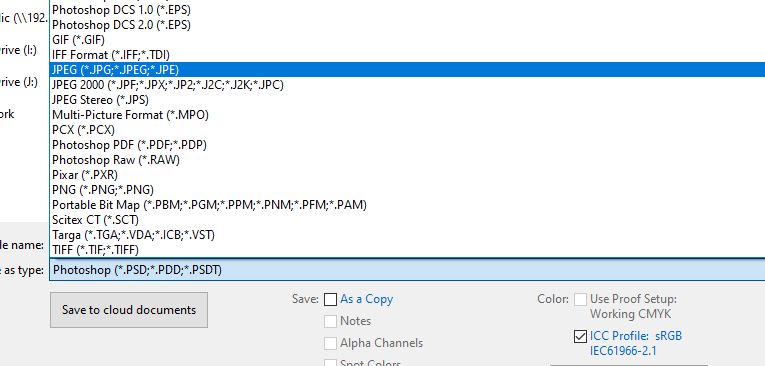
At the bottom of the window, you can also set the file format with which you want the file to be saved. From this dropdown menu, select JPEG, then click the Save button to complete the saving process.
After you have saved the file, all you need to do is open the file explorer application on your device and find the saved stencil image. Then just print it in the same way as you usually would!
With the stencil printed, you can use it to create a whole range of artwork! By cutting out the black sections with a pair of scissors or a craft knife, you can create a stencil that can be painted over with different colors or patterns to produce some exciting variations of your image, for instance. The opportunities are endless!
And that is about all there is to know about the methods involved in producing a stencil version of an image! If you prefer to learn from videos, then click here to access an awesome resource by ‘My Life Be Like’ which demonstrates the process in just one minute!
Hey, I'm a Professional Retoucher making $10k a month thanks to Photoshop.Register to my newsletter to get freelancing tips and a FREE Brush Pack in Bonus! My Newsletter

