How to Replace the Sky in a Photo with Photoshop
I’m sure it’s happened millions of times. You’ve taken an incredible shot of a landscape, but the sky is ruining it. Or perhaps you simply want to make your photo that little bit more unique.
Whether it be a grey sky due to bad weather, or one that is just full of clouds or contradicts the mood that the image conveys, we can replace it easily by using basic selection tools and layer masks to separate the sky, before utilising Photoshop’s Advanced Blending Sliders to effectively replace it.
This technique is pretty simple for anybody to follow, no matter how much experience you may have. But if you would like to first learn the more basic Photoshop skills, then check out this list of tutorials that we have put together to help you learn Photoshop step by step here.
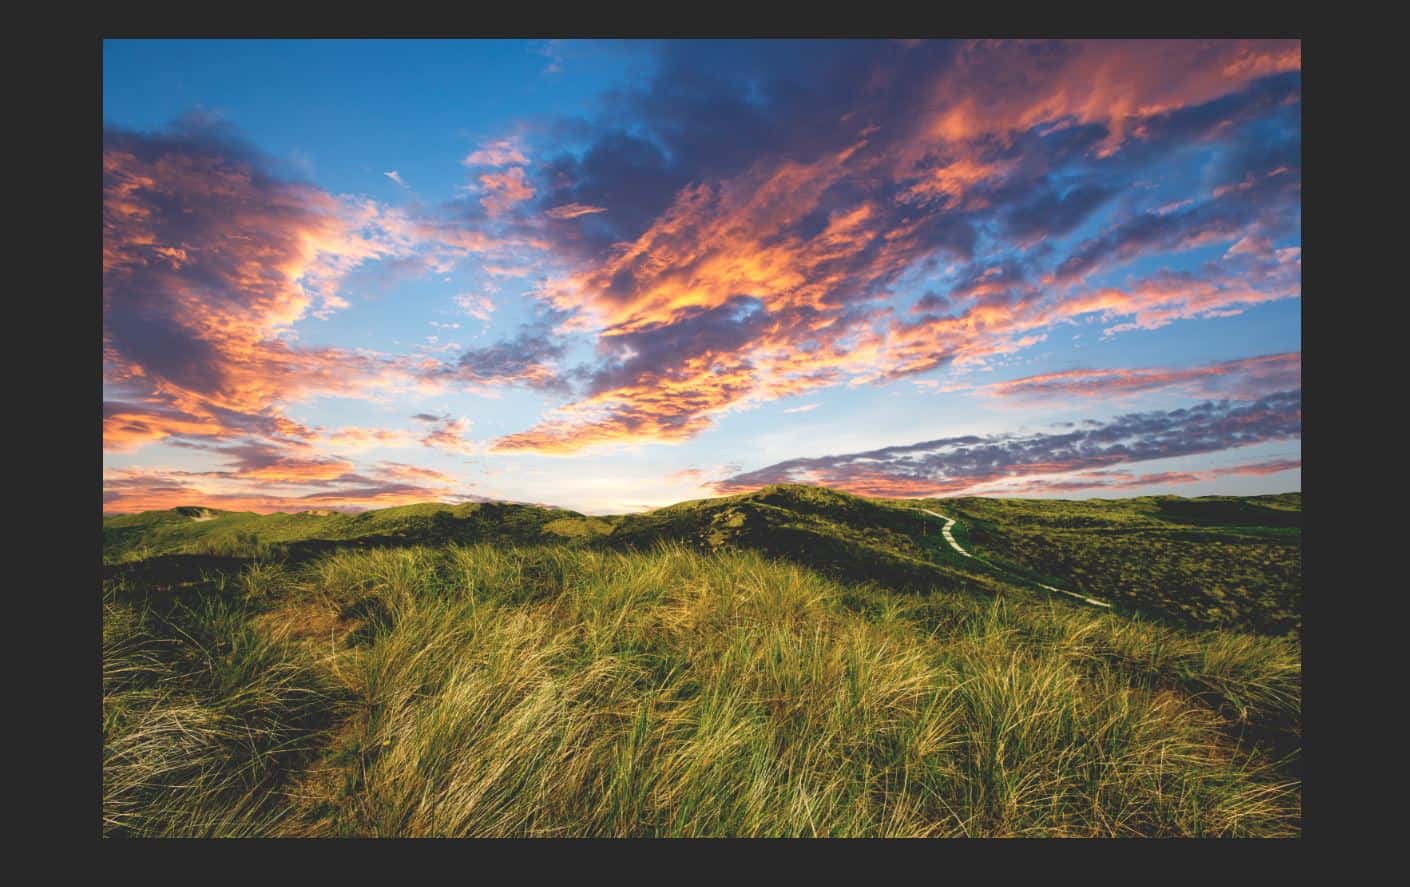
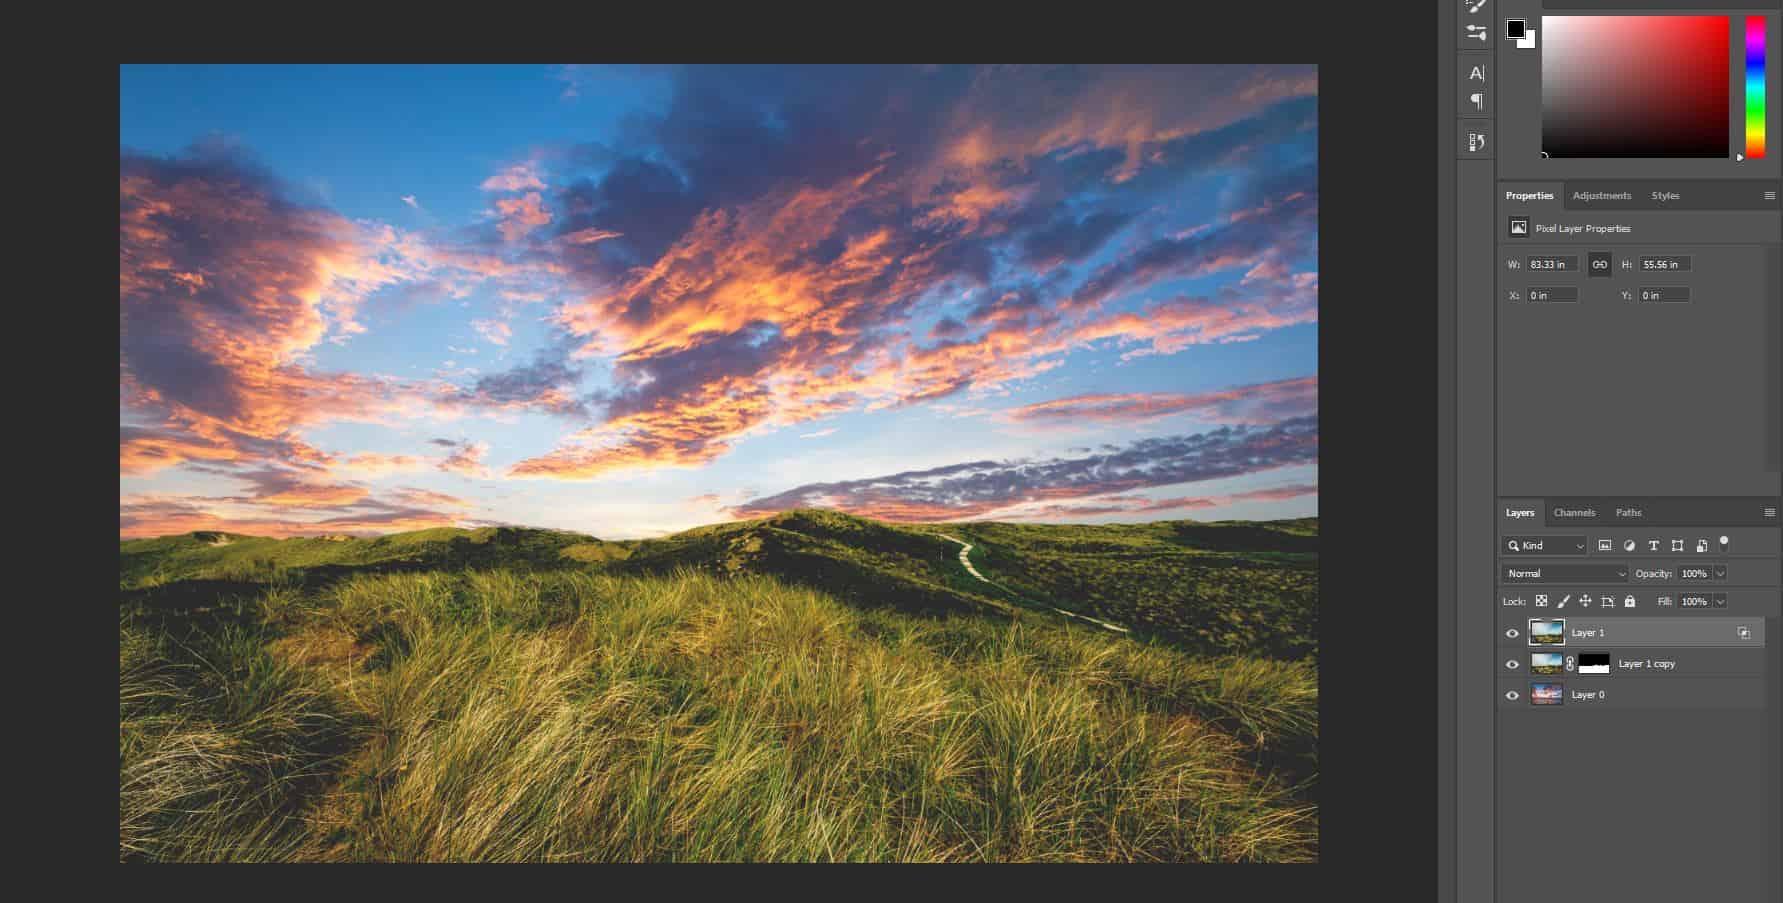
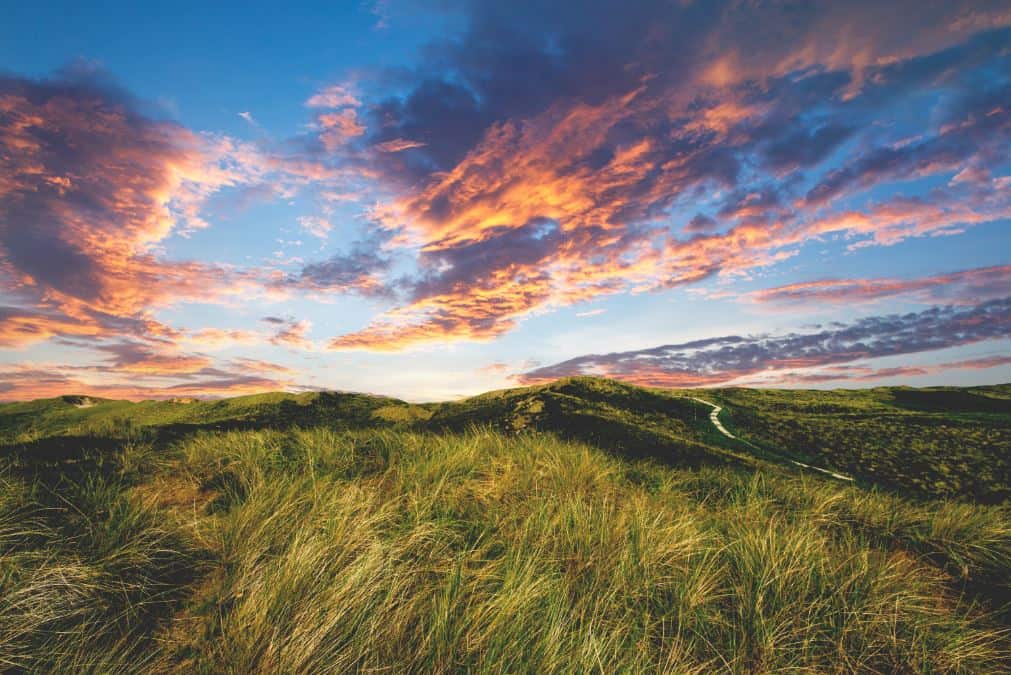
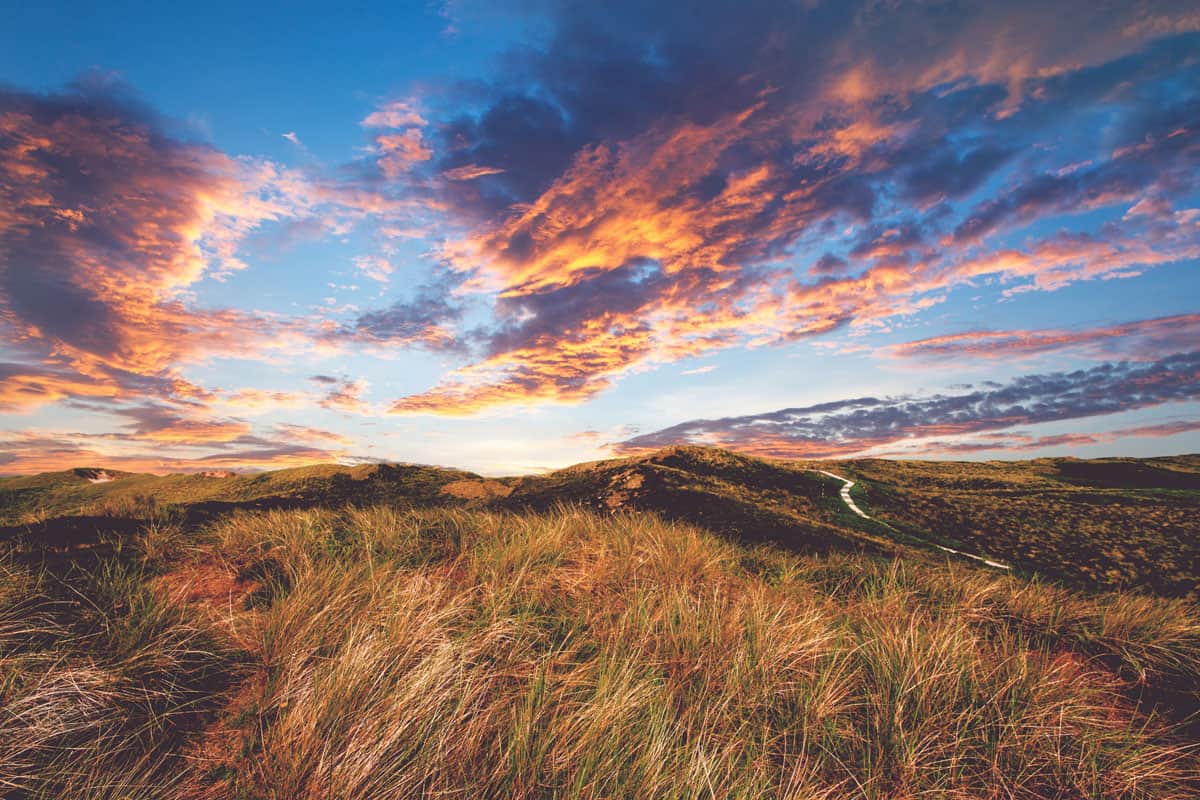
So, if you want to create an effect similar to the one below, then carry on reading to find out about how to replace the sky in a photo with Photoshop!
Step 1: Prepare your images
For this technique, we will first need to open both images in Photoshop- the original image in which we will replace the sky, and an image that contains a ‘replacement sky’. In this tutorial, we used images by Artur Roman and InstaWalli from Pexels.
Note that it is probably best to use images of the same orientation, and a similar size. You will see why this will make things easier later on in the step.
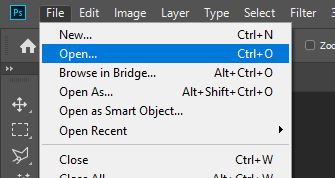
To open an image, head to the top of your screen and select File > Open, choosing the relevant photos from your files.
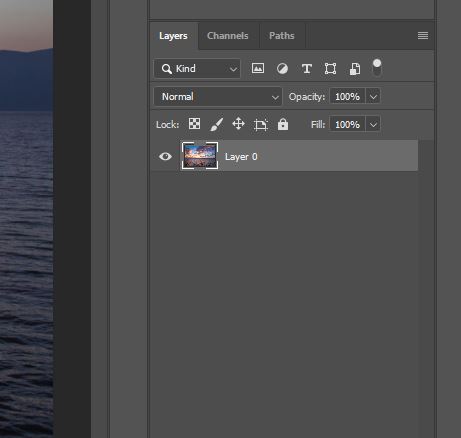
Now, due to the nature of this process, both of our images will need to have the exact same dimensions. So, to achieve this, you can first head to one of the documents, and refer to the Layers Window (likely located in the bottom right corner of your screen).
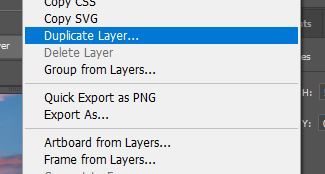
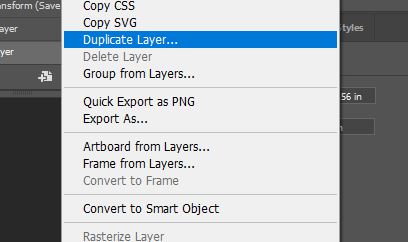
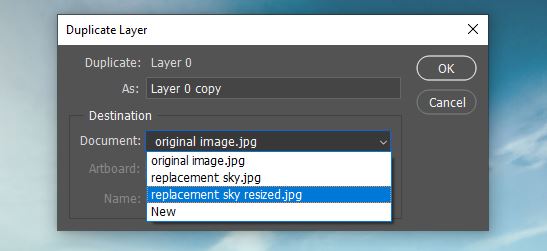
Here, right click on the layer, then select Duplicate Layer from the list that appears.
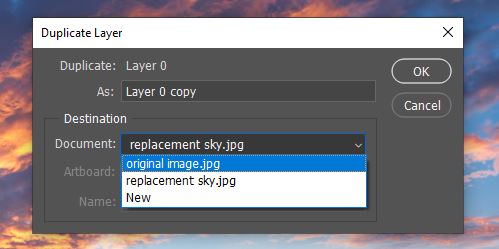
In the Destination bar, change the location to the other document. This will copy the layer into the same document as the other image. Click OK.
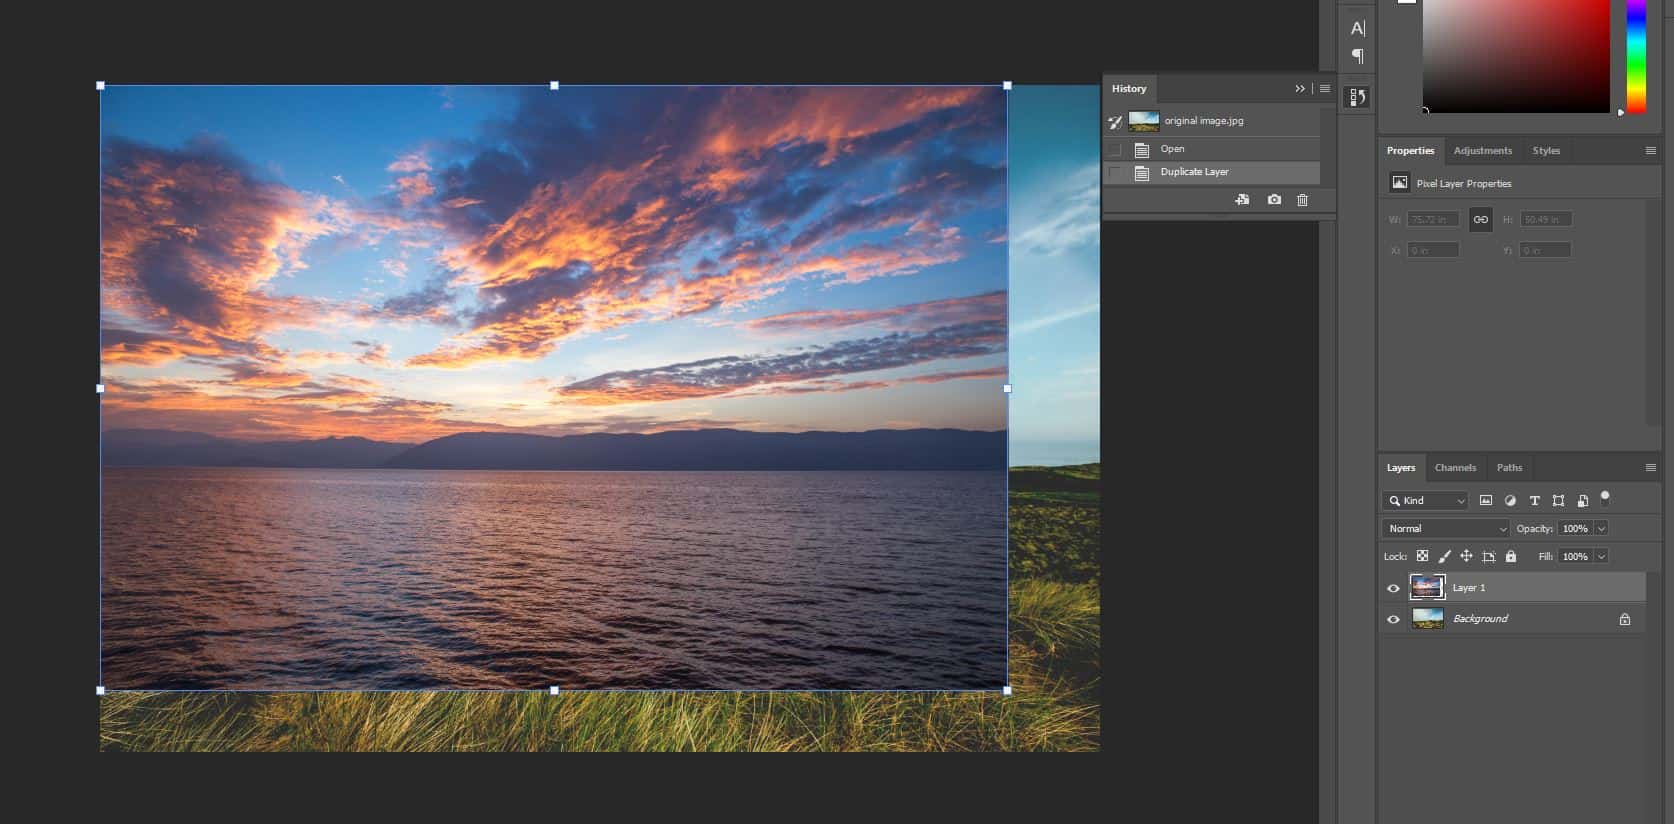
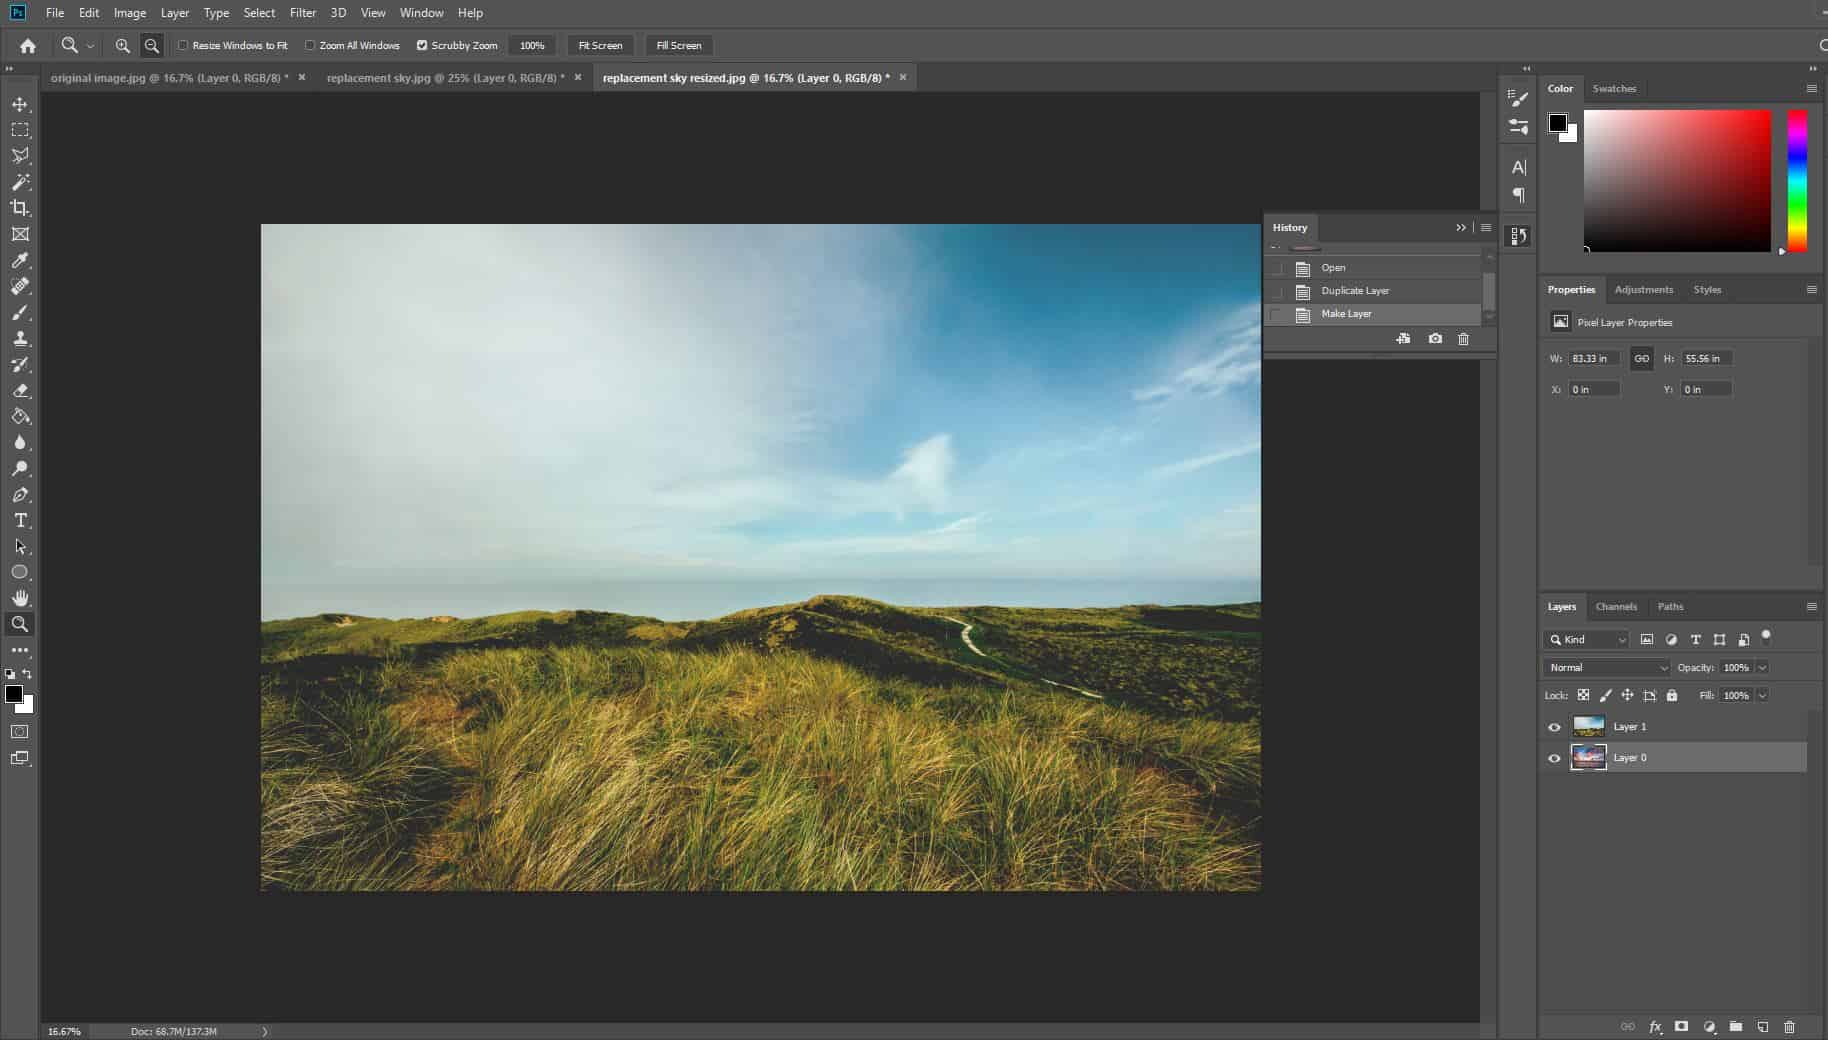
Now head to the document to which you duplicated the image. You should see that both images appear in the Layers Window. Click on the top layer (the image that you imported) in the Layers Window, then press CTRL + T [Win] / CMD + T [Mac].
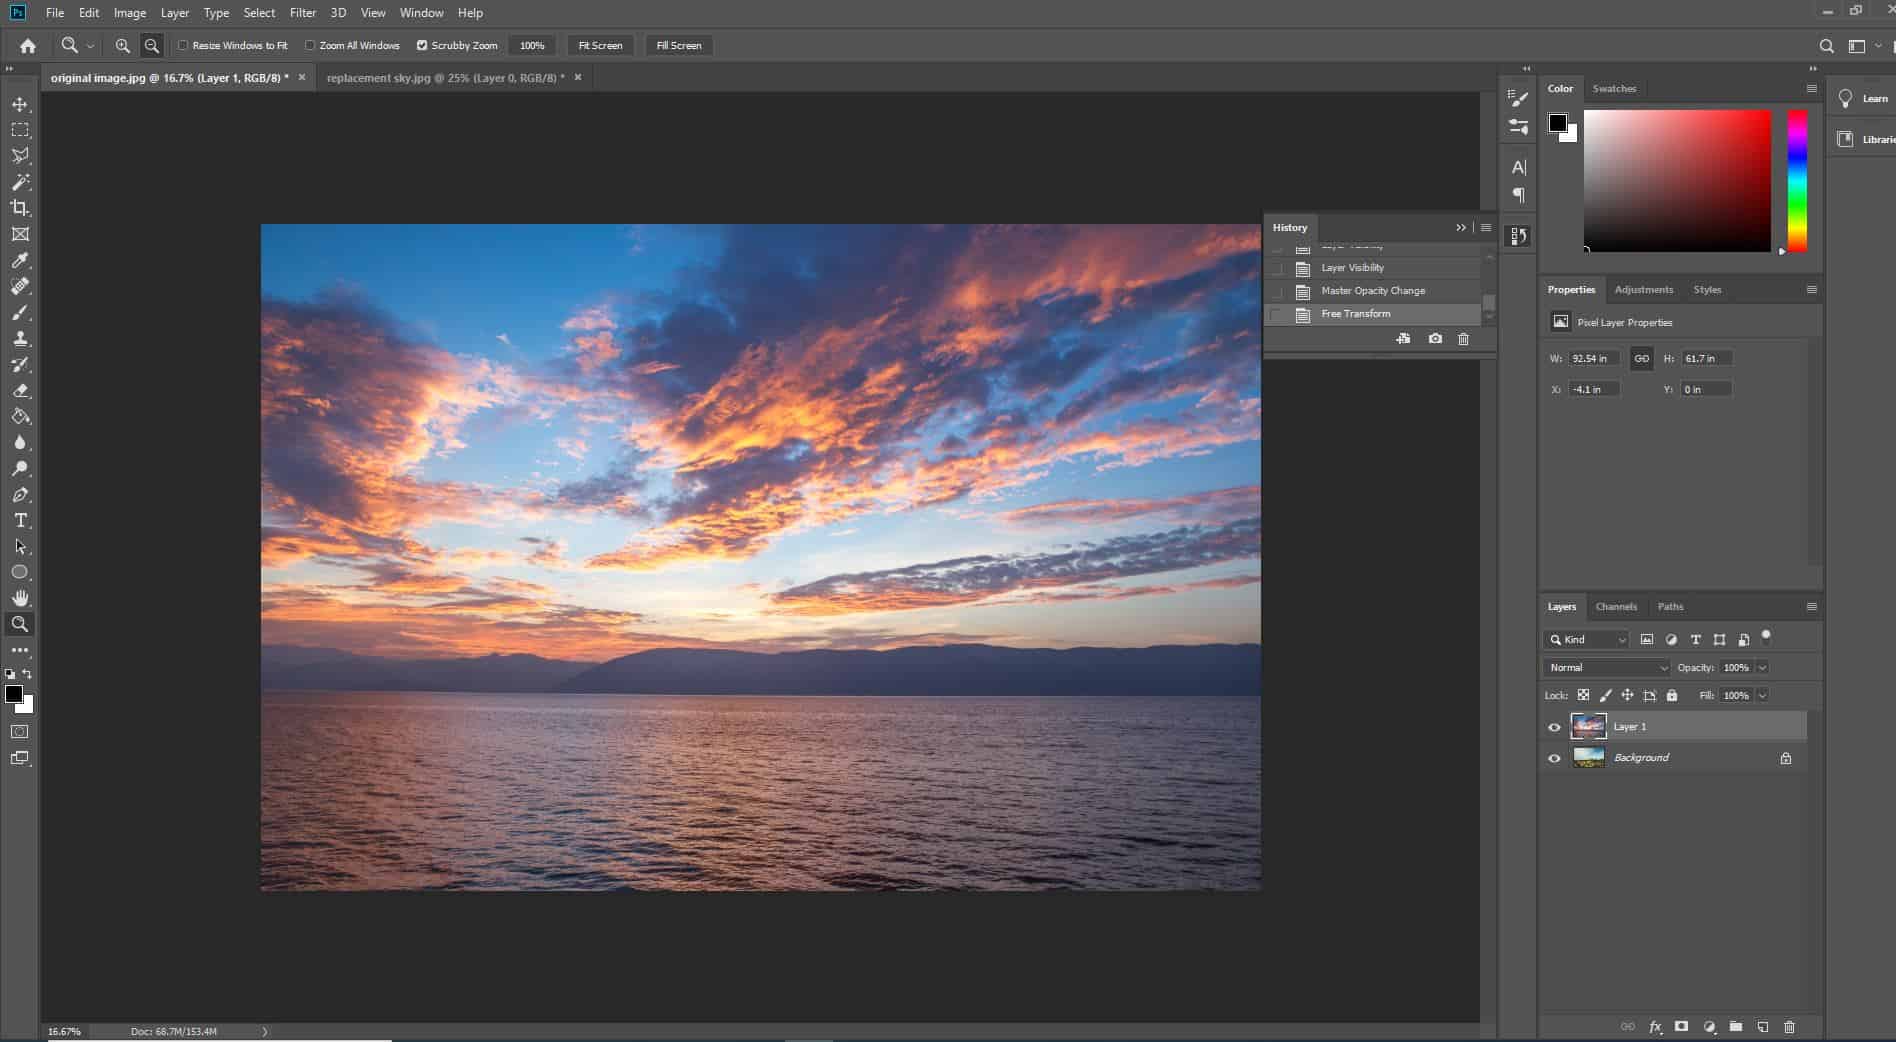
This will allow you to transform the image. Resize it by dragging the corners of the image (whilst holding down the Shift key to preserve its original proportions) until it covers up the image behind it.
You can then head to File > Save As and save the image as a JPEG. This will save the photo as having the same dimensions as the other one, meaning that you can properly combine your images now.
Step 2: Bring the Resized Photos into the Same Document
Now that your photos have the same dimensions and size, you’ll need to put them in a document together.
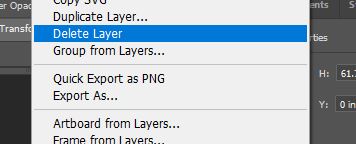
In the document that we were just working on, delete the layer of the image that we duplicated and brought in to resize, by right clicking on it and choosing Delete Layer from the list that appears.
Then head to File > Open and open the resized JPEG version of it. You should now have both images open in separate documents. We’ll need to bring them into the same document so that they can be blended together.
So, let’s repeat the process of duplicating that we did at the start. With the document containing your original image (with the sky that you want to replace) open, right click on the layer in the Layers Window and select Duplicate Layer from the menu that appears.
Now change the destination to the name of the document containing the new sky photo and press OK.
Upon opening that document, you should see that both layers are together in one document.
Step 3: Copy the Main Photo Layer
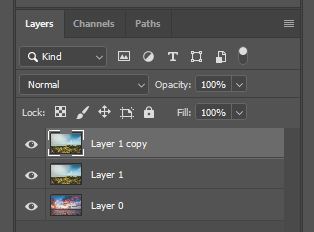
You’ll now want to duplicate the layer of the main photo, by right clicking on the layer in the Layers Window and choosing Duplicate Layer (CTRL + J [Win] / CMD + J [Mac]). You should now have three layers- one of the replacement sky at the bottom, with two copies of the main photo above it.
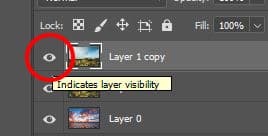
For now, we will make the top layer invisible, by clicking the visibility icon (represented by an eye) on the left of the layer in the Layers Window.
Next, go ahead and click on the visible main photo layer, to make it the active layer.
Step 4: Select the Area Below the Sky
Later on, when we use the Advanced Blending Sliders, we will use settings that mean that any blues in the image will be made transparent. Whilst this is for the purposes of making the predominantly blue sky transparent, it is inevitable that there is some level of blue in most of the colors other than those in the sky, for instance whites.
Therefore, to avoid these other areas of the image being made transparent, we will need to make a selection of everything other than the sky to separate the two sections, allowing us to work with them individually and protect areas from the Advanced Blending Sliders.
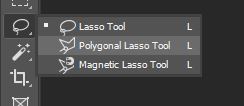
To select these areas that we want to be protected, we’ll use the Polygonal Lasso Tool. This can be chosen from the toolbar down the left side of the screen and is nestled under the icon shown below.
NOTE: There’s also another useful technique that uses Channels to make great selections as well. You can check this tutorial by Piximperfect here.
By just clicking on this icon, you will select the Lasso Tool, which can be used in this case as an alternative to the Polygonal Lasso Tool, if you wish.
However, to select the Polygonal Lasso Tool instead, click and hold with the mouse on the icon, and select the relevant tool from the menu that appears.
Now that you have the tool selected, you can select the area below the sky by clicking at various points around the edges of the section. This doesn’t have to be too precise around areas like trees but do make an effort around straight edges and areas similar, in tone and color, to the sky.
It’s also important that you try to stay below any areas of sky and avoid including any of it in the selection.
Step 5: Convert the Selection into a Layer Mask
Once you are happy with your selection, you’re going to want to turn it into a Layer Mask. To do so, simply click on the Layer Mask Icon at the bottom of the Layers Window (as shown below).
It won’t look too professional at the moment, so don’t worry about the appearance too much.
In preparation for the next step, make the top layer visible again by clicking on the eye icon next to it in the Layers Window. The entire photo should now reappear in the document window. You’ll also need to make it the active layer at this point, so also click on the layer in the Layers Window.
Step 6: Choose the right Blending Options
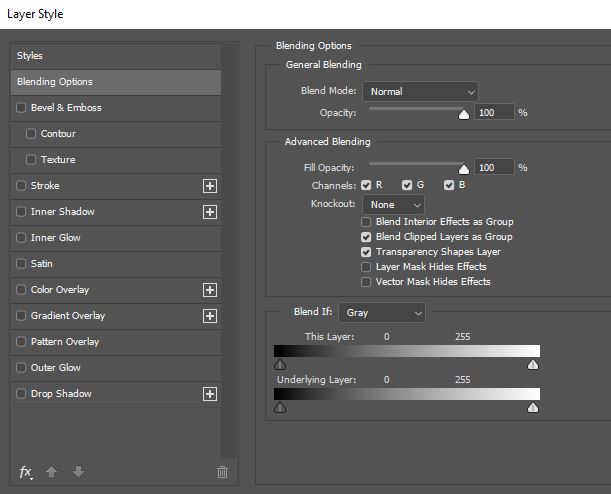
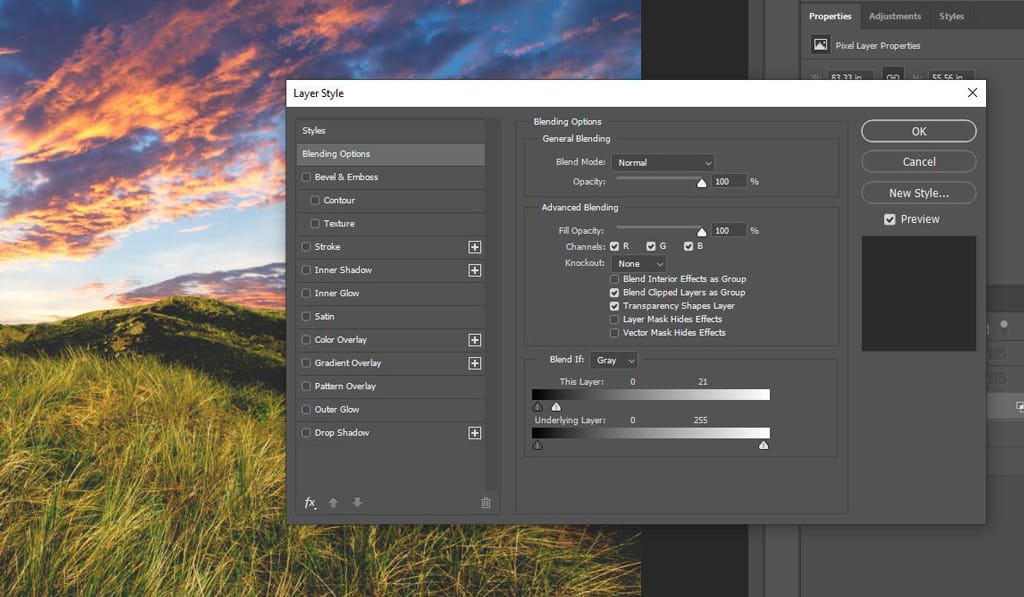
With the top layer active, you’ll now want to double-click on its preview thumbnail in the Layers Window. This will open up a Layer Style window in which we’ll select Blending Options.
You should see that there are two slider bars at the bottom of the dialog box, in the Advanced Blending section.
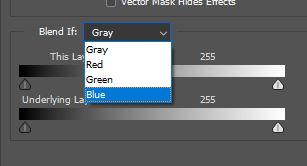
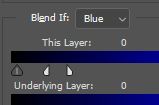
Directly above these is the Blend If option. This will be set to gray by default, so we’ll need to change it to blue by clicking on the word ‘gray’, then selecting blue from the dropdown menu that appears.
Step 7: Use the Advanced Blending Sliders
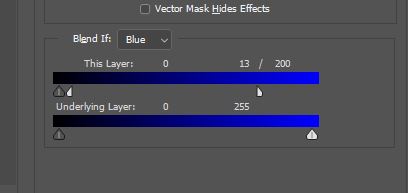
Let’s now draw our attention to the two sliders beneath the Blend If option. We can ignore the bottom slider bar, as we only need to use the top one, which affects, and is titled, ‘This Layer’.
Go ahead and click on the small slider below the far-right side of the top bar and begin dragging it to the left.
As you do this, you should be able to see the original sky in the photo disappearing, and in turn being replaced by the sky from the layer underneath.
Continue dragging the slider to the left until most of the original sky has disappeared.
Step 8: Adjust the Transition Between the Photos to Remove Fringing
Whilst at this point the effect is certainly looking better then it was after the previous step, the outcome probably still isn’t fully convincing, as it is likely that there will be harsh edges and fringing around, for instance, the trees and leaves or any other edges.
This is because there are still some of the original colors left over from the sky in the photo. To fix this issue, the transition between the photos therefore has to be softened. This way, the thin, but harsh, fringing will be replaced by a gradual, softer, and less obvious transition.
To soften the transition, we will need to split the slider in half.
So, let’s begin by releasing the slider that we were dragging before. Then press and hold the Alt [Win] / Option [Mac] key. Keeping it held down, click on the slider and keep dragging it to the left.
It should now consist of two separated halves that can be moved independently.
Now that we’ve got the slider split in half, we can move them to a position in which the transition between the original photo and the sky will be smoother. It is the distance between the two halves of the slider that determines the softness of the transition.
Experiment with the distance between the two and keep an eye on the fringing to see when it disappears, or at least reduces to an acceptable level.
Click OK once you are happy to close the window.
Step 9: Make the Effect Look More Convincing
Your piece is probably looking pretty good at this point, but we can still do more to make the effect appear more realistic. For instance, basic light and color adjustments can be made to either the foreground or the sky in the background, in order to make the images seem more closely related.
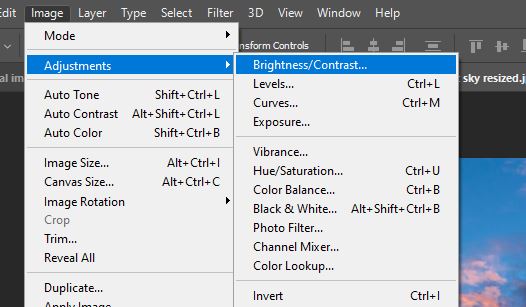
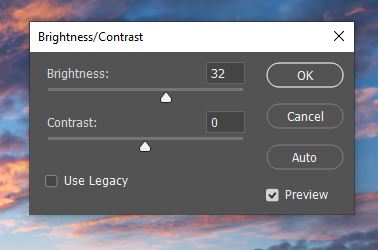
Let’s say you wanted to decrease the brightness of the foreground to make it match the brightness of the sky more closely. Making sure that you’re clicked on the correct layer, head to Image > Adjustments and then choose Brightness / Contrast.
You can then adjust the brightness and contrast to whatever extent you think is suitable, feeling free to play around with multiple adjustments until you are satisfied.
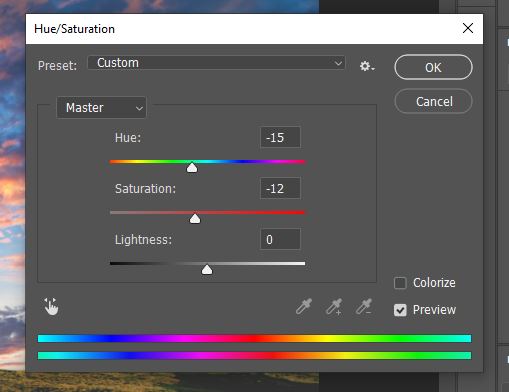
Since, in our example, we changed a sky from a daytime scene into one from a sunset scene, we decided to also adjust the hue and saturation of the grass in the foreground, since the lighting in the overall scene would change depending on the time of day.
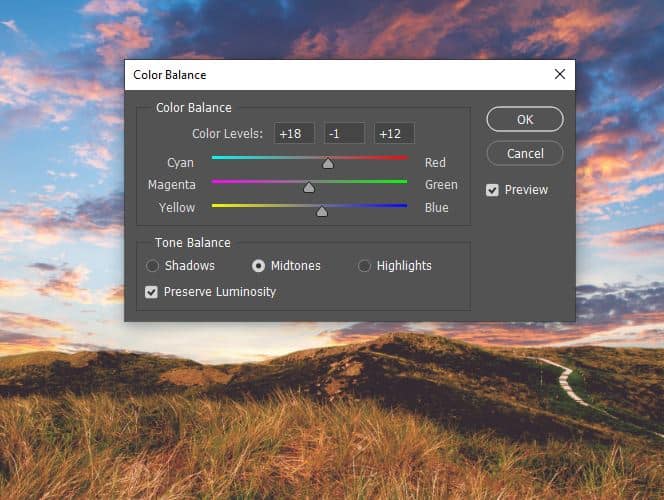
After doing so, we also made changes to the Color Balance– an adjustment option that can also be found by choosing Image > Adjustments from the options bar along the top of the screen.
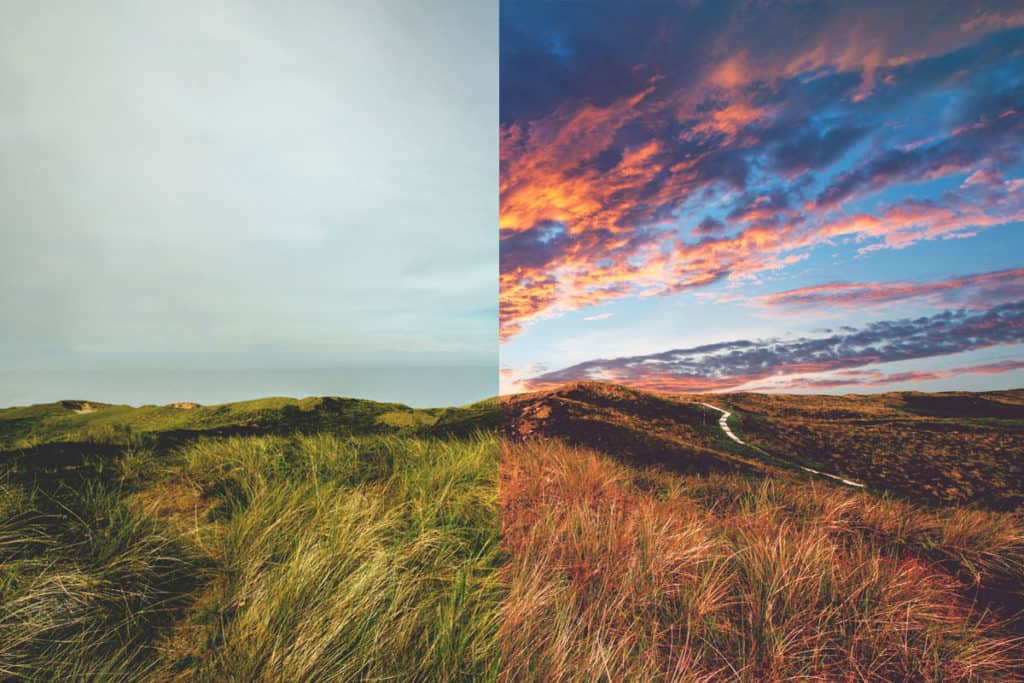
As you can see from the following before and after visual, these light and color adjustments made a significant improvement to the effect, and made the scene appear to be much more convincing.
BEFORE:
AFTER:
And that’s about all there is to know about how to effectively replace a sky in Photoshop! You should now have the skills to enable you to replace any sky in Photoshop, and be ready to take your landscape shots to a whole new level!
BONUS
Want to find out more about how to replace the sky in a photo with Photoshop?
Check out this video by Visualsofjulius, or this video by CreativeSalek, both of which will help to further explain the process and enable you to become an expert at editing your landscape photography.

Hey, I’m a Professional Retoucher making $10k a month thanks to Photoshop.Register to my newsletter to get freelancing tips and a FREE Brush Pack in Bonus! My Newsletter

