For Photographers that enjoy shooting panoramic images, Instagram’s dimensional restraints can be really annoying. Although recently they’ve allowed users to post images that aren’t square-shaped, there are still constraints in place that, more often than not, prevent the sharing of full panoramas. But fear not! In this article, we’ll talk you through a way in which you can utilize Instagram’s multi-post sharing feature to create a seamless panorama as viewers swipe through the photos within your post.
You can directly download the Photoshop template PSD file here.
Want to get more to grips with Photoshop before you start this tutorial? Then check out some of the more basic tutorials from this list that we have compiled of 50 Photoshop Editing Tutorials.
So, let’s get started!
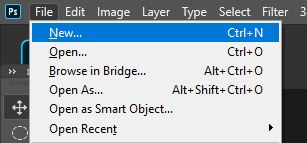
1: Go to File > New and Create a 1080 x 1080 Pixels Document with sRGB Color Profile
The first thing we’ll do is head to File > New to create a new blank document.
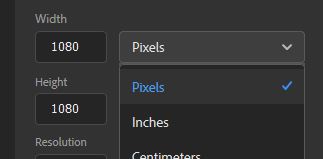
Clicking this will open an options window, in which you can set the properties of your document. As we will be working with square images compatible with Instagram, we’ll create a square document of 1080 by 1080 pixels.
Any dimensions in which the width and the height are equal would work, but these values are the best since they allow us to create a document of the highest possible file size, and therefore the highest quality, that is compatible with Instagram.
Make sure to set the ‘Color Profile’ to sRGB, since this is the one that Instagram will use, but this isn’t terribly important so don’t worry if you prefer working with a different one.
2: Consider How Many Square Images You Want Your Panoramic Post to Take Up
Before we continue, you’ll want to make sure that you know how many square images you want to take up with your panorama. Instagram will work with a maximum of 10 images, so any value from 2 to 10 should work. Take a mental note of this, as it’ll be important later.
For this tutorial, we’ll be using 4.
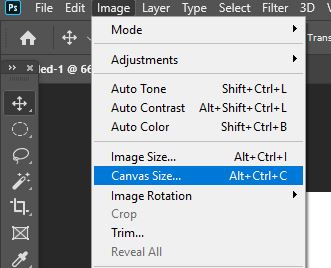
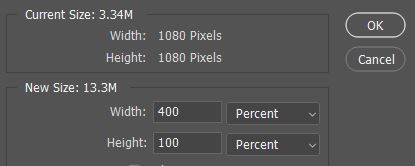
3: Go to Image > Canvas Size and Edit the Width to be (100 x n)% where n = the Number of Square Images You Will Create (ie for 4 images, set 400%)
We can now get started with creating our separated panorama! Go ahead and select Image > Canvas Size from along the top of the screen.
Doing so will open an options window. Here, keep the Height the same, but change the Width to be (100 x n)%. For instance, for a panorama composed of 4 images, choose 400%. For a 5 image panorama, choose 500% etc. You can set the units to be ‘%’ by clicking on the dropdown menu next to the value for the width.
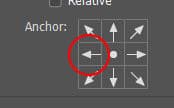
Also be sure to click on the center arrow pointing to the left, as this will cause the canvas to be extended to the right of our square document.
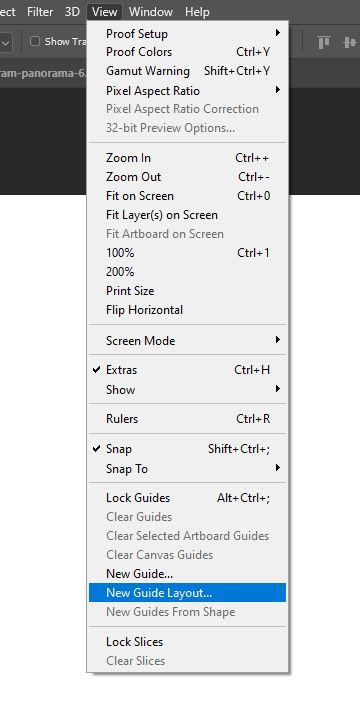
4: Choose View > New Guide > Layout and Set the Number of Columns to be the Number of Images (eg 4 or 5)
Next, we’re going to make a start on separating our long canvas into square pieces, to indicate where each part of the image will be situated. From the top of the screen, select View > New Guide Layout.
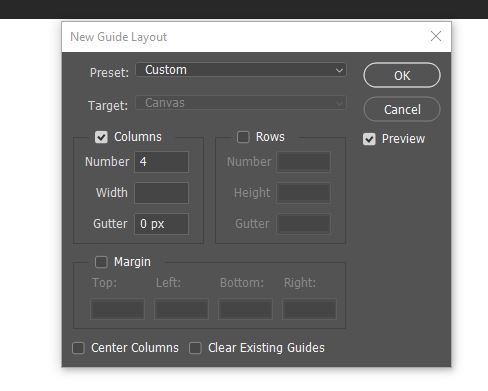
In the window that opens, set the number of Columns to be equal to the number of square images you’ll be using (in our case, 4).
5: Select the Slice Tool from the Toolbar and Click and Drag Along Each Guide to Create the Separate Sections
Although it’s an uncommon tool, the Slice Tool can really come in handy in moments like these. It allows you to essentially cut up an image, enabling you to quickly save multiple documents out of a single image.
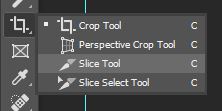
You can select it from the toolbar, nestled under the Crop Tool, as displayed below.
With the tool selected, simply click and drag down the guides, following them to make slices along the columns that you’ve created.
After slicing all your boxes, you’ll be able to see a number of blue labels that is equal to the number of images that you intended to include in your panorama.
6: Go to File > Place Embedded to Add Your Panorama Into the Document, and Transform it so That it Fits
Now that we’ve got the document split up correctly, we can import the panoramic image by choosing File > Place Embedded from the top of the screen, then selecting the relevant photo from your files. For this tutorial, we used a panorama by Kamran Khan from Pexels.
This should import the image into the document. If it doesn’t fit properly, or it’s too big or too small, then you can resize it by clicking Ctrl + T [Win] / Cmd + T [Mac] and dragging the corners in or out. Note that to keep the original proportions of the image, you’ll need to hold down the Shift key whilst doing this.
7: Choose File > Export > Save for Web to Export the Slices as Individual Files as JPEGs
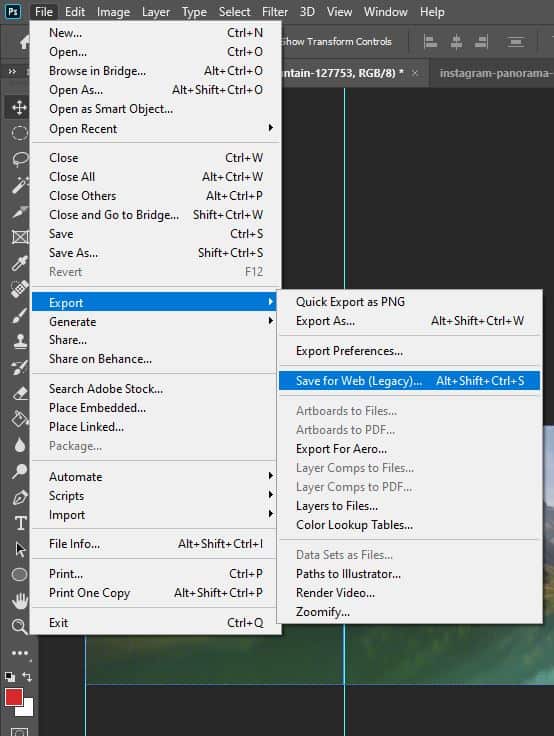
When you feel as though you’re ready to save the panorama, go to File > Export > Save for Web.
By the way, if you want to know more about correctly exporting your files, check this article.
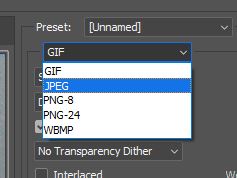
Select the File Type as JPEG and choose the maximum quality. Then click on Save.
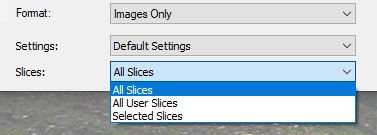
At this point, a dialog box will open. Choose the location in your files in which you want to save the images, and under Slices Choose All Slices, then click Save.
And you should now have separate files that you can post on Instagram! To upload them, transfer the files to your mobile (via Email or Dropbox, etc) and share them as a beautiful, seamless multi-image post!
BONUS
Want to find out more about how to split images for Instagram’s multi-post panoramas? Check out this video by Becki and Chris that talks you through the same process and also touches on Lightroom.
You can also download the PSD template used to Split Images for Instagram’s Multi-Post Panoramas here.
Hey, I'm a Professional Retoucher making $10k a month thanks to Photoshop.Register to my newsletter to get freelancing tips and a FREE Brush Pack in Bonus! My Newsletter

