
No matter what you’re using Photoshop for, it is highly likely that you will need to make selections at some point. One common scenario in which you may need to make more complex selections is when you want to eliminate a large area of a single color.
In such cases, you can speed up the process significantly by selecting areas based on colors rather than shapes. Instead of spending potentially hours manually creating tedious, complex selections, you can luckily take advantage of a few handy tools in Photoshop which produce the same effect in just minutes!
Through using Photoshop’s Magic Wand and Select Color Range tools, you can easily and quickly select areas of a single color, before creating layer masks based on the selections to eliminate the whole color within the document!
In this article, we’ll cover the following topics:
Table of Contents
Which method is best to remove one color in Photoshop?
Before we start discussing how you can remove all of one color in Photoshop, let’s establish the situations in which you might want to use these techniques, and when they may be less suited to the task.
The following techniques are best suited towards removing a clearly defined area of color from an image. You’ll want there to be a clear distinction between the colors you want to keep and the color you would like to remove.
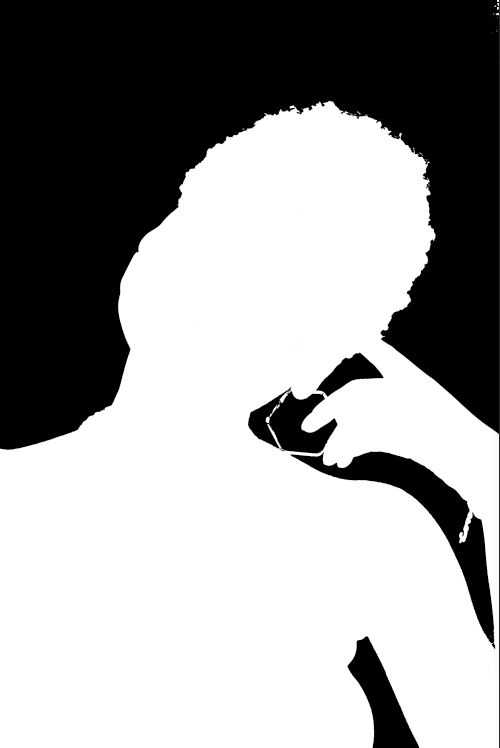
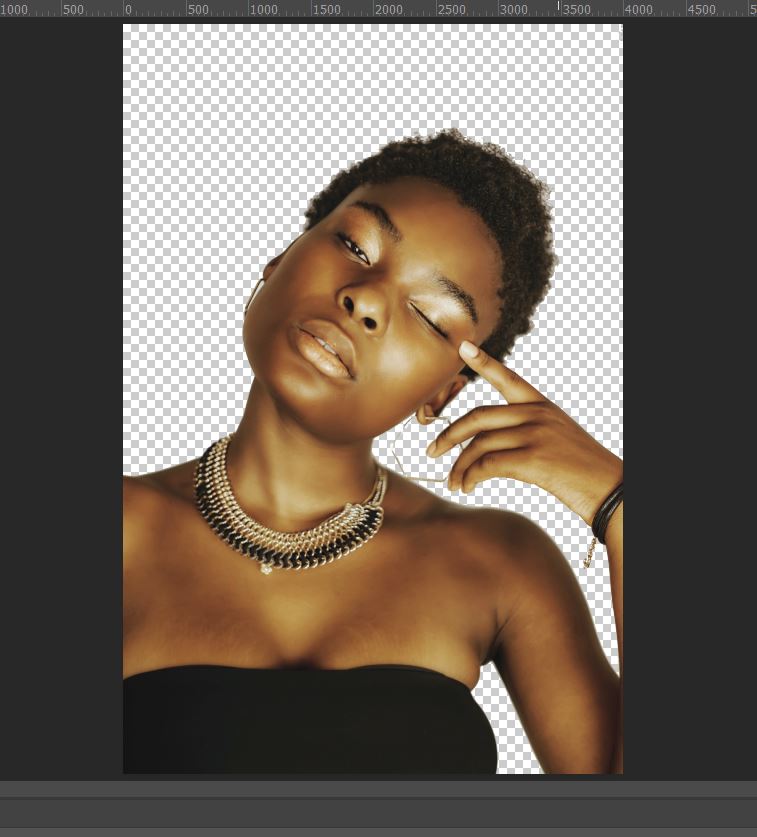
To see this point illustrated, take a look at the images below.

As you can see, the image on the left (by cottonbro from Pexels) is less suited towards the use of these methods. Let’s say we wanted to remove the background of the photograph and isolate the subject. It would be hard to select a color range to delete the background since it is made up of so many different colors.
By contrast, the image on the right (by Francesca Zama from Pexels) would be a lot easier to work with. It’d be simpler to get rid of the background as it is only composed of a single color range which is clearly defined and separated from the subject.
The methods we will explore are useful, for instance, in scenarios where you want to select a logo or a subject from a blank background.
Using the Select Color Range Tool method
The Select Color Range tool is the technique I always try first because it usually get you a better outcome.
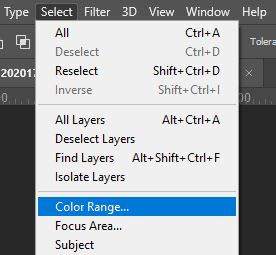
To use it, let’s head along the top of the screen to Select > Color Range.
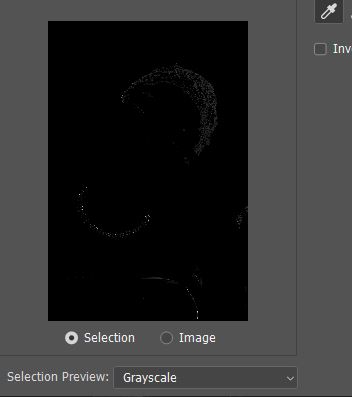
A new window open up where we can make a selection based on a color range. First, we’ll draw our attention to the options at the bottom of the window.

Tick the option that says Selection and set the Selection Preview to Grayscale.

In the preview window, you should be able to see that the image is now made up of black, white, and gray tones. Just like with layer masks, the areas that appear white are completely selected, whilst the areas that are displayed as black are entirely invisible in the selection.
The shades of gray between these two extremes will be of varying transparencies in the selection, with darker tones being less visible than lighter ones.
You can click anywhere on your picture to specify the areas of the image you want to keep.
Personal tips: holding down the Shift key and clicking on areas of the image lets you add to the selection, whereas holding down the Alt [Win] / Option [Mac] key whilst clicking on areas that have been selected already lets you remove those areas from the selection.
Keep repeating this process of editing the selection until you’re happy with what appears in the preview window.
You can also refine the selection with the Fuzziness slider.

Here, a larger value means that Photoshop will select more pixels as it is more lenient with the color range it selects.
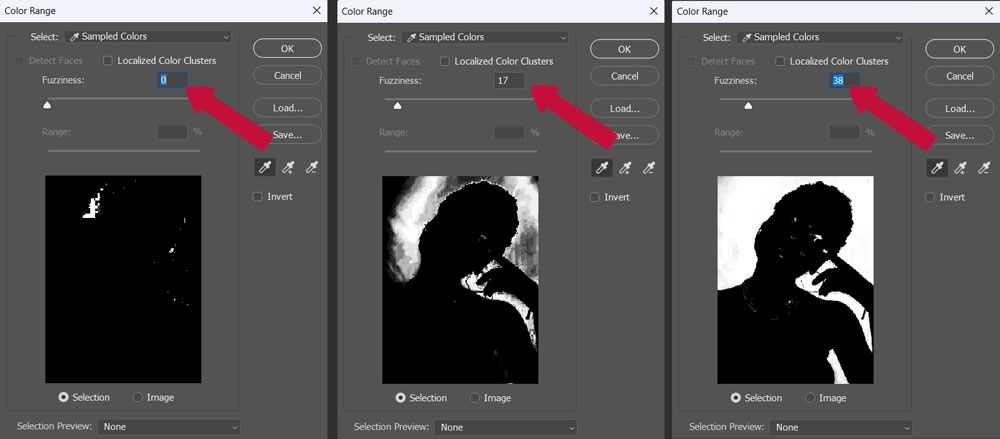
Feel free to experiment with this value by dragging the slider from side to side, as the optimum value really does depend on the image you’re using and the number of pixels you want to remove.
When you’re happy, click the OK button to convert the grayscale preview to a selection.
But if it doesn’t work automatically, then don’t worry. As we discussed for the Magic Wand tool, this newly created selection can non-destructively remove the unwanted color range from the image by being converted into a layer mask manually, too.
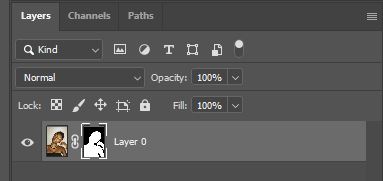
To do this, first make sure the selection is active. Then, simply click on the image layer in the Layers Window and add a layer mask by clicking on the icon depicted below, which can be found at the bottom of the window. This will cause Photoshop to generate a layer mask based on the selection you created, meaning that the pixels containing the color you originally selected have been hidden temporarily.

And hopefully, you should have successfully removed the selected color range from all areas of the image!

Related Guide:
– How to Select and Change Colors in Photoshop
Using the Magic Wand Tool method
The second method we will discuss, and probably the simplest to understand, involves using the Magic Wand tool.
This tool lets you click on a pixel within the image, then automatically selects all the pixels that share the particular color you selected.
Personal note: The difference with the color range technique we discussed before is that the Magic Want Tool doesn’t allow you to update the “tolerance” after you clicked. On the contrary, the Color Range tool lets you adjust the “fussiness” during the whole process.
In this case, we can use it to select the color range we want to remove. To begin, you’ll want to select the Magic Wand tool from the toolbar on the left of the screen. It can be made active by clicking on the icon shown below, or through the keyboard shortcut W.

With the tool selected, go ahead and click anywhere within the area of the canvas that contains the color you want to select. Doing so will cause Photoshop to make an automatic selection of all the pixels within the color range you specified.

It’s unlikely that the selection will be perfect after the first try. So luckily there are a few ways in which you can edit the selection without having to restart it.
The first alteration you can make is editing the Tolerance value. This setting can be found in the bar near the top of the screen.
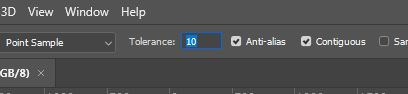
Adjusting this setting lets you tell Photoshop how wide of a color range to select. Based on the color of the pixel you select, Photoshop will select either a limited or highly varied color range, with a greater Tolerance value allowing for more variations in hue.
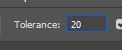
Usually, a value of around 20 is a good place to start, as it will select slight variations in hue whilst avoiding the selection of too many pixels. You can edit this as you experiment, though, to see what works best for you.
To manually add sections of the image to the selection, you can hold down the Shift key and click on all the colors you want to include in the selection. Just repeat this until the selection contains all the colors you want to include.
To remove areas from the selection, simply hold down the Alt [Win] / Option [Mac] key on your keyboard whilst clicking on pixels of the individual colors you want to remove from the selected area.
Feel free to alternate between these approaches until you have crafted a selection that you’re satisfied with!

At this point, you’ll now be ready to remove the selected color range. So how can this be done? Well, we’re going to show you how to hide the selected color range in a non-destructive manner.
This means that we won’t delete any pixels, but rather use a layer mask to temporarily hide them. Working in such a way gives us the possibility to retrieve any pixels if we realise that we want to bring them back into the piece.
The process is pretty simple. With the selection active (indicated by the selected area being bounded by a moving dotted line), click Shift + Ctrl + I [Win] / Shift + Ctrl + I [Mac] to invert the selection.
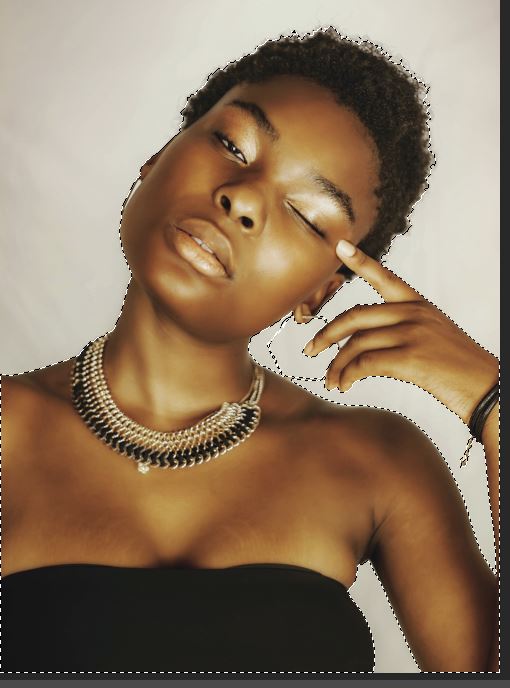
This will cause Photoshop to convert the selection of the color range to a selection of everything except for the color range- in other words, we have now obtained a selection of the areas we want to preserve.
After inverting the selection, click on the image layer in the Layers Window to make it highlighted and therefore active, then add a layer mask by clicking on the icon circled in the image below.

You should now notice that the color range we originally selected has been hidden and all that remains is the rest of the image!
BONUS Video tutorial
If you want to learn more about how to remove a single color using Photoshop, then check out this video by BehrDesign which talks you through how to remove a one-color background!
Hey, I'm a Professional Retoucher making $10k a month thanks to Photoshop.Register to my newsletter to get freelancing tips and a FREE Brush Pack in Bonus! My Newsletter

