How to Make an Image Transparent in Photoshop

When it comes to working with transparency in Photoshop, the opportunities are endless. Whether you would like to make a single layer transparent, create a transparent selection, or isolate a subject on a transparent background, Photoshop allows you to do it all.
Editing aspects of an image by changing their transparency, in fact, could be applied to many design situations.
You could use some of the skills mentioned here to layer images on top of one another, for instance. Maybe you need to add a logo onto multiple images? Creating a PNG file of it allows you to do so within seconds.
In short, you want to isolate your subject (what you want to keep in your image) from the rest by selecting it and copy-pasting it to a new layer. You then delete or hide the layers you want to be transparent. Don’t forget to save your work in PNG, jpeg will replace transparency with pure white.
Now, are you ready to find out more about how to make an image transparent in Photoshop? Then read on!
Open the Image you want to have a transparent background on
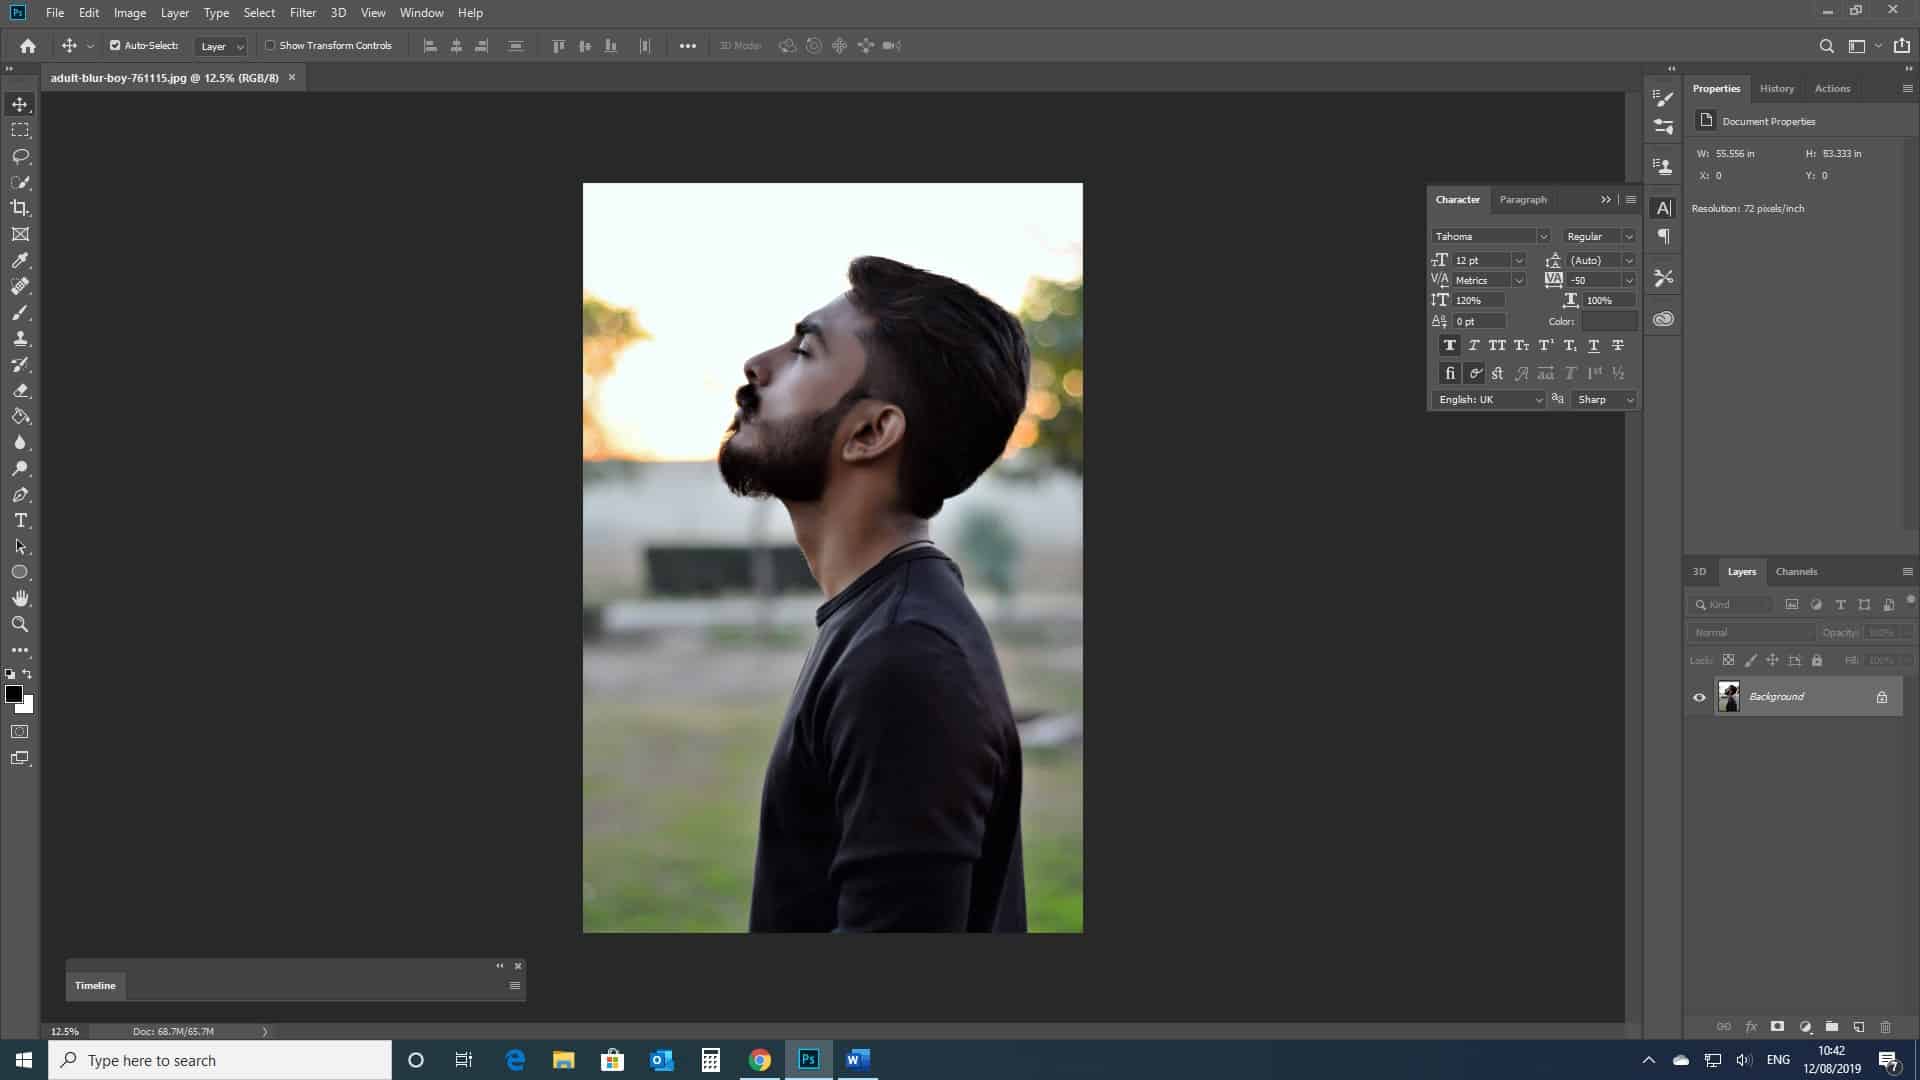
So let’s make a start by opening the photo in Photoshop. For the purposes of this tutorial, we will be using a portrait to display the process. In this case, an image in which the outline of the subject is strongly defined would be most suitable.
Likewise, with any image, whether it be still life, landscape, or portrait, high contrast between colours and tones of neighbouring sections is important.
Let’s say I wanted to select only the subject. It will be much easier to do so with this image by khalifa waleed from Pexels (or a similar one) because due to its high contrast, Photoshop will be able to sense a difference in colour between the subject and background, therefore making a cleaner selection. It is always possible to do it even if you don’t have a big contrast between your background and subject but you will have to take more time to do it manually.
Once you’ve decided on which image will be ideal, open it in Photoshop by choosing File > New.
Use Photoshop selection tool to Select your Subject
Now that you’ve opened your photo, it’s time to decide on how you want to use transparency in this piece.
In this article, we will explore three different options, all of which will discuss different ways in which you could potentially work with transparency.
Note: the most important part of this tutorial is the selection process. Indeed, the better your selection is, the better your final result will be.
Option 1: Making a Layer Transparent
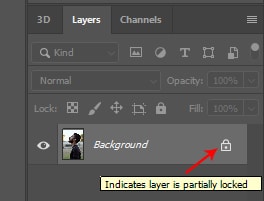
In order to be able to alter the transparency of a layer, you will first have to make sure that it is named as a Layer, rather than a Background.
If it is a background rather than a layer, then convert it to a layer by simply clicking on the lock icon next to the layer name (indicated below).
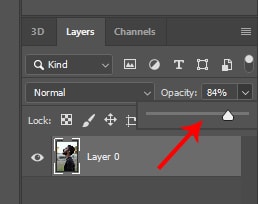
Now that we are sure that we’re working with an editable layer, we can change the transparency of it by adjusting the opacity. Do this by selecting the drop-down menu entitled ‘opacity’ at the top of the Layers Panel, and adjusting the opacity to the desired level
The opacity can be changed on a 0-100% level – 0% making the layer invisible, and 100% making it entirely visible (in the same state as it is originally imported).
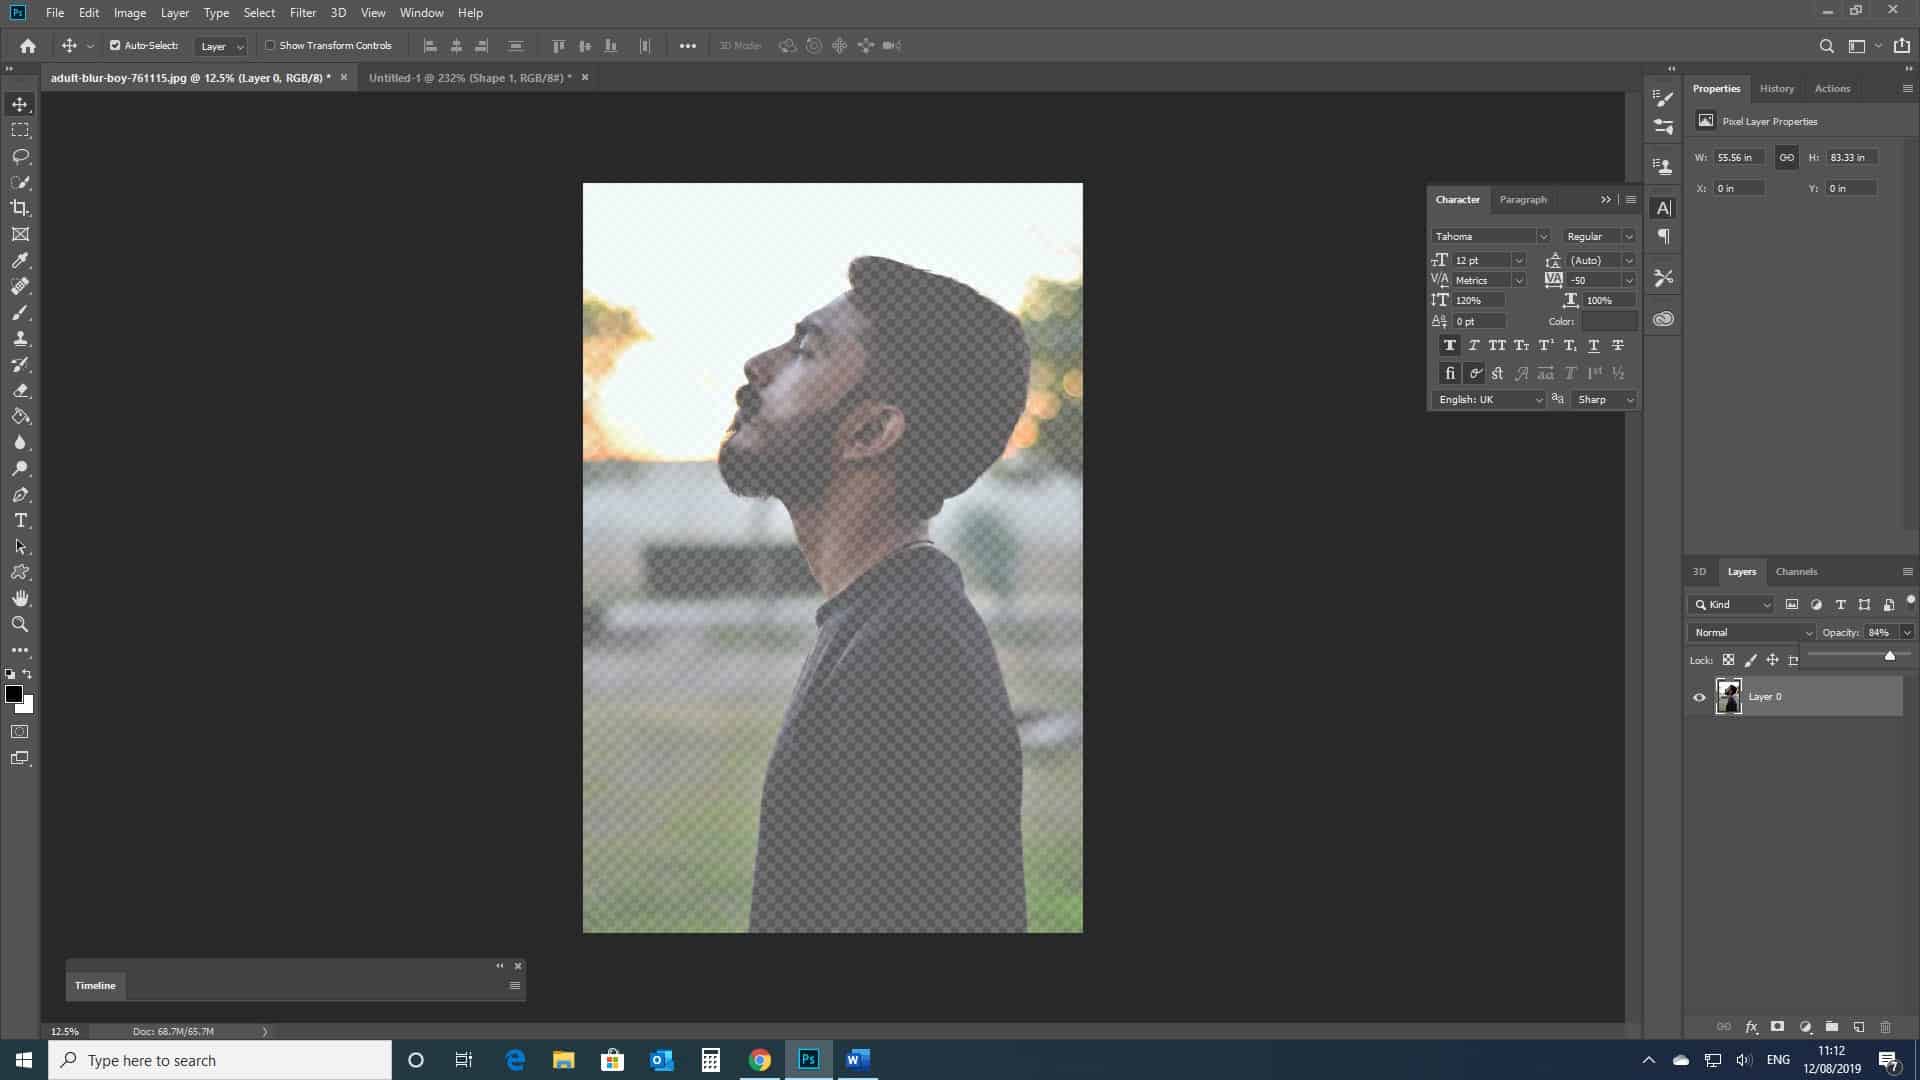
Here I adjusted the opacity to 84%, for example. By lowering the opacity, you are able to see small white and grey squares behind the image. This indicates that there is no background behind the layer, and therefore we now have an image that is semi-transparent.
Now save the image as a .PNG file to preserve its transparency. (Do this by going to File > Save As, then change the file type to .PNG.
Option 2: Creating Transparent Selections
So let’s imagine you want to keep the subject of the image completely visible, but you would like to make the background slightly transparent.
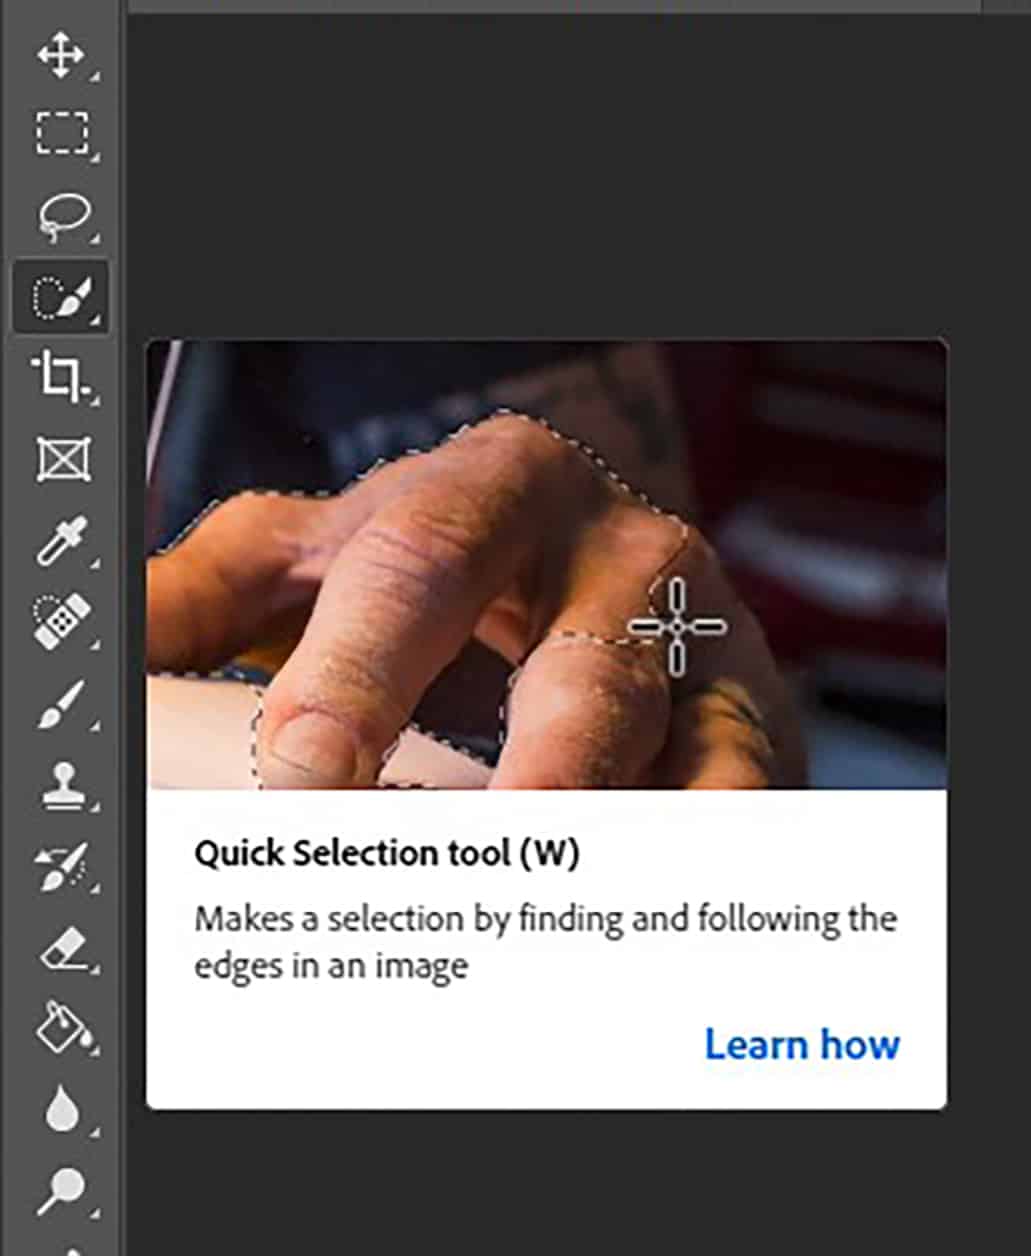
If your image has distinct, simple outlines then you’ll likely be able to do this using the quick selection tool.
On the contrary, if you have difficulties to select your subject, you’ll want to use different techniques. You have for example the Subject Selection tool from Photoshop that can do great or you could also use channels to isolate and select your subject.
Remember that it is crucial to have a good selection to isolate your subject in a proper way. Therefore, there are different video tutorials you may want to check:
You can use Alpha Channels to create precise selections as well. Check this article we did about the subject here.
To make the selection, of the subject for example, simply select the quick selection tool and use it by clicking and dragging with your mouse over the area you wish to select.
The selected region is indicated by being surrounded with a moving white dotted line.
When using the quick selection tool, a panel along the top of the screen will appear, which allows you to alter the properties of the tool, such as the brush size.
If you wish to add to the selection, then click on the middle icon, with a plus sign, and use it to click and drag from the original selection to the perimeter of the area you want to add to the selection.
Similarly, if you want to subtract from the selection, then click on the icon on the right, with a subtract sign, and click and drag until the selection is how you would like it to be.
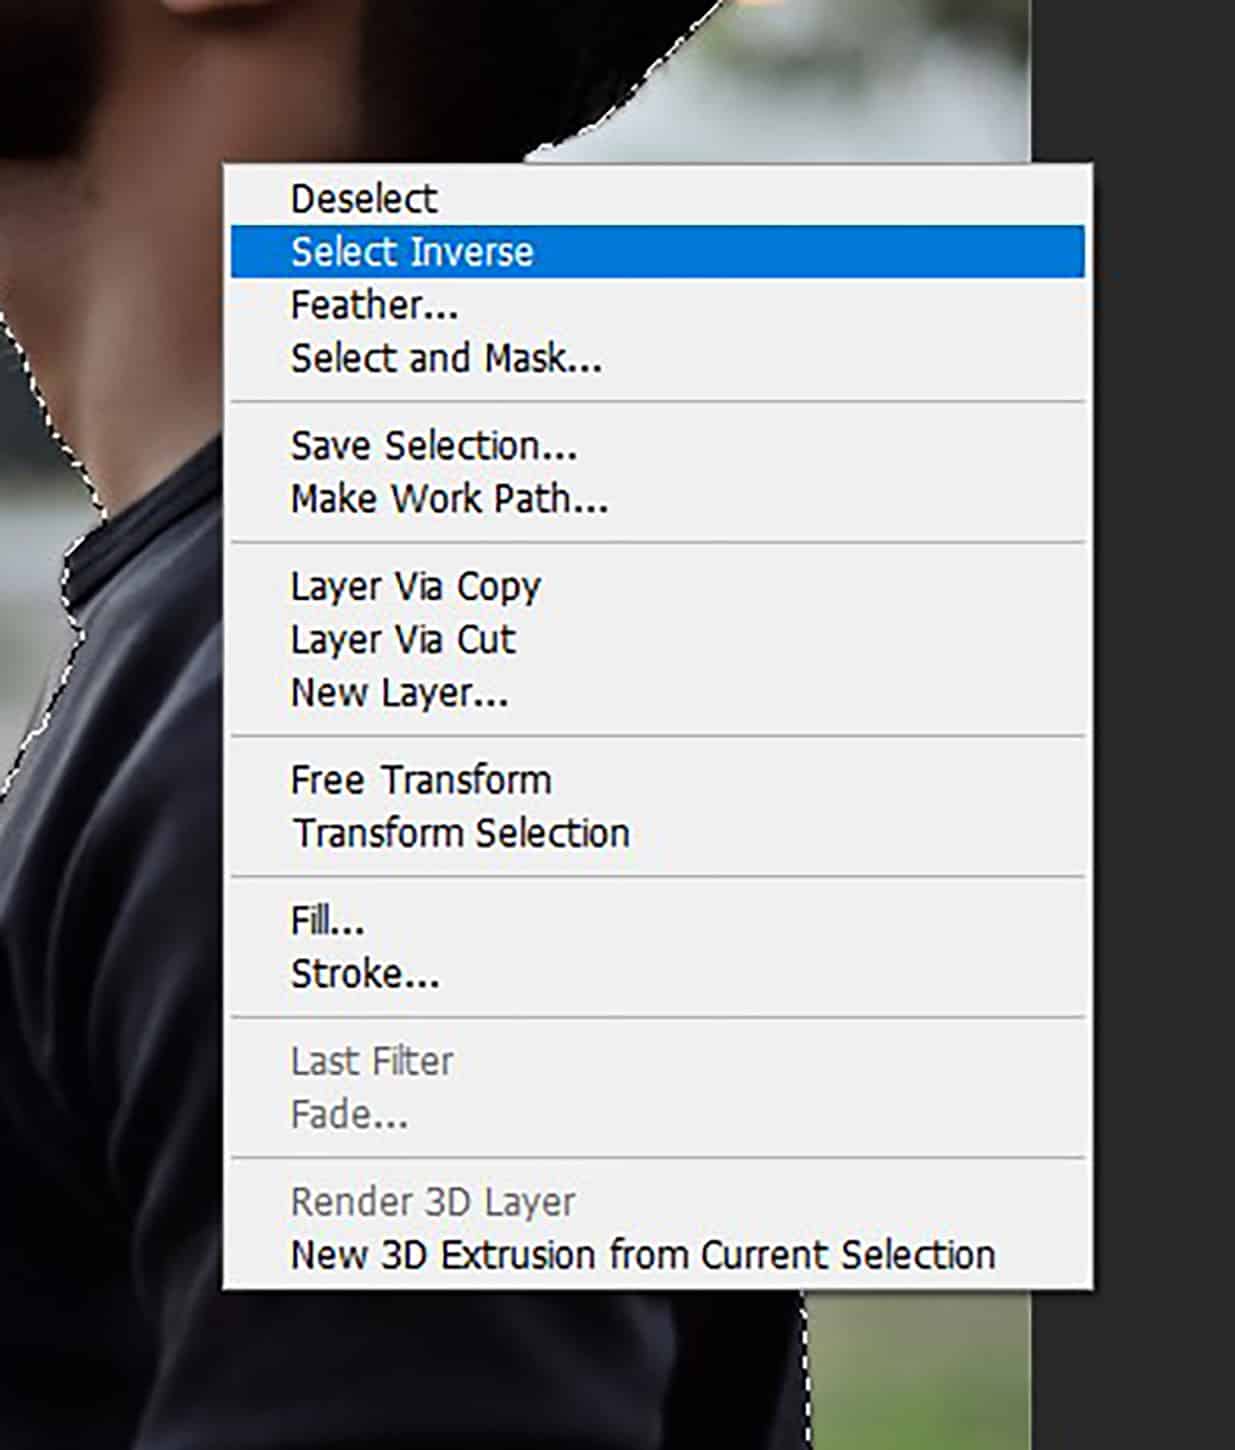
To invert the selection, right click on the selection > select inverse.
This is useful if, for example, you want to select the background of a portrait. As exemplified here, it is easier to make a selection of the subject, then right click and select inverse.
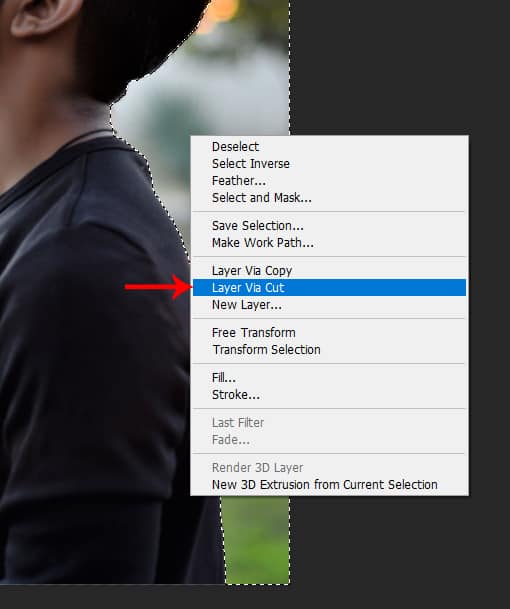
Next, we’re going to again right click on the selection > layer via cut. This effectively separates the two different areas of the image, in this case the subject and the background, onto two different layers.
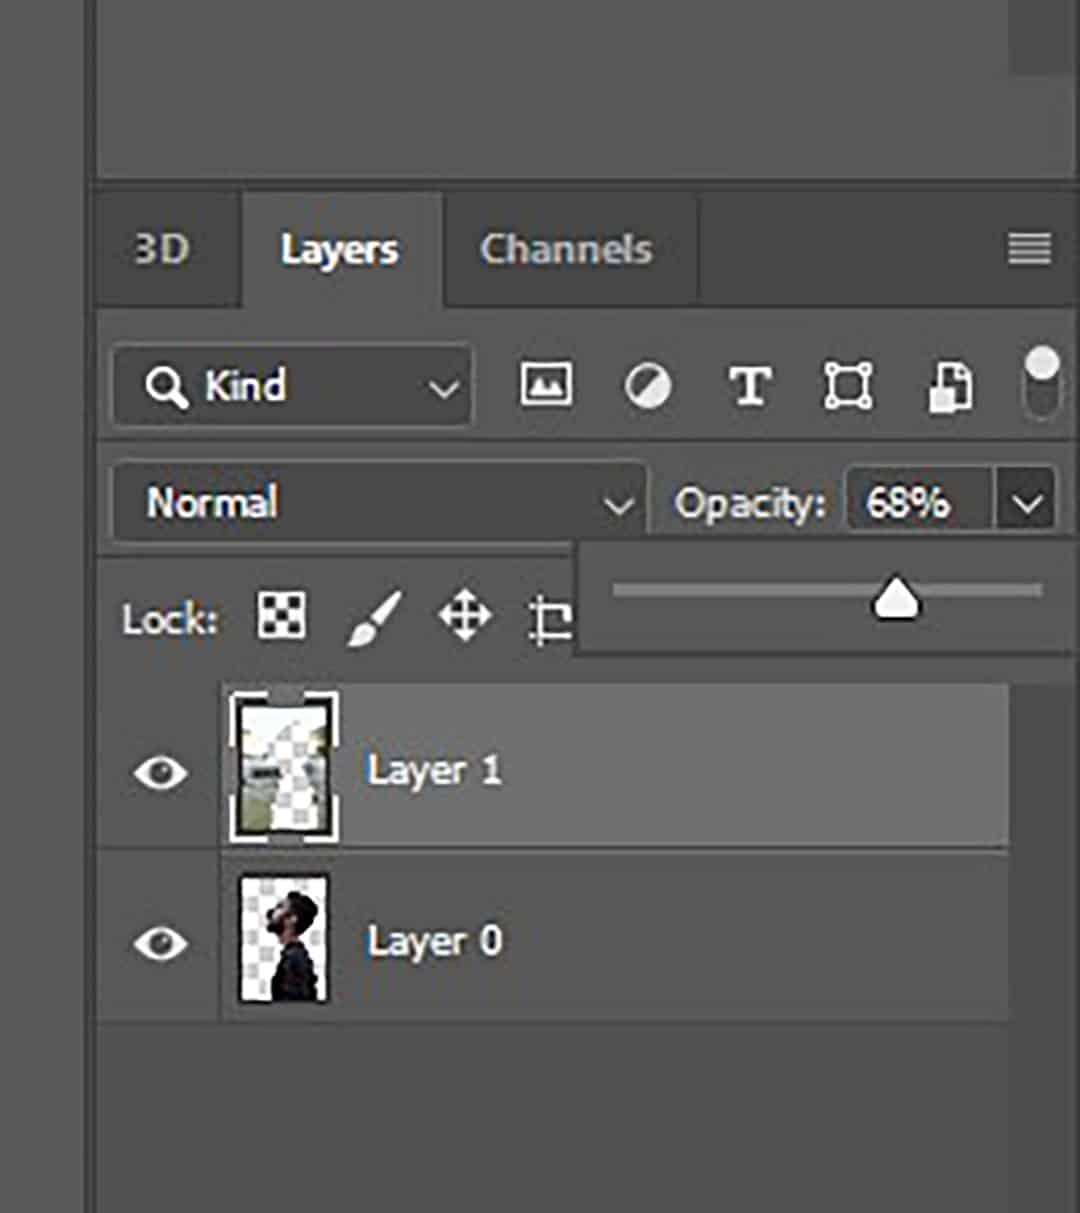
Now that the subject and background have been isolated from one another, we can alter the properties of each layer individually. Click on the layer containing the background of the image and use the opacity dropdown at the top of the layers window to edit the transparency of the contents of the layer.
As you can see below, the subject will still be fully visible, whilst the background contents of the image are partially transparent.
Finally, save the file as a .PNG to retain its transparency.
Option 3: Creating a Transparent Background
For this, the same principles as the previous option apply, in terms of selecting one area of the image, and using layer via cut to separate the two elements – background and subject – onto different layers. See the above option for the details of this process.
Now the only difference between this and the process for option 2 (creating a transparent selection) is that once you have the background and subject on separate layers, we will reduce the opacity of the background layer fully, or alternatively delete the layer (right click on the layer in the layers window > delete layer).
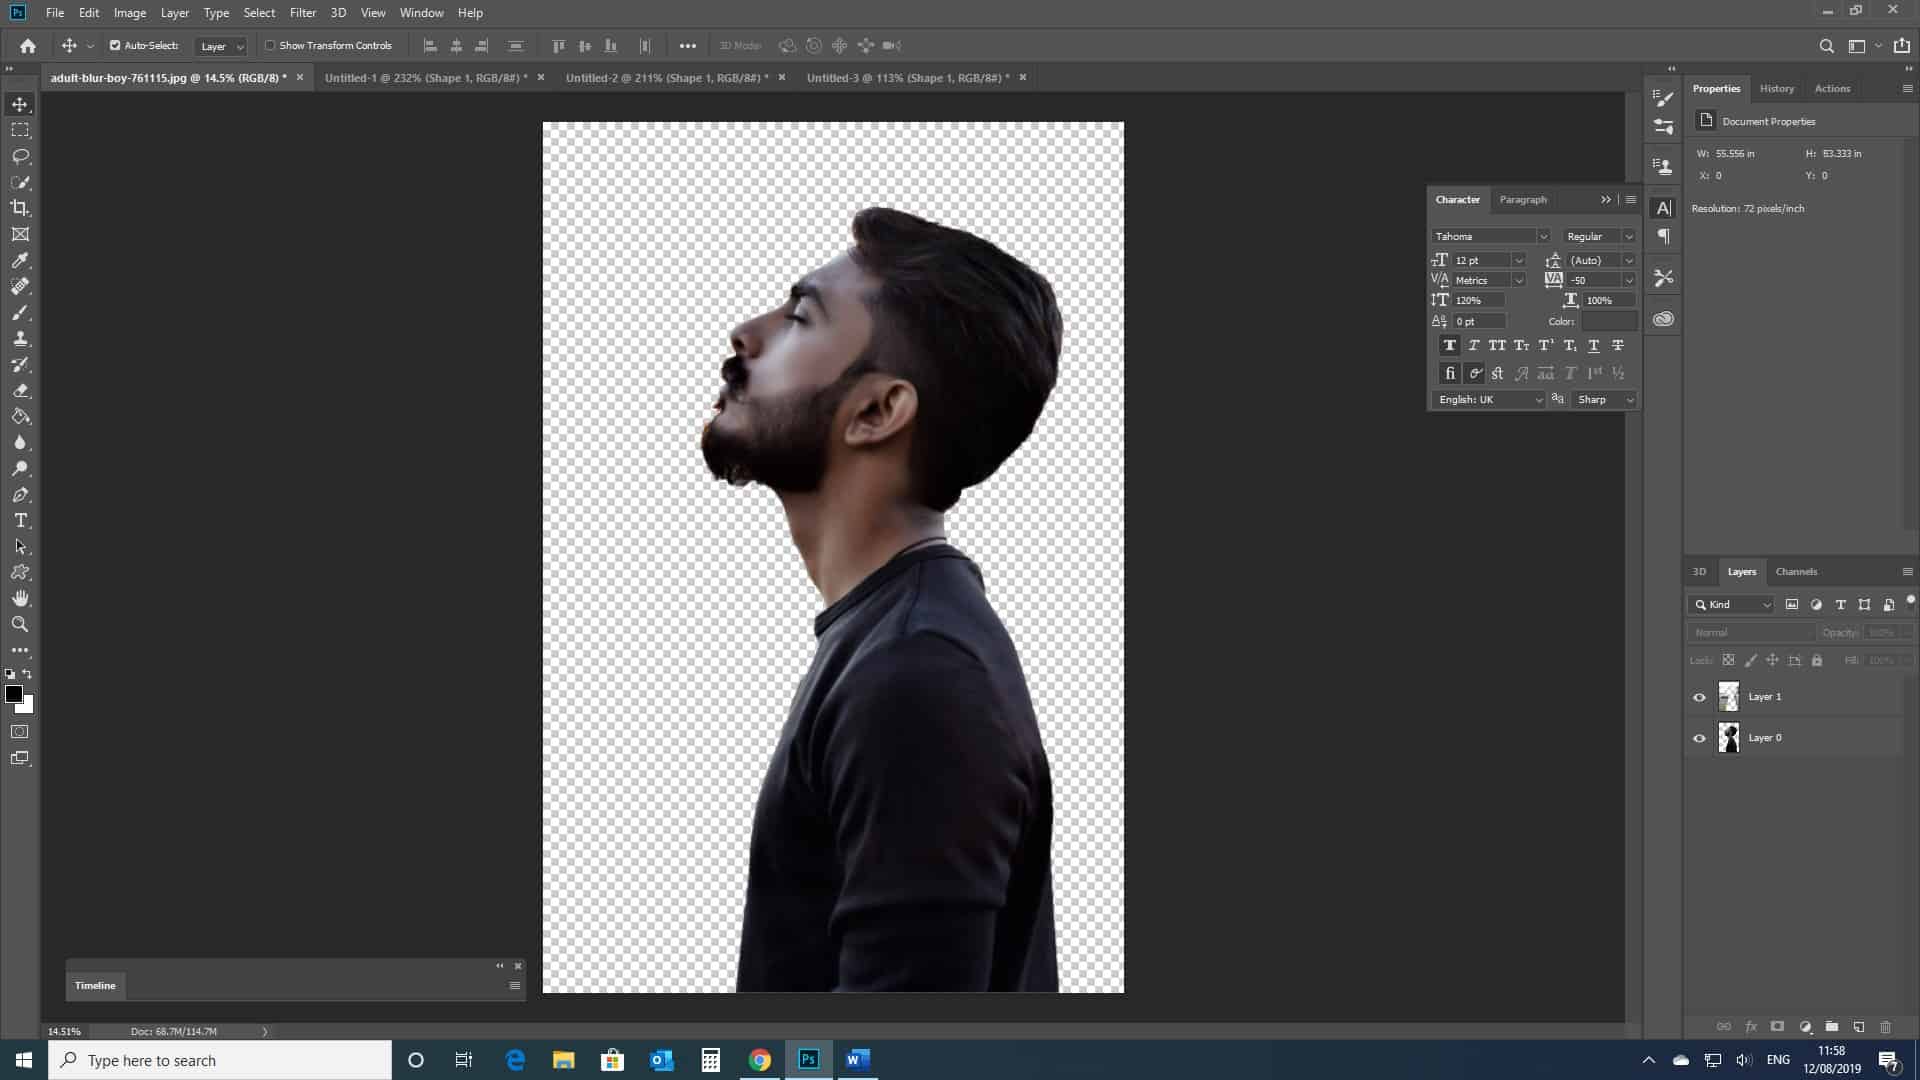
We can now see that the subject has been fully isolated and lies on a transparent background.
To finish off, save the file as a .PNG, in order to retain the image’s transparency.
Using these Transparent Files in Practice
So, now you’ve created your PNG files of these transparent images, how do you use them in practice?
Here’s an example of how you could bring your subject on a transparent background (created with the process under ‘Option 3’) onto a different background.
For the purpose of simplicity in this tutorial, we’re just going to show you how you could place the subject onto a plain coloured background, but you could apply the same process in any situation, to place your subject into any scene, for example, or a logo onto an image.
Here, you’ll need to open up two things in Photoshop: your PNG file of the subject (eg a person or a logo) and the background image (for example, a plain colour or a landscape). To open these, head to File > Open.
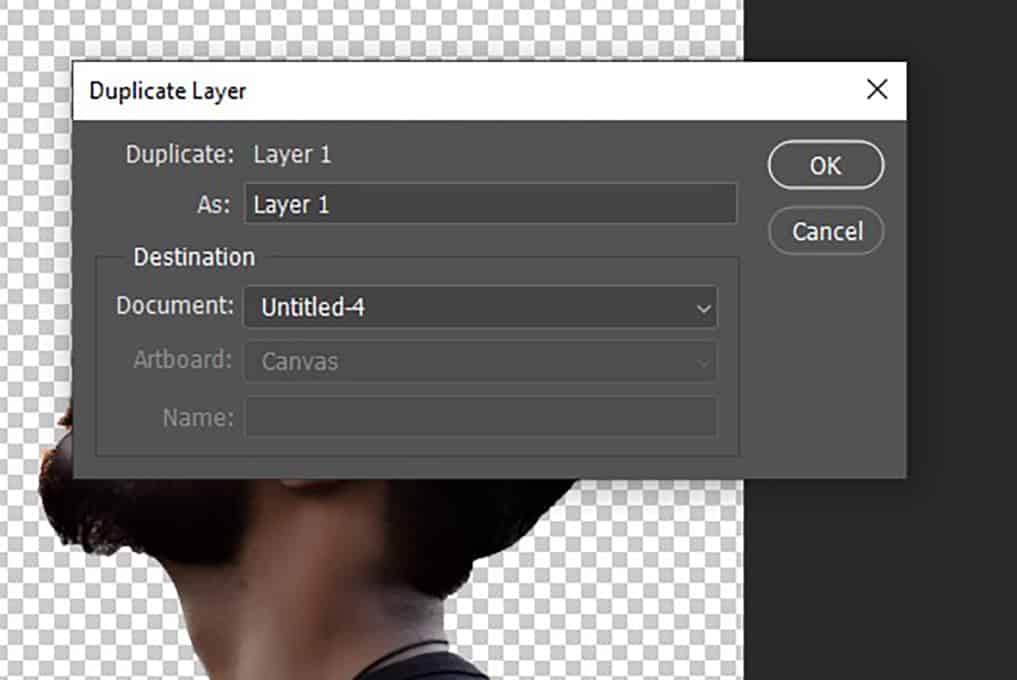
Now, have the PNG file open, and right click on the layer in the layers window > duplicate layer.
This window should open up. Where it says destination, select the correct destination from the document drop-down menu (the destination will be the image in which you want to place your subject).
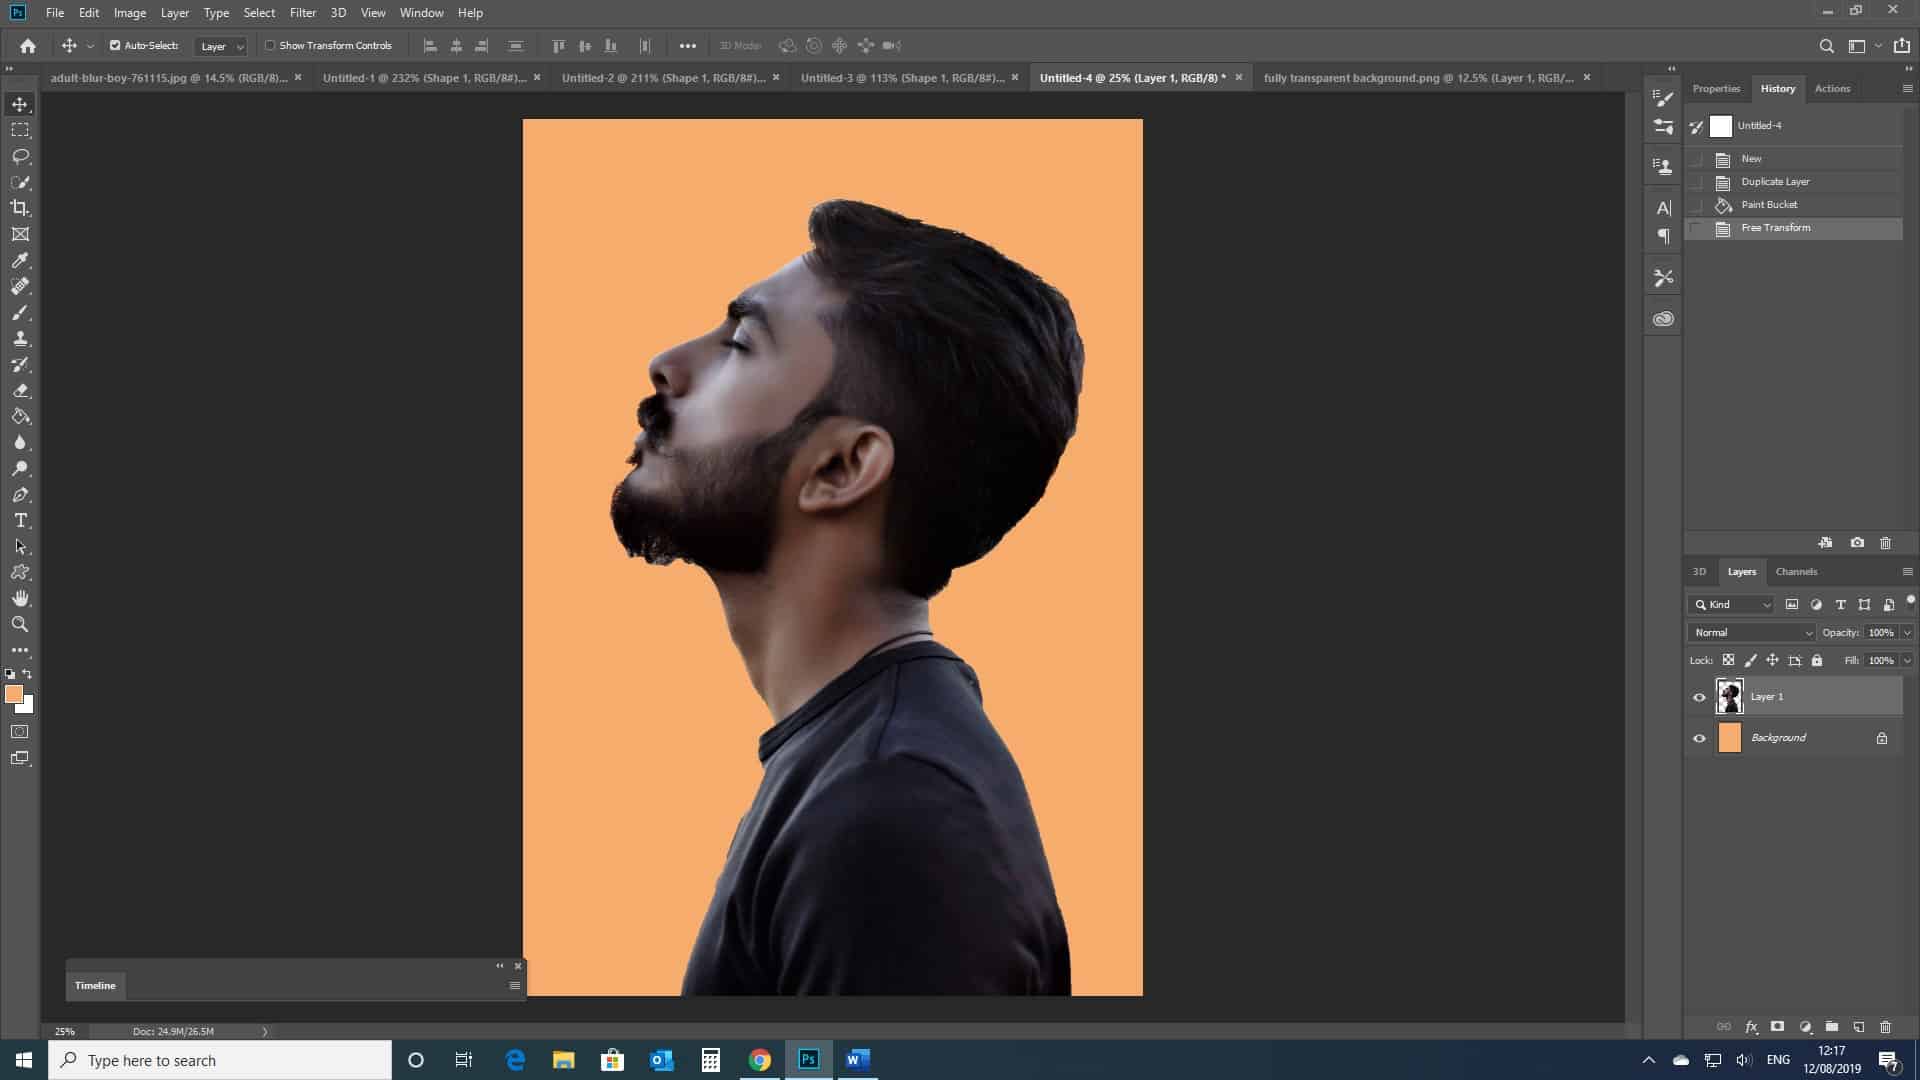
If you now head to the destination file, ie the background on which you plan to place the subject, you will see that the subject layer has duplicated itself onto the background document (in this example just an orange background).
If the layer imports itself as a size that is too big or small, you can alter the size of the layer by pressing Ctrl + T [Win] or Cmd + T [Mac] and transforming the size of the subject from there.
And there you have it! A transparent image, that you can add into pretty much any other image you want to. The most important thing to remember about working with transparency in Photoshop is to always save the file as a PNG to retain the transparency.
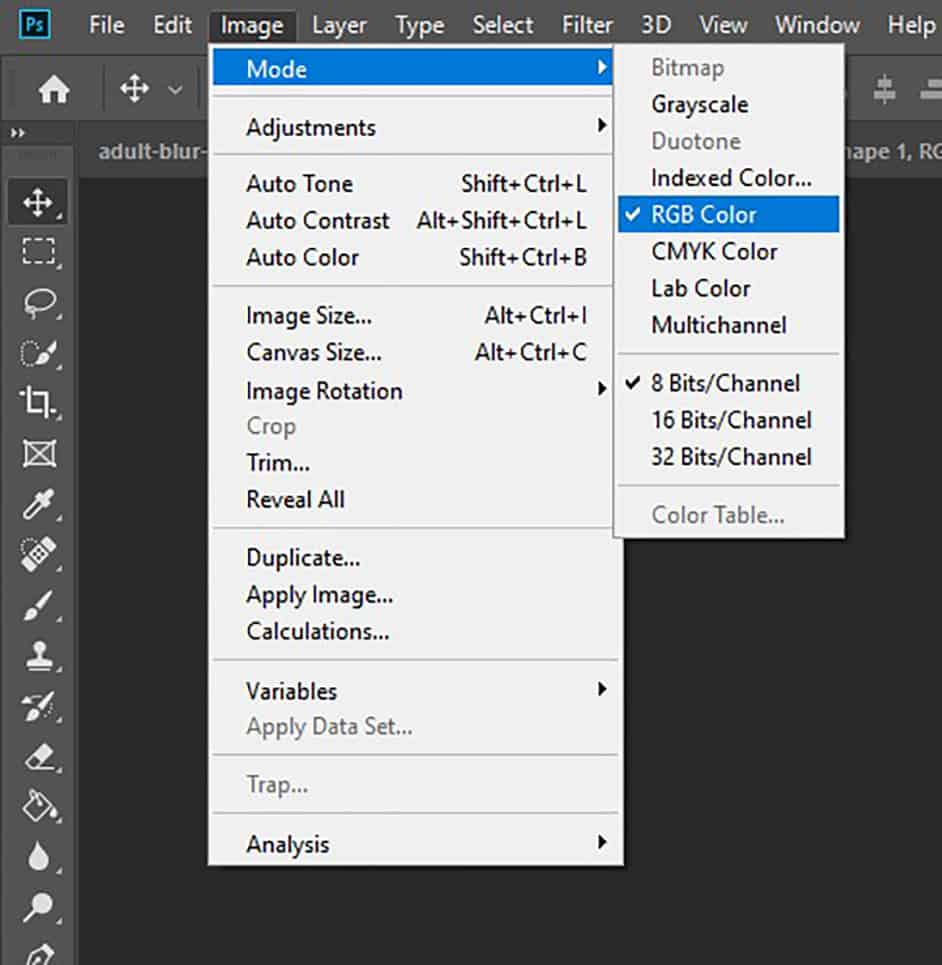
If you’re having issues saving a file as a PNG, then you’ll possibly have to convert the file from the CMYK colour mode to be in RGB mode. To do this, head to the top panel and click Image > Mode > RGB Colour.
BONUS
If you’re looking to make a side income or even to become a full-time graphic designer, we recommend you to read this article: 7 Proven Ways to Make Money with Photoshop.
If you would like to find out more about creating transparent areas in Photoshop, then check out this video by VerticDesigns on how to remove and delete the background from a photograph: https://youtu.be/Hw0-SehGcgg
Note that this is especially useful if you plan to work with a more complex image – one with less defined edges.
Hey, I'm a Professional Retoucher making $10k a month thanks to Photoshop.Register to my newsletter to get freelancing tips and a FREE Brush Pack in Bonus! My Newsletter

