

Although there is no built-in feature in Photoshop that is dedicated to creating bullet points, you can add them in various ways. Adding bullet points to your work in Photoshop can be very useful, especially if you’re producing materials that contain large bodies of text.
You can add bullet points in Photoshop by using the Type Tool in combination with this symbol • (which you can copy and paste into a text box), or you can use the keyboard shortcuts Alt + 0 + 1 + 4 + 9 [Win] / Option + 8 [Mac].
In this article, we will discuss the following methods in more depth:
Table of Contents
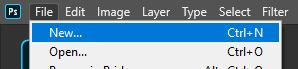
Before we begin, make sure that you have a document open to work in. To open an existing one, you can head to File > Open then select the file you want to open, and to create a new document, select File > New from the bar along the top of the screen before editing the settings in the window that comes up to customize the new file.
1: Use Keyboard Shortcuts
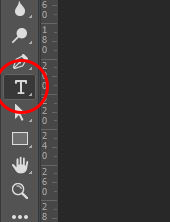
We will start with the most intuitive method. To begin, let’s choose the Type Tool. This can be done by clicking on the icon depicted below located in the toolbar down the left side of the screen, or by hitting the T button on your keyboard.
With the tool active, you can now click anywhere on the canvas to create a new text box! Once you have seen a new box and a typing cursor appear, you can go ahead and type in a new bullet point.
One way to do this is by using the keyboard shortcut Alt + 0 + 1 + 4 + 9 [Win], or Option + 8 [Mac]. Doing this will automatically add a bullet point to the text box in Photoshop!

To resize it or change the color, you can edit the settings in the bar near the top of the screen, as highlighted below.


2: Use the Built-in Font Wingdings
Another method that is perhaps less obvious is to use Wingdings, a special font which is automatically downloaded into Photoshop. Rather than causing the letters you type to be displayed, it replaces each letter with a designated symbol. And luckily, there’s one letter that can be typed to display a bullet point!
So, starting with a file already open, we’re going to select the Type Tool again, either by hitting the T key on the keyboard, or by clicking on the icon shown below, found down the toolbar at the left of the screen.

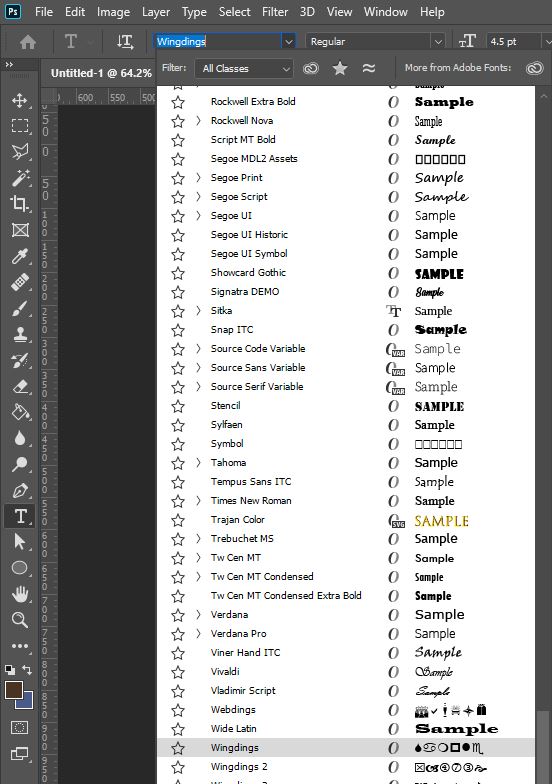
Now that the tool has been selected, you can click anywhere within the document to start typing. You should notice that once you have clicked to create a new text box, an options bar appears near the top of the screen. At the left of this is a dropdown menu that lets you choose a font.

Click on the arrow to the side of the current font name to pull up the different options in the menu. Then hover your mouse over the list and scroll down until you find the font entitled Wingdings (this will be located somewhere near the bottom of the list since it is ordered alphabetically).
After selecting this font, click back on the text box and type the letter ‘L’. And hopefully, you will see that it magically appears as a bullet point!
If you can find it, you can follow this article to install a new font.
3: Use the Windows Character Map or Copy and Paste a Symbol
Although the Character Map option is only available for Windows users, it allows you to essentially copy and paste a bullet point symbol directly into the text box.
If you want to save some time, then you can copy one of the following bullet points, and paste it into your text box:
•
○
∙
⦿
‣
⁃
➼
For more symbols, you can check out the selection on this site.
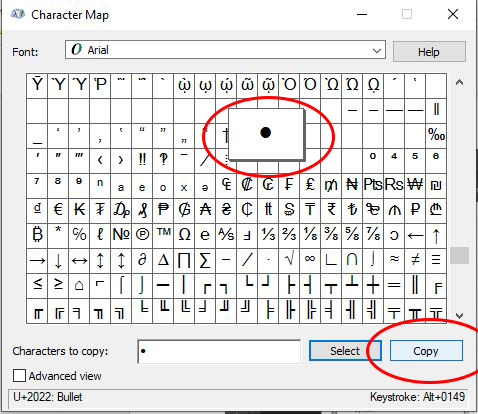
Alternatively, you can find a symbol using the Windows Character Map. To begin with, find the taskbar and search ‘Character Map’.

Click on the result that comes up and select the character you want to use as a bullet point from the opening window. After selecting it, click on the Copy button at the bottom right of the window.
Then, with the bullet point on your clipboard, head into Photoshop and paste the symbol into the text box using the Type Tool!

4: Use the Glyphs Panel in Photoshop
With your Photoshop document open, create a new Text layer with your Type Tool ![]() or with the shortcut “T”.
or with the shortcut “T”.
Once you’re in your Text Layer, go to your Photoshop top menu > Type > Panels > Glyphs panel.
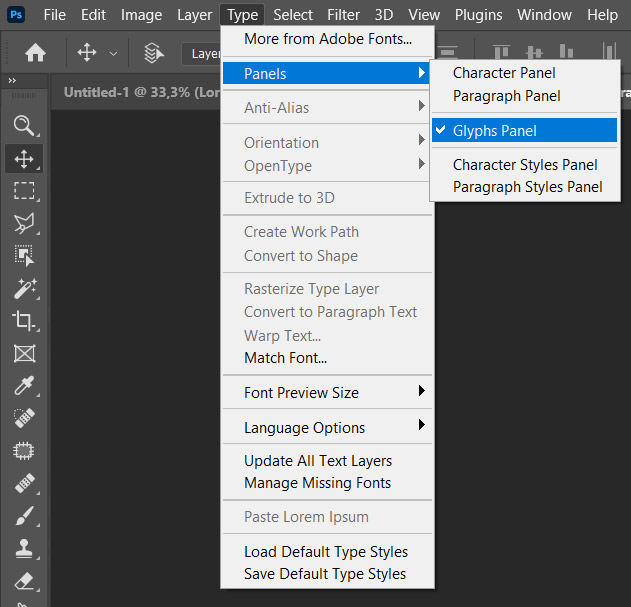
This will open your Glyphs Panel where you have all kind of different symbols and elements that you can import directly in your Text Layers. And if you scroll until down, you will find one that has the exact same shape of a bullet point.
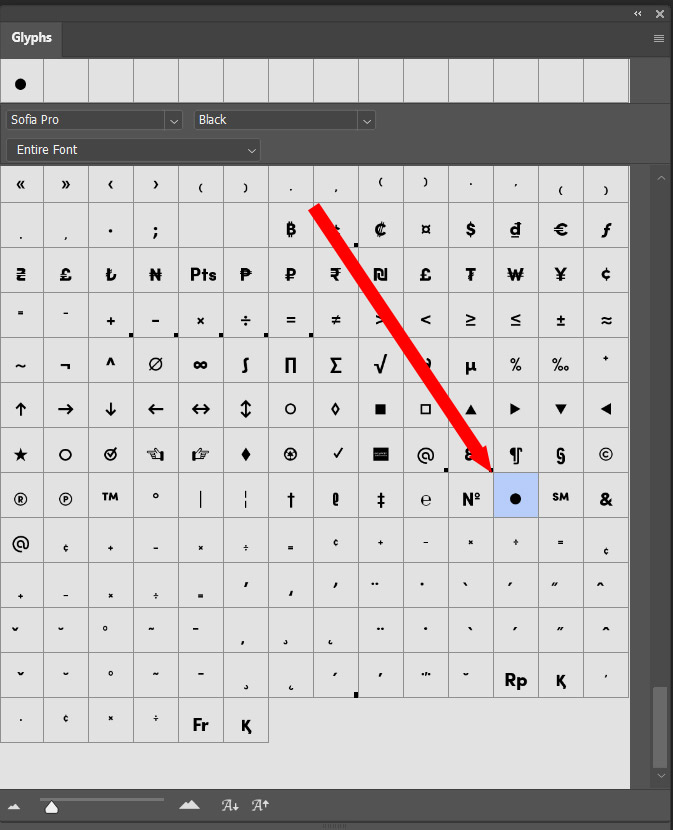
Now you can simply add a bullet point in Photoshop by double-clicking this element in your Glyphs Panel.
And that is everything you need to know about all the easiest methods you can use to add bullet points in Photoshop! If you want to find out more ways to add them, then check out this video by Pixel and Bracket which demonstrates a different technique.
Here are some of my favorite Photoshop tools:
Thank you for reading this article. I hope you found it helpful as you’re using Adobe Photoshop. Here are some tools that I use daily while retouching or editing that made my life easier. I hope you’ll also find them as useful as me. These are affiliate links, so if you do decide to purchase any of them, I’ll earn a commission.
But in all honesty, these are the exact tools that I use and recommend to everyone, even my closest friends and family.
Tablet: I remember purchasing my first tablet back in 2011. It was the smallest Wacom available at that time, I think it was an A5 format. Tablets make a huge difference with Photoshop and I can’t work without one nowadays. I recently switched to the amazing Xencelabs Medium Bundle and I just love it.
Quick Fixes: Whenever I need to edit pictures quickly, I use the AI-powered Luminar photo editing tool.
Content Creator Essentials: If you’re taking pictures, video footage, or any other types of media, I recommend you the Samsung T5 external SSD to safely backup and transport your files. Regarding my working station, since I’m always moving from one place to another, I’m using the ASUS ZenBook Pro Duo 15. Its second screen comes in really handy when working on Photoshop.

Hey, I’m a Professional Retoucher making $10k a month thanks to Photoshop.Register to my newsletter to get freelancing tips and a FREE Brush Pack in Bonus! My Newsletter

