
Cropping your images to fit in a circle can be a really useful technique. You could use the cropped image as a profile picture for your social media sites or preserve the transparency of the background and add it to another project. Luckily, it couldn’t be simpler to do!
To resume, you will use your Elliptical Marquee Tool to create a round selection, invert it, and delete or mask the selection to create a circle crop.
So, let’s do everything step-by-step.
Table of Contents
PS: there is a great forum feed about the exact same subject directly on Adobe Community Website.
01. Unlock your background
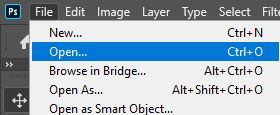
We will of course begin with opening our image in Photoshop- the one that we want to crop into a circle. To do this, load the program and head to File > Open, and choose the relevant photo from your files.
For this tutorial, we used an image by Diana Jefimova from Pexels
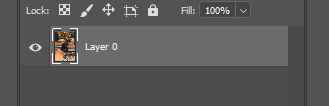
Now that you have the image open within Photoshop, you’re almost ready to crop it into a circle, but before we can act on the layer in this way, we must change it from being a background layer, allowing us to work with it as we would with a normal layer.
This can be done within seconds by clicking once on the lock icon at the end of the layer in the Layers Window, as shown below.
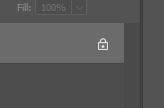
You should see the name of the layer change from ‘Background’ to ‘Layer 0’.
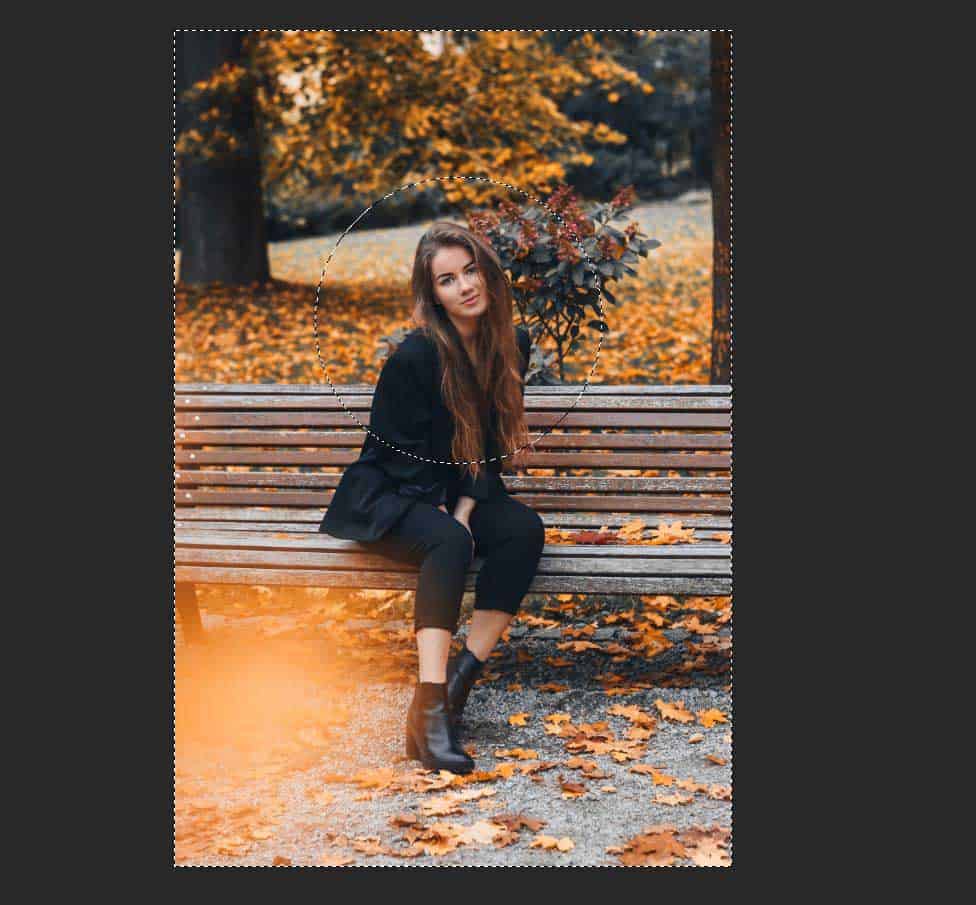
02. Create a circular selection
With that sorted, we can now get started with making a circular selection of an area of the image. To do this, we’ll use the Elliptical Marquee Tool. You can select this from the toolbar down the side of the screen.
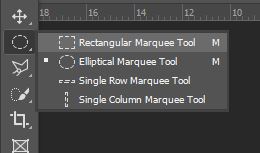
The tool itself is usually nestled underneath the Rectangular Marquee Tool, which is shown by the icon displayed below. The Elliptical Marquee Tool can then be selected by clicking and holding on this icon, before choosing it from the list that appears as a result.

You can use it by clicking anywhere in the document window (the image that you are working with) and dragging your mouse out to create a circular selection.
Note that to create a perfect circle, you can hold down the Shift key whilst dragging the mouse.
Simply release the mouse to confirm the selection.

If you’re not happy with the area of your image that you originally selected, you can move around the circle to select a different section of the image by using the respective arrow keys.
You can also right-click on the selection while having your Elliptical Marquee Tool, and choose “Transform Selection”.
03. Invert and mask/delete your selection
Now that we have a circular selection that is of the right size and in the right position, we need to select the inverse- that is, everything outside of the circle, rather than on the inside, as was selected before.
This can be done quickly and in two different ways.
One way in which you can select the inverse of the originally selected area is by right clicking on the circular selection and choosing Select Inverse from the list that appears as a result.
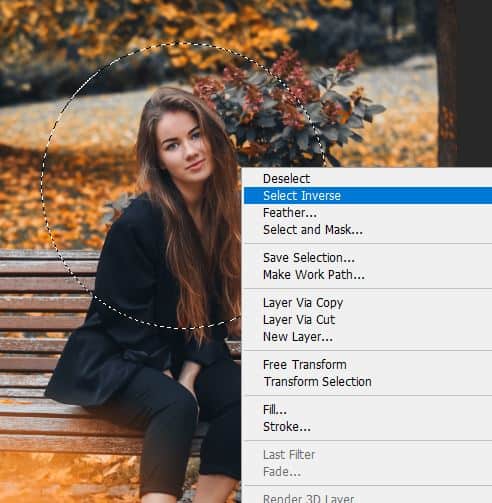
Alternatively, you could head along the top of your screen and choose Select > Inverse from the top bar.
You should now see that the dotted lines surrounding the selection are now indicating that the selected area consists of the areas outside of the circle, rather than on the inside like before.
Now that we have selected everything in the image other than the circle itself (that we want to preserve) we need to delete the selected area, in other words, the parts that we want to get rid of.
A way in which you can do this extremely quickly is by simply pressing the delete key on your keyboard.
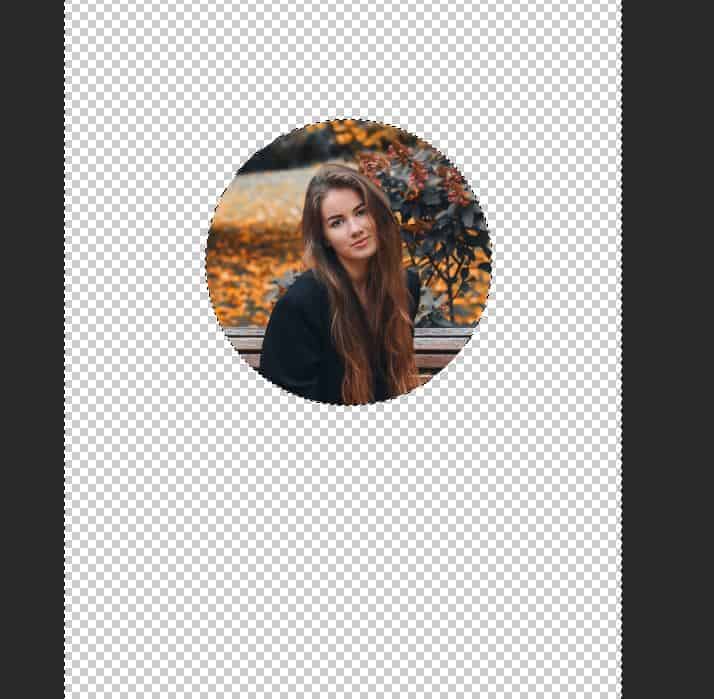
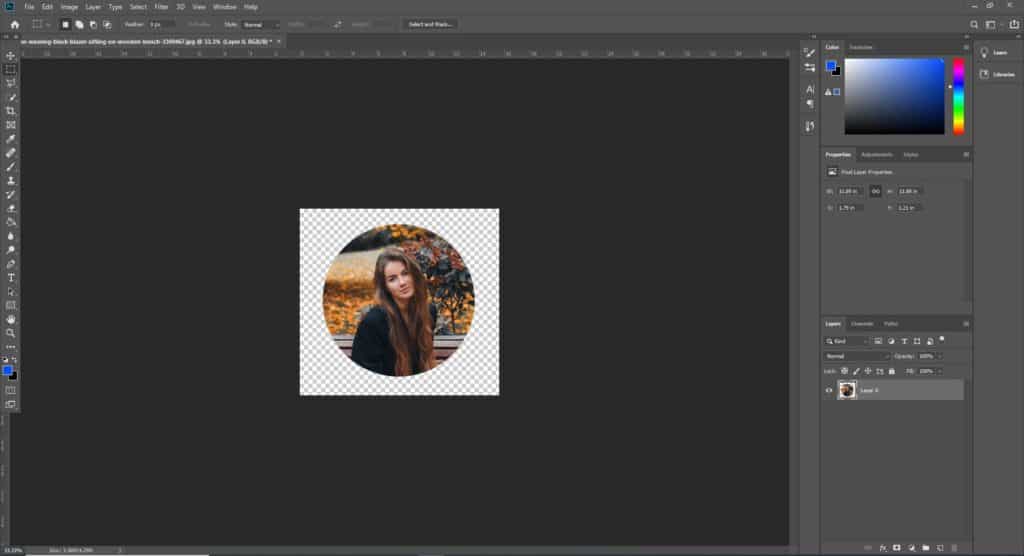
You should now be able to see that only the circular selection remains, and your image has effectively been cropped into a circle. This will leave you with just the selected area on top of a transparent background (indicated by grayscale checks).
04. Crop the Excess Background
At this point, you’re pretty much finished! But there’s just one more thing that we can do before we save and export our image that we’ve cropped into a circle.
To ensure that the image is of a higher quality once it’s been saved, we can crop the piece to be of a smaller area, making the image take up more of the whole document size.
So, let’s go ahead and select the Rectangular Marquee Tool from the toolbar down the left side of the screen.
With the tool selected, click and drag on your document to create a rectangle or square around the circular image, again holding down the Shift key if you wish to make a perfect, square-shaped selection.
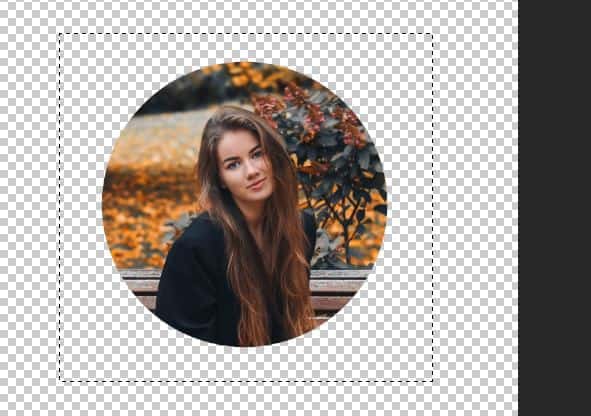
With the selection made, head along the top menu and select Image > Crop. This will crop the image to the selection that you created, trimming the irrelevant transparent pixels from the piece.

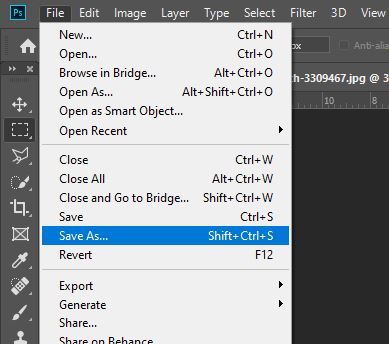
To save your outcome, go to File > Save As.
Whilst saving it, be sure to change the file format to PNG. This way, the image will be saved without a background, meaning that you can apply just the circular image to any other piece rather than a circular image on top of a coloured square background.
You’re done!
BONUS – Video tutorial to crop images in a circle shape
And that’s about it! Want to find out more about cropping images to a circle in Photoshop? Then check out this video by Photoshop Essentials that shows the process further.

Hey, I'm a Professional Retoucher making $10k a month thanks to Photoshop.Register to my newsletter to get freelancing tips and a FREE Brush Pack in Bonus! My Newsletter

