
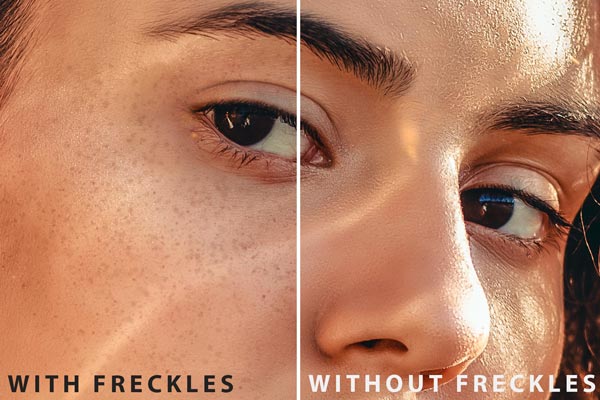
Have you ever wished you had a sprinkling of cute freckles on your nose and cheeks?
Or maybe you’re a photographer or graphic designer looking to add some natural-looking freckles to your models’ faces?
Whatever your reason, creating realistic freckles in Photoshop is easier than you might think. In this tutorial, we’ll show you step-by-step how to create natural-looking freckles that will add a touch of charm and whimsy to any portrait.
Here’s a quick overview of the process:
- Open your photo in Photoshop and create a new Curves Adjustment Layer. Reduce the RGB curve and add a Black layer mask.
- Selec the Brush tool, choose a small, round brush with a soft edge, and adjust the settings for size, spacing, and opacity. You can also create your own custom brush.
- Paint freckles with white onto the layer mask. Focus on areas where freckles naturally appear, and vary the size and opacity for a realistic pattern.
- Adjust the layer opacity and blending mode to blend the freckles with the skin tone.
- Save your image and enjoy your new natural-looking freckles!
So grab your Photoshop brushes and let’s get started! 😉
Table of Contents
Use Curves to create Freckles in Photoshop
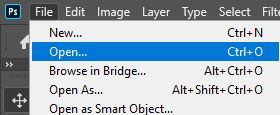
Once you’ve opened Photoshop, you can immediately head to File > Open at the top of the screen to open a portrait from your files.
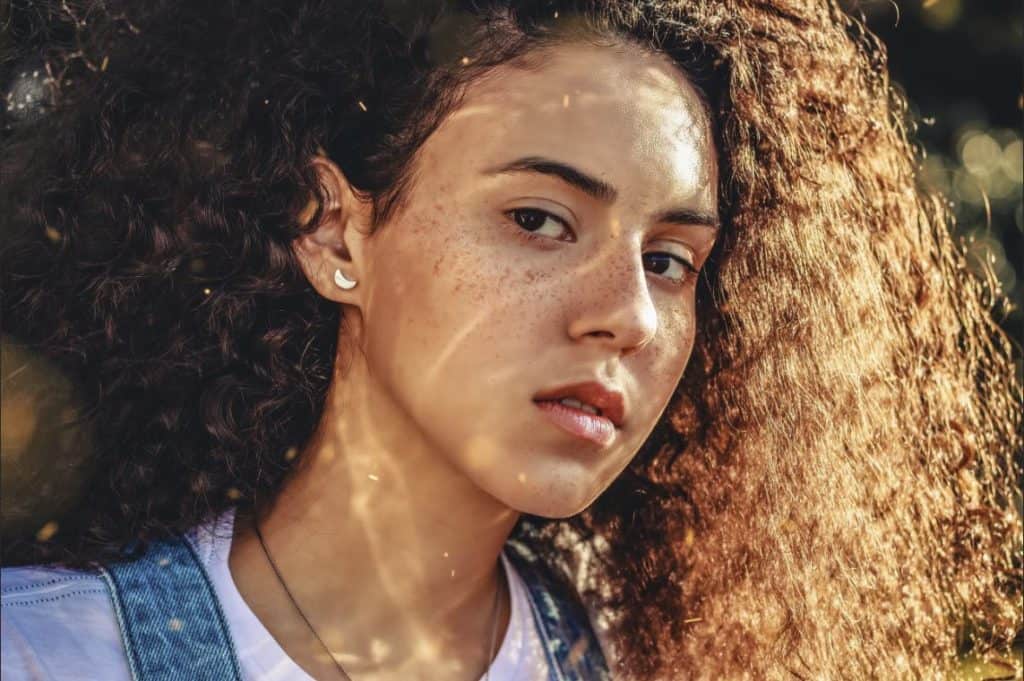
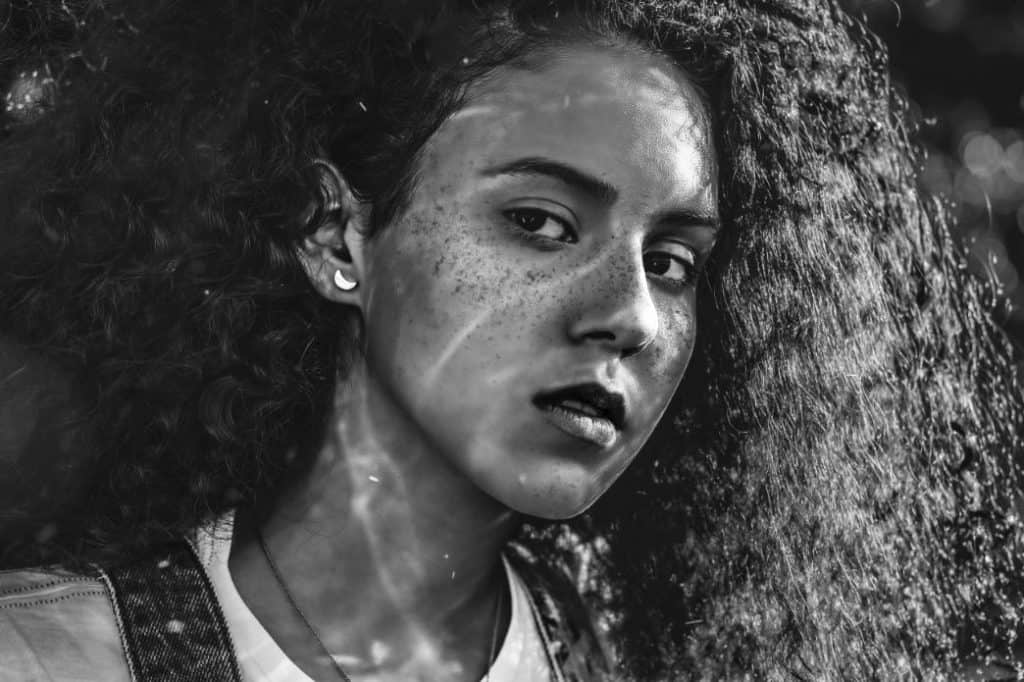
We used this photo by Ibraim Leonardo from Pexels. If, like us, you’d prefer to use a stock photo to practice this technique, then you can find thousands of free, high-quality images over on Pexels.
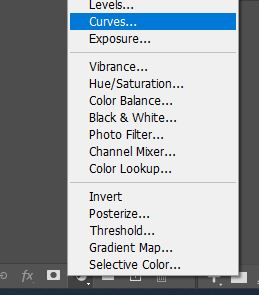
Once your image has opened in Photoshop, add a new curves adjustment layer by clicking on the New Adjustment Layer icon at the bottom of the window.

This will prompt a list to come up, from which we’ll select Curves.
In the options window that opens, you should see a diagonal line.
We’re going to make the mid-tones darker by simply clicking on a point somewhere near the center of the line and dragging it downwards until you’re happy with the effect. The brightness of this determines the color and brightness of the freckles that we will add, so it won’t be applied to the whole image.
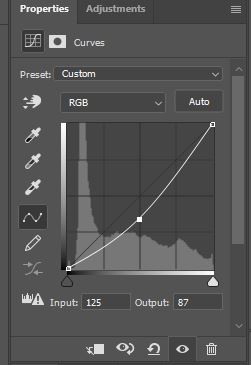
Lower it until you think it reaches a good contrast that resembles freckles. Don’t worry if you don’t find the perfect settings, you’ll be able to fine-tune it again later on. You can also play with individual color channel to add different hue.
For example, I tend to increase the Red Curve a little bit.
Related Guide:
– Channels vs. Layers in Photoshop: What’s the Difference?
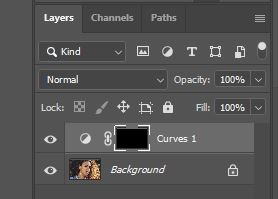
Since we only want the adjustment layer to show up where we draw the freckles, we’re going to use a layer mask to determine in which areas the effect is visible and invisible.
When working with layer masks, always remember that black indicates areas, where the layer is disable, whilst white, indicates where the effect is visible, with gray indicating areas of visibility between the two ends of the spectrum.
With that clarified, we’re first going to have to make the adjustment layer’s layer mask fully black to hide it all initially, and then use a white brush to bring the effect back in where the freckles are.
So, go ahead and click on the layer mask of the adjustment layer, then hit Ctrl + I [Win] / Cmd + I [Mac] to invert it- in other words, filling it with black.

You’ll see that the adjustment layer no longer affects the image, and that your Layers Window looks like this:
Paint Freckles on your Layer Mask
Now’s the big moment you’ve been waiting for: you can finally add the freckles!
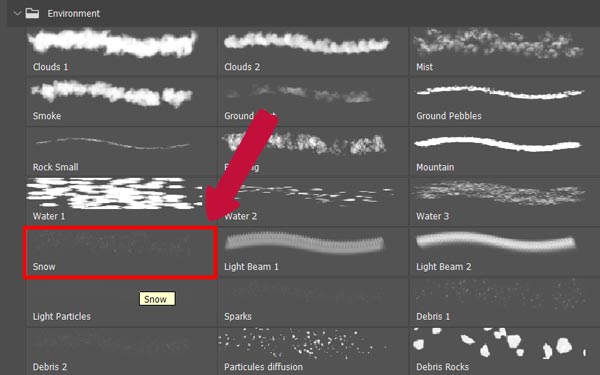
Make sure you have the Brush Tool (B) selected, then choose one brush that looks like freckles. I used the “Snow” brush in our Free Brush Pack.
Personal Tips: to install new custom brushes, check our article: How to Install & Use a Photoshop Brush
Make sure you’re working on the Layer Mask of the Adjustment Layer.
I suggest that you have the Flow set to 100% (this can be done in the options bar at the top of the screen) and that you change the freckle brush that you’re using every so often, as this will allow you to avoid a repetitive effect as much as possible.
If you want to get rid of any freckles, simply switch to a black brush and paint over them.
You can always change the darkness by clicking on the Adjustment Layer itself, then dragging the center of the curve further downwards in the options window.
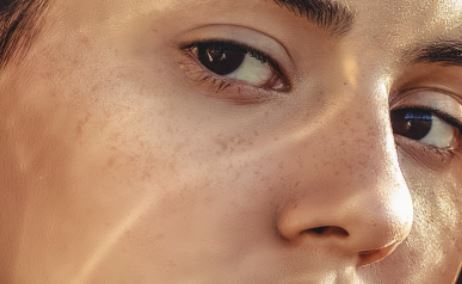
Just keep going until you’re satisfied! Be careful not to go too overboard, and make sure that your image always looks as natural as possible. Here’s what our outcome ended up looking like:
Fine-tune your added Freckles
To enhance the freckles, you can always add a black and white adjustment layer (by clicking on the New Adjustment Layer icon at the bottom of the Layers Window, then choosing Black and White from the list that comes up) and decrease the brightness of the reds in the Properties Window.
Then you can just play around with the brightness and contrast of the image. You end up with an awesome result in which the freckles really stand out.
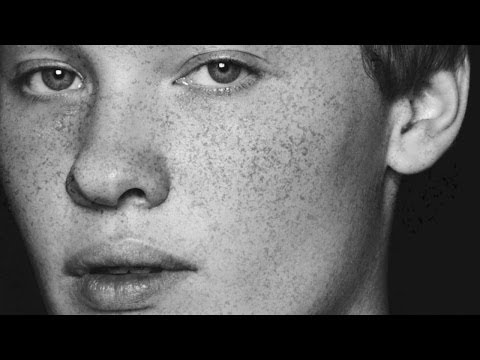
Video Tutorial to add Freckles in Photoshop
And that’s about all there is to creating natural freckles in Photoshop using custom brushes and an adjustment layer! Want to find out more about the process?
Then take a look at this video by PHLEARN that will walk you through a similar process.
Hey, I'm a Professional Retoucher making $10k a month thanks to Photoshop.Register to my newsletter to get freelancing tips and a FREE Brush Pack in Bonus! My Newsletter

