How to Batch Resize Images in Photoshop
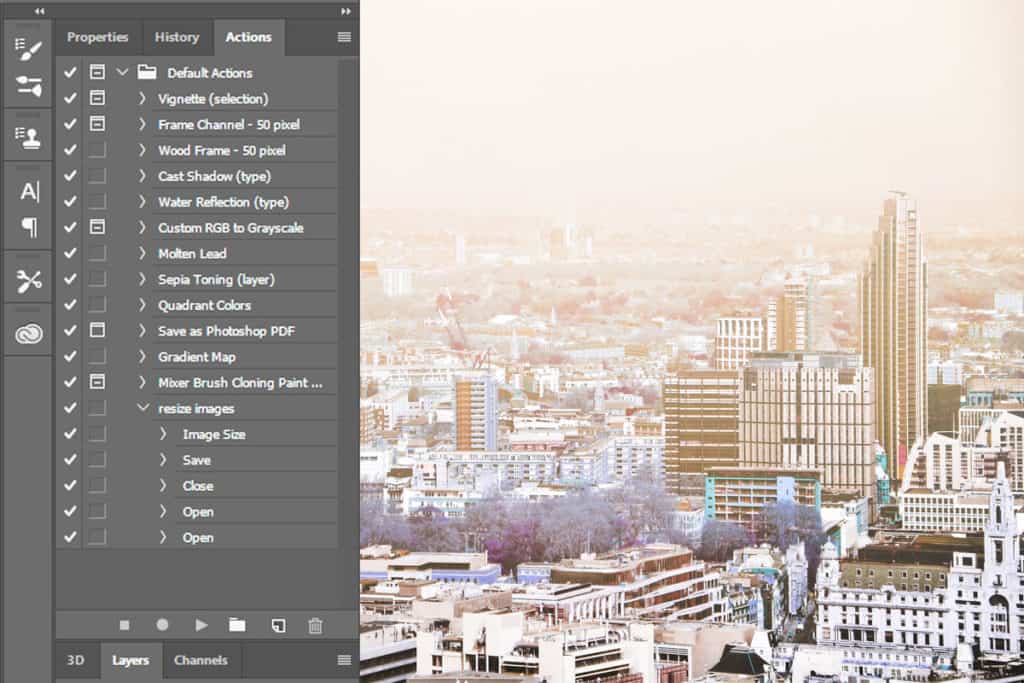
Have you ever taken hundreds of photos but needed to increase the quality of all of them? Or needed to change multiple photos to be in the same dimensions? Then you’ve come to the right place! In this tutorial, we will learn how to batch resize many pictures in Photoshop.
Photoshop offers features that are perfect for batch resizing, helping out photographers and designers, particularly in large orders for clients or when exporting photos for personal use.
After this tutorial, you will have learned how to batch resize images in Photoshop. If you’re new to Photoshop and would like to learn quickly, you can check our 22 Video Tutorials to Help You Learn Photoshop Step By Step.
Most importantly, you will know how to save hours of your time by creating an action that will resize batches of images in what will seem like virtually no time. So let’s get started.
Step 1: Gathering and Organising the Images
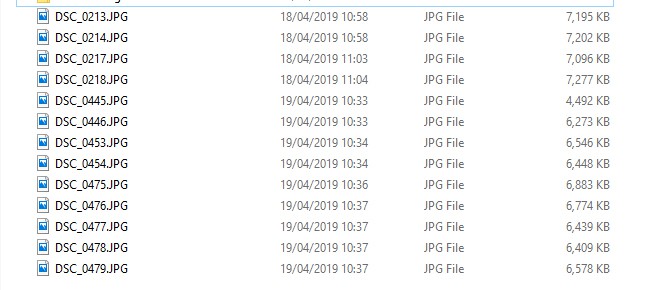
After establishing which photos you would like to resize, we’ll begin with placing all the images into one location, both for organisational purposes and for simplicity later on in the process.
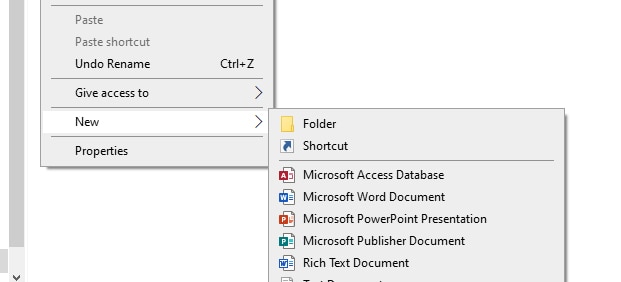
Add all the images into a new folder named ‘Photos to Resize’ (or similar).
Having all the images in one folder will be vital when using the action later on in the process.
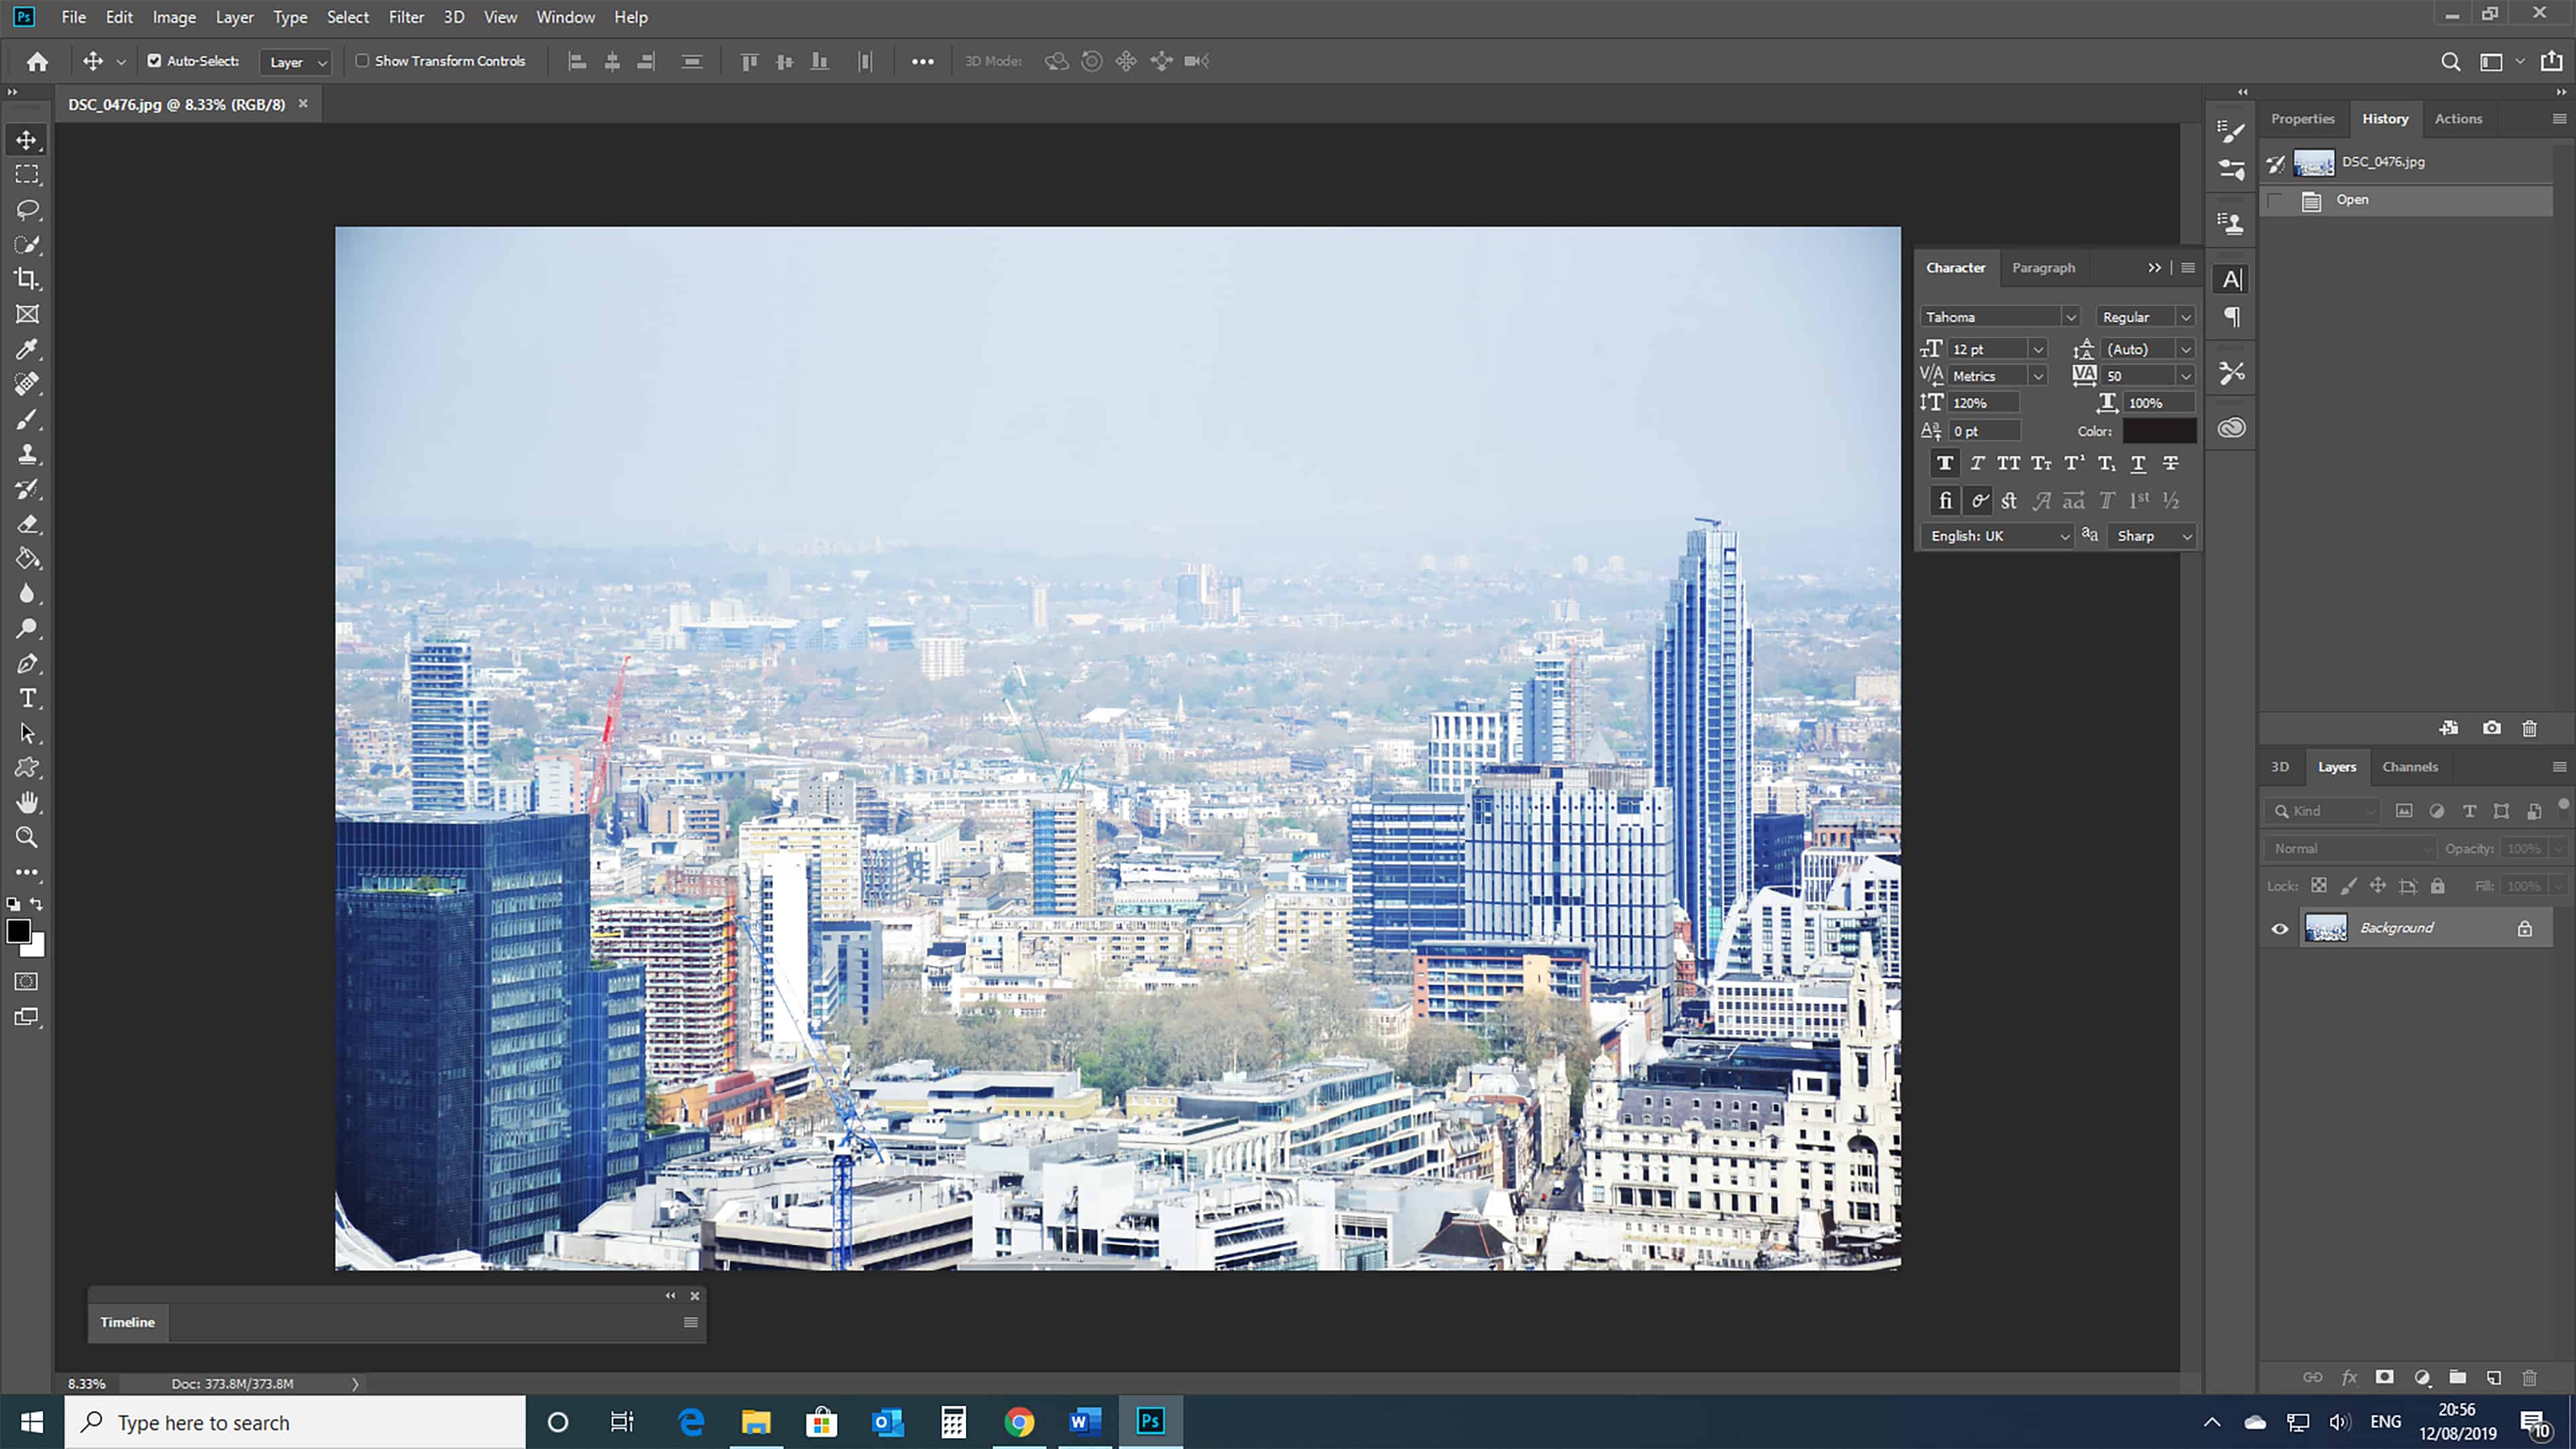
After creating the folder and adding into it all the images that you wish to resize, open Photoshop and import one of the images from the folder. To do this, open the programme and go to File > New.
Step 2: Create a New Action to Batch Resize in Photoshop
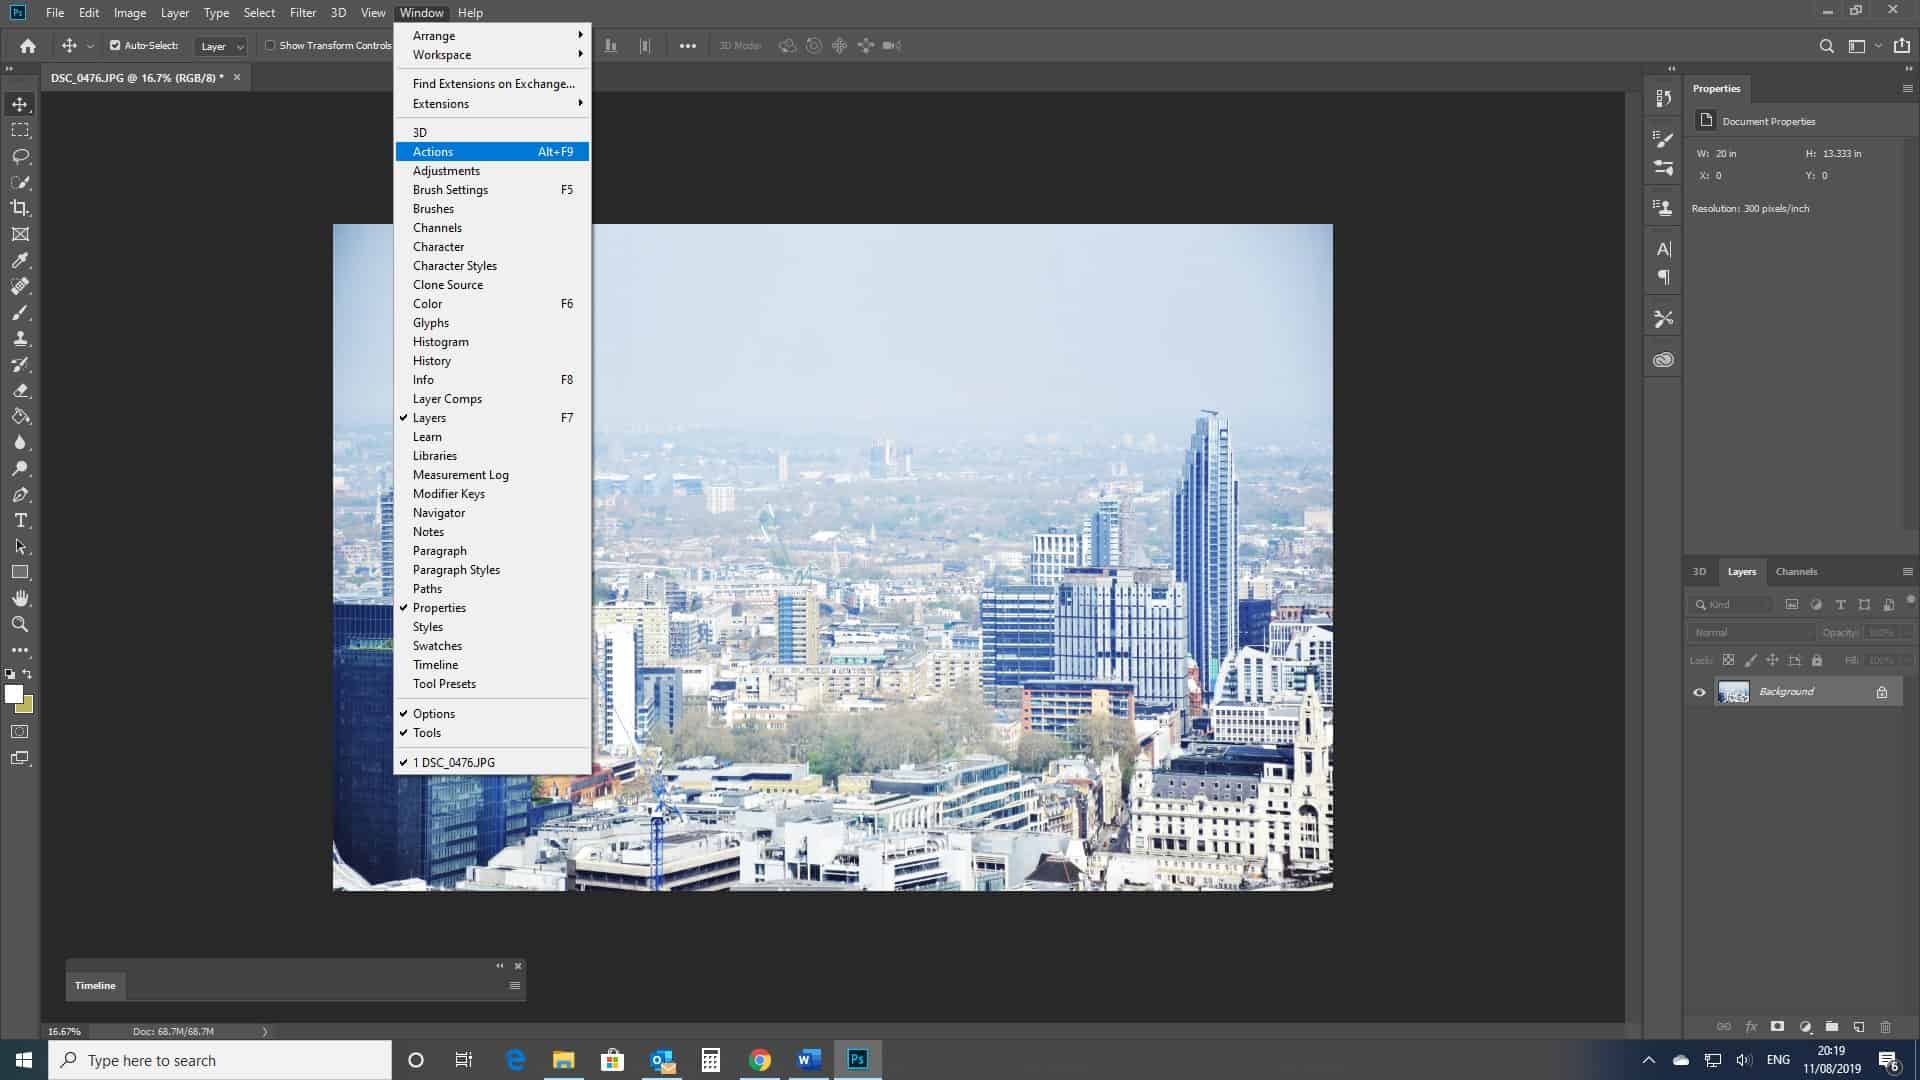
Once you have the photo open, you’ll be ready to get started on creating the action. Head to the actions panel at the right side of your screen. (If this isn’t present, then you can open it from the panel along the top of the screen – (select window > actions)).
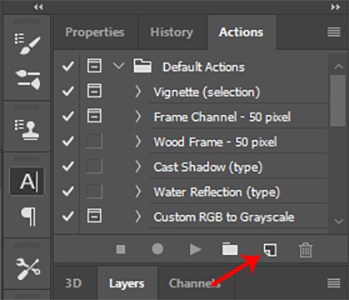
We’re now going to click on the icon at the bottom of the panel, second from the left (indicated in the screenshot below). Doing so will create a new action.
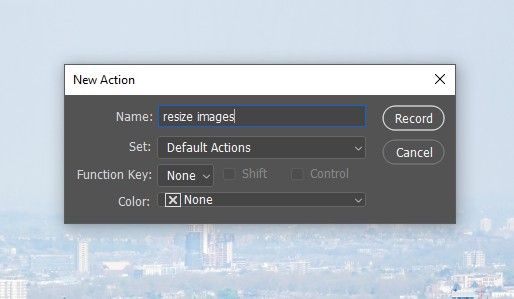
You will be given the option to name the action- give it a relevant title, such as ‘resize images’. Below this will be a drop-down menu entitled ‘Set’. From this, choose ‘Default Actions’.
Now that we’ve set up this new action, let’s press ‘Record’. This will cause the action to start memorising your steps, so that it can repeat what you do and apply the process to another image later on.
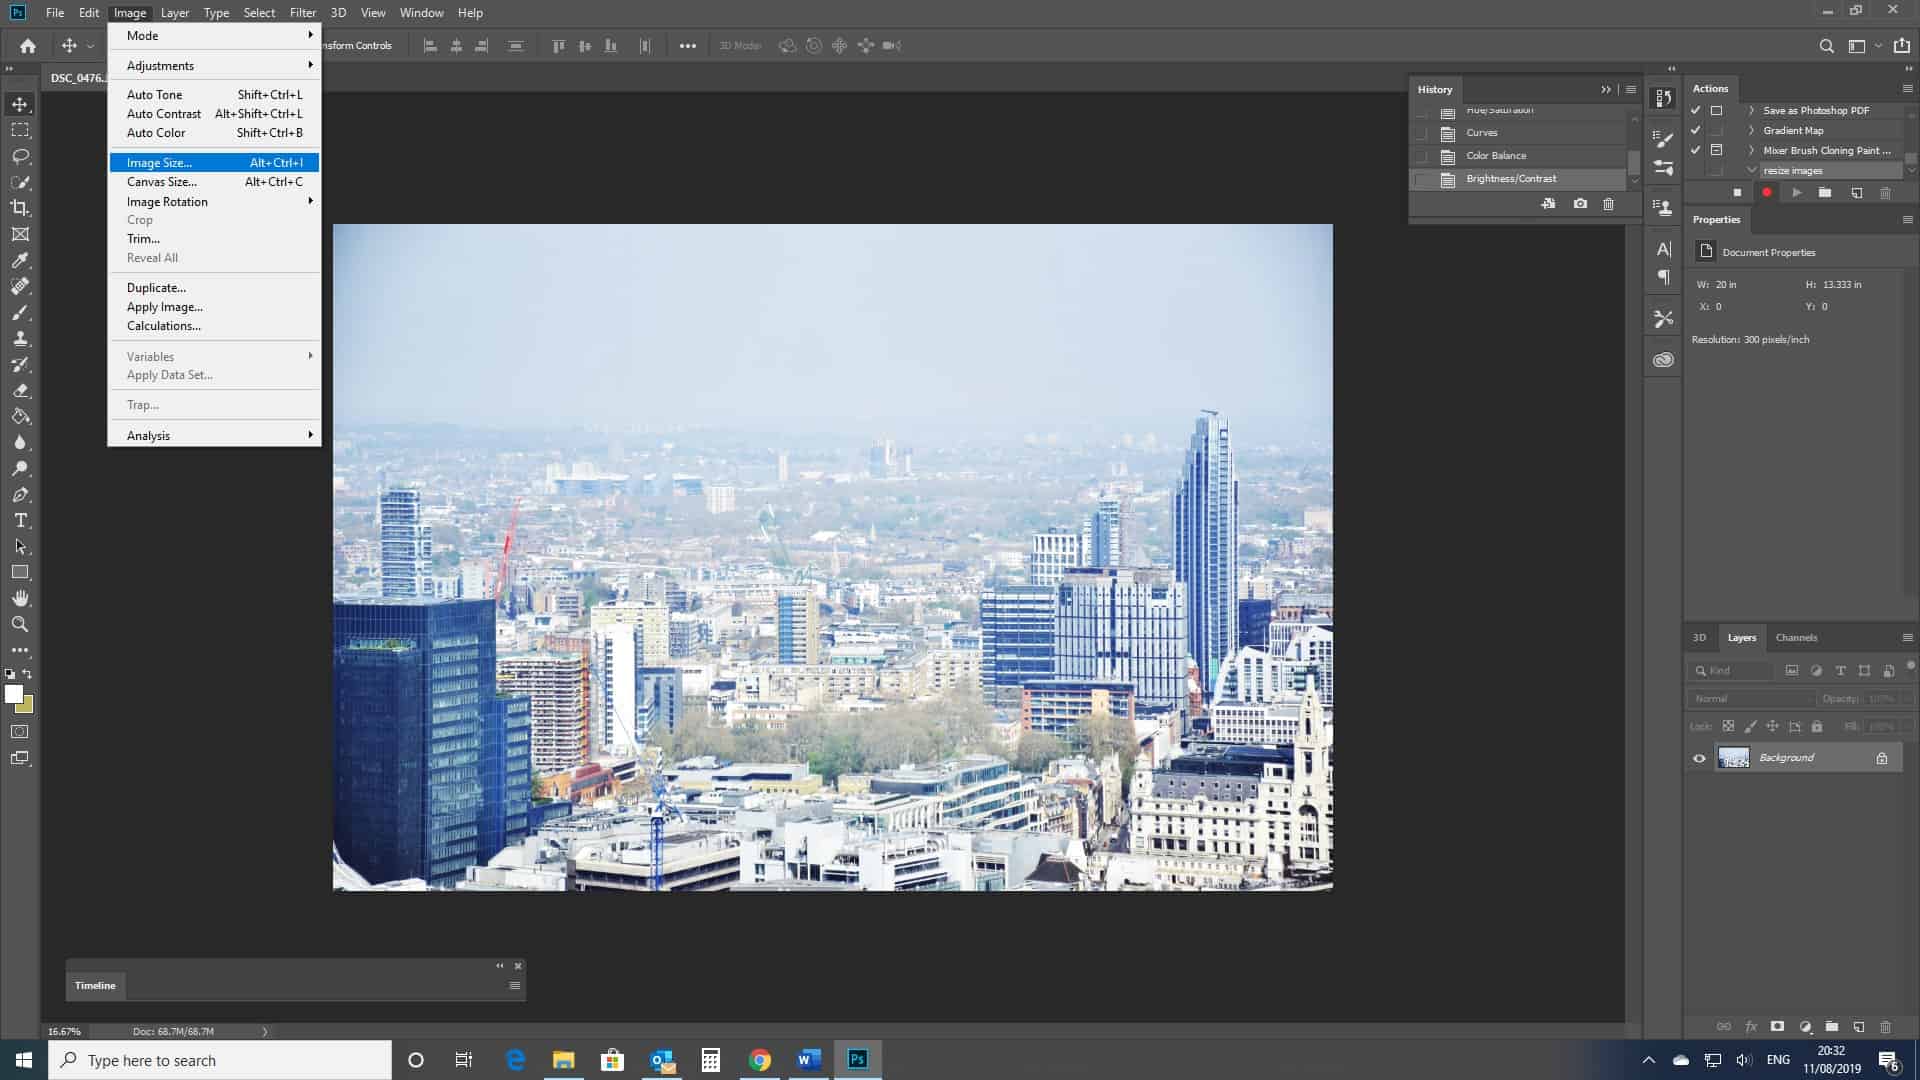
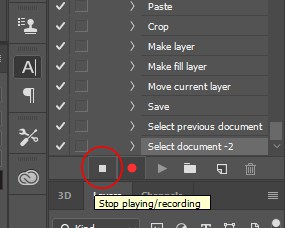
The red icon at the bottom of the window should appear circular, as above, when the action is recording, and as a square when not recording.
Step 3: Recording the Process
Now that the action is recording the steps, head over to Image > Image Size.
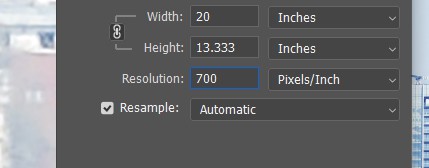
This should open up a window, in which you will be able to set a customised width and height for the photo. Here, type in the correct values to fit in with your desired dimensions for the images.
For instance, if the images need to be in a 4:3 ratio, set the width and height to 400 by 300 pixels.
When changing the width and height of your images, it’s important to note that a substantial change in the ratio of the dimensions can cause the photo to appear distorted.
Thus, whilst in some cases, a drastic, intentional change could have the potential to be effective, it’s often better to keep the values in their original ratio, particularly when working with portraits.
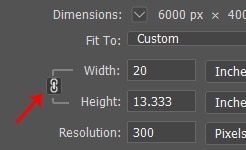
To maintain the original width : length ratio, ensure that the icon indicated in the screenshot below displays a chain / link. This means that the length will change with respect to alterations in the width, or vice versa.
If, rather than altering the dimensions of the photos, you wish to give the image a higher resolution, this can be done by editing the document size. Head to where it says resolution and increase the value, for instance, in the example, I changed the resolution from 300 to 700.
This increases the number of pixels per inch, hence making the image appear to be of a higher quality.
Note that with an image that is already of a considerably low resolution, increasing the image size won’t be as effective, and the photo may still appear to be of a fairly low quality.
Therefore this technique of increasing the size and quality of the image may be more suitable when working with higher quality photos.
Once you’re satisfied with the new size of your photo (you should have some idea of what it will look like from the preview), click OK.
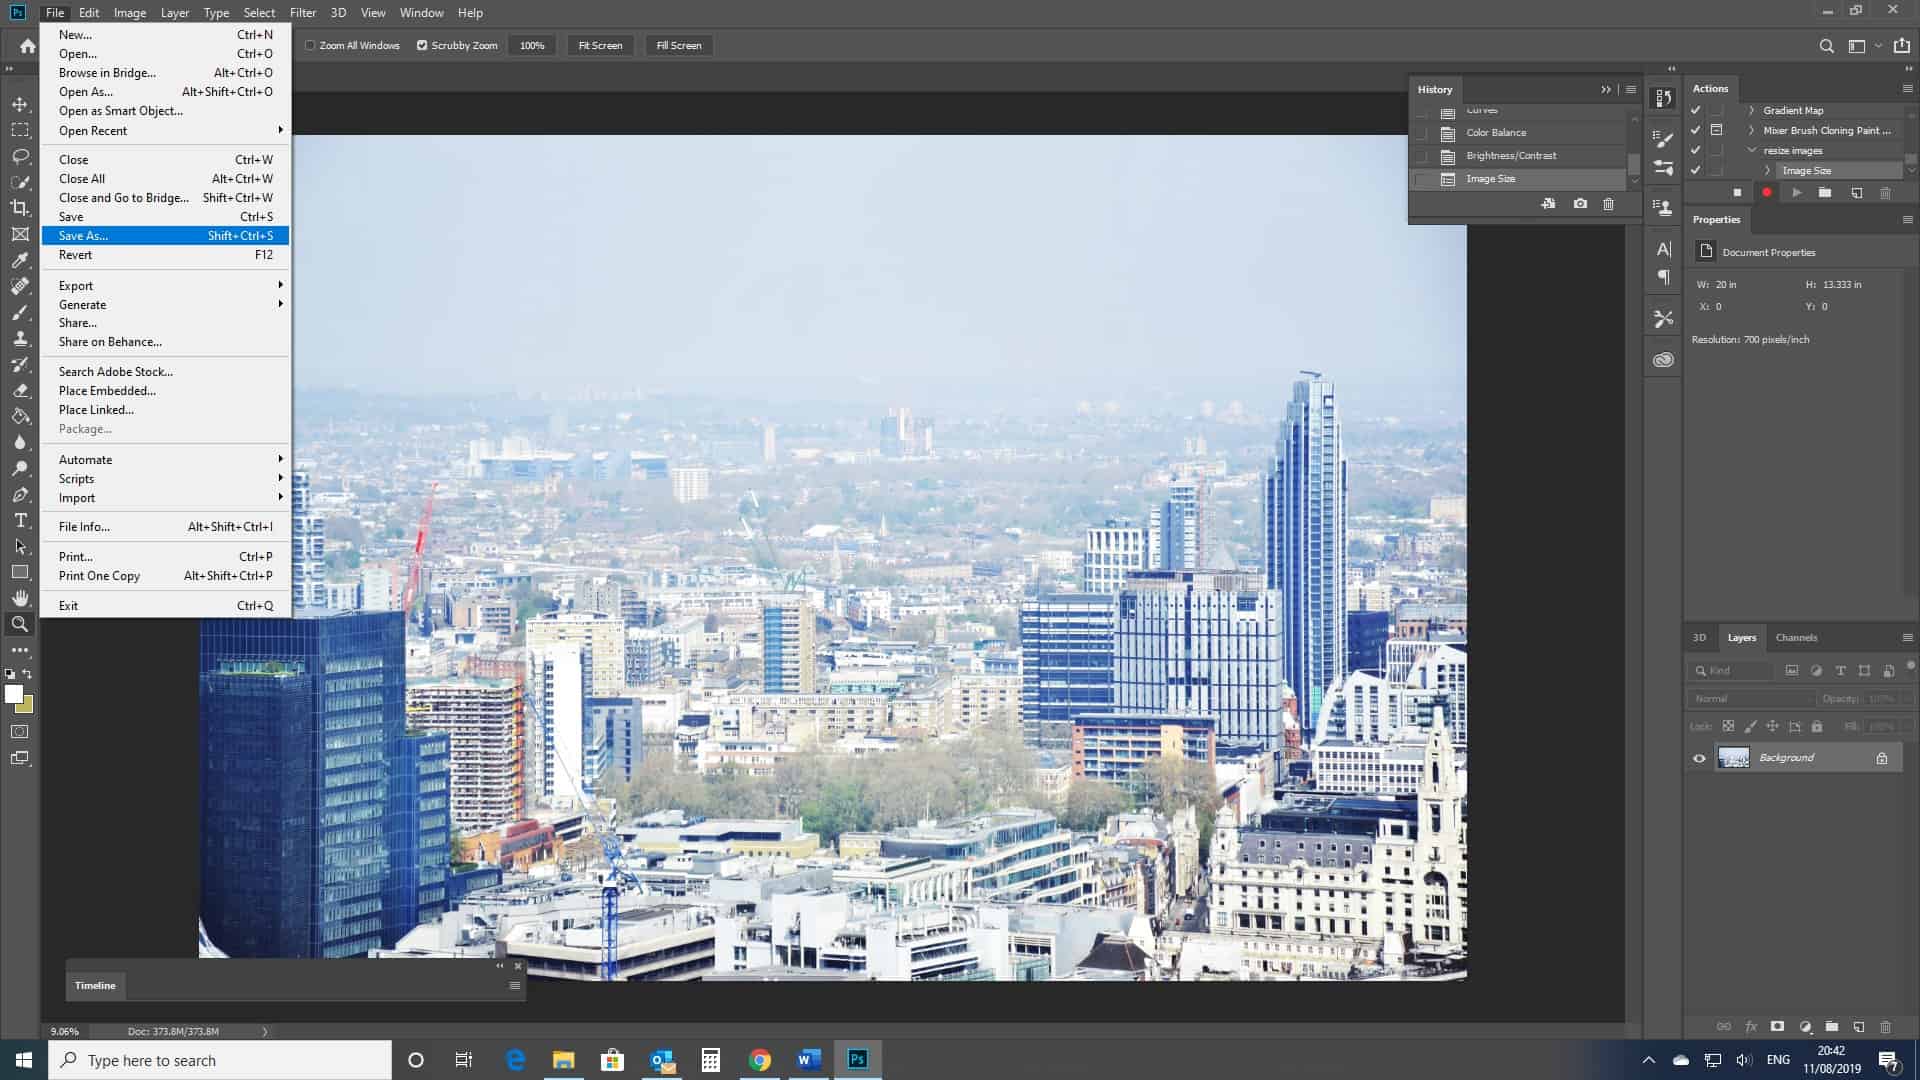
Next, still recording, we’ll need to save the image. Go to File > Save As.
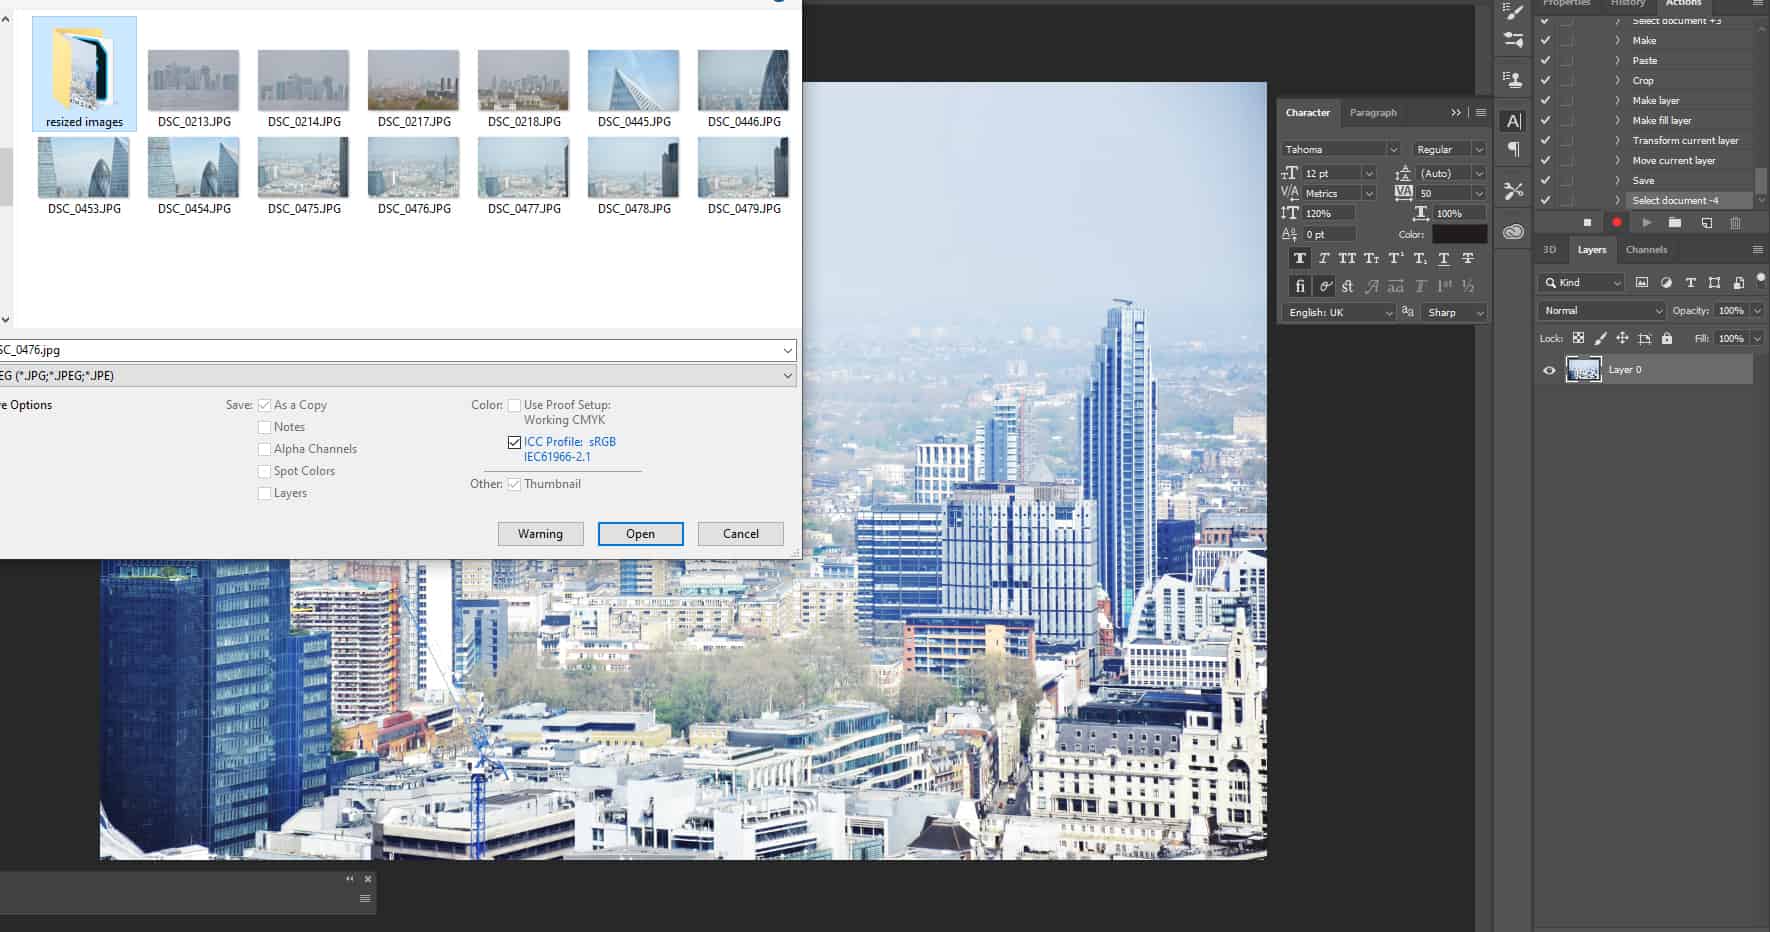
When choosing a destination in which to save the image, create a new folder in the folder that you initially created (‘Photos to Resize’). Call this new folder ‘Resized Images’ (or similar).
There’s no need to change the file name, just press the save button.
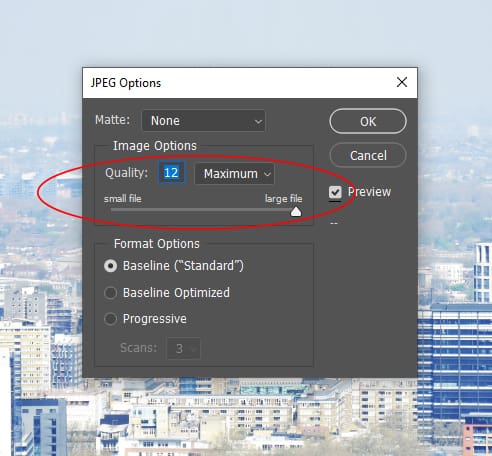
If another window comes up entitled JPEG options, then simply press OK, unless you want to change the export file size. I would recommend that you save it as the maximum size (12) but a smaller file size may be more appropriate in terms of storage, particularly in this case, when saving a large batch of photos.
Now to complete the action, we’ll close the image. By including this step in the action, it means that your Photoshop won’t have hundreds of files open at the same time when you import the batch later on.
To stop the recording, click on the stop icon in the actions panel. You’ll now have a new action, which will be accessible at any time in the actions panel at the right hand side of your screen.
Step 4: Use the New Action to Batch Resize Your Images
So, now you’ve got your images in one place, one photo resized, and the action recorded, you’re ready to start batch resizing! For this, Photoshop has a handy option that allows you to apply an action to a batch of photos.
This method of batch resizing will automatically open, resize, save, and close every image in a folder for you.
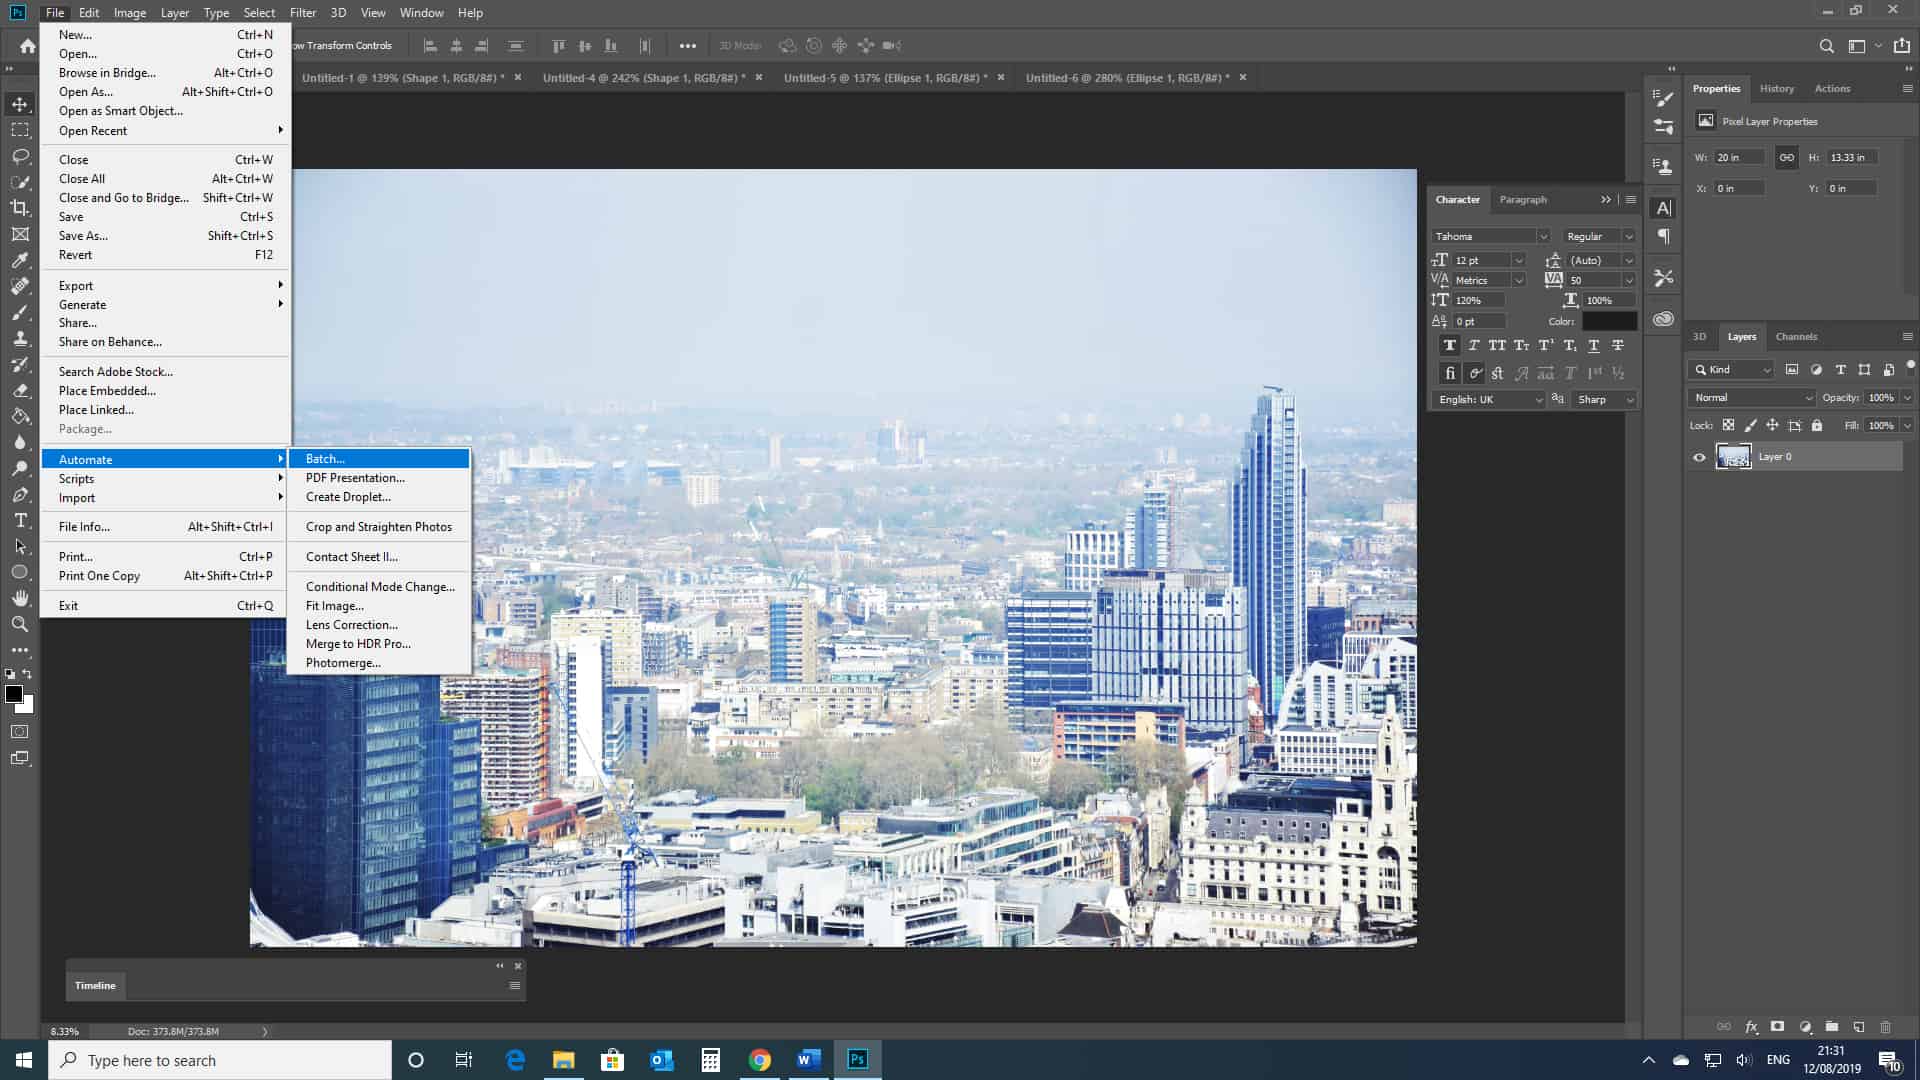
Let’s continue by heading to File > Automate > Batch.
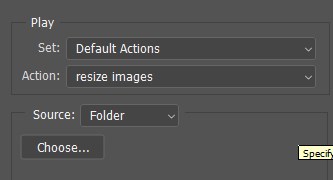
Once you have selected this, another window will open up. The first few drop-down menus on the window should be entitled set and action.
In the set drop-down menu, select ‘Default Actions’, and in the actions drop-down menu, select the newly created action (likely entitled something along the lines of ‘resize images’).
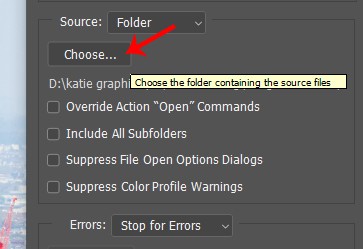
The next drop-down menu will be entitled source. Select folder, and then choose the folder that you created initially, containing all the original, unedited photos that you need to resize. This determines which photos Photoshop will import and resize.
Clicking the OK button will cause Photoshop to import, resize, save, and close all the images in the folder.
Every photo will be resized to the same dimensions and resolution. This means that this process will probably be best for a set of images that are of the same rotation and width : length ratio.
And there you have it! A batch of photos that have been resized and exported to be of the same dimensions or image size. (And hours of your time saved by creating one simple action that allows Photoshop to do the work for you).
BONUS
Do you want to find out more about how actions can save time when batch resizing images in Photoshop? Check out this video by PHLEARN to learn how to create batches of photos of a predetermined width within minutes:
Hey, I'm a Professional Retoucher making $10k a month thanks to Photoshop.Register to my newsletter to get freelancing tips and a FREE Brush Pack in Bonus! My Newsletter

